Kenwood DDX574BH Instruction manual - Page 4
Initial Settings
 |
View all Kenwood DDX574BH manuals
Add to My Manuals
Save this manual to your list of manuals |
Page 4 highlights
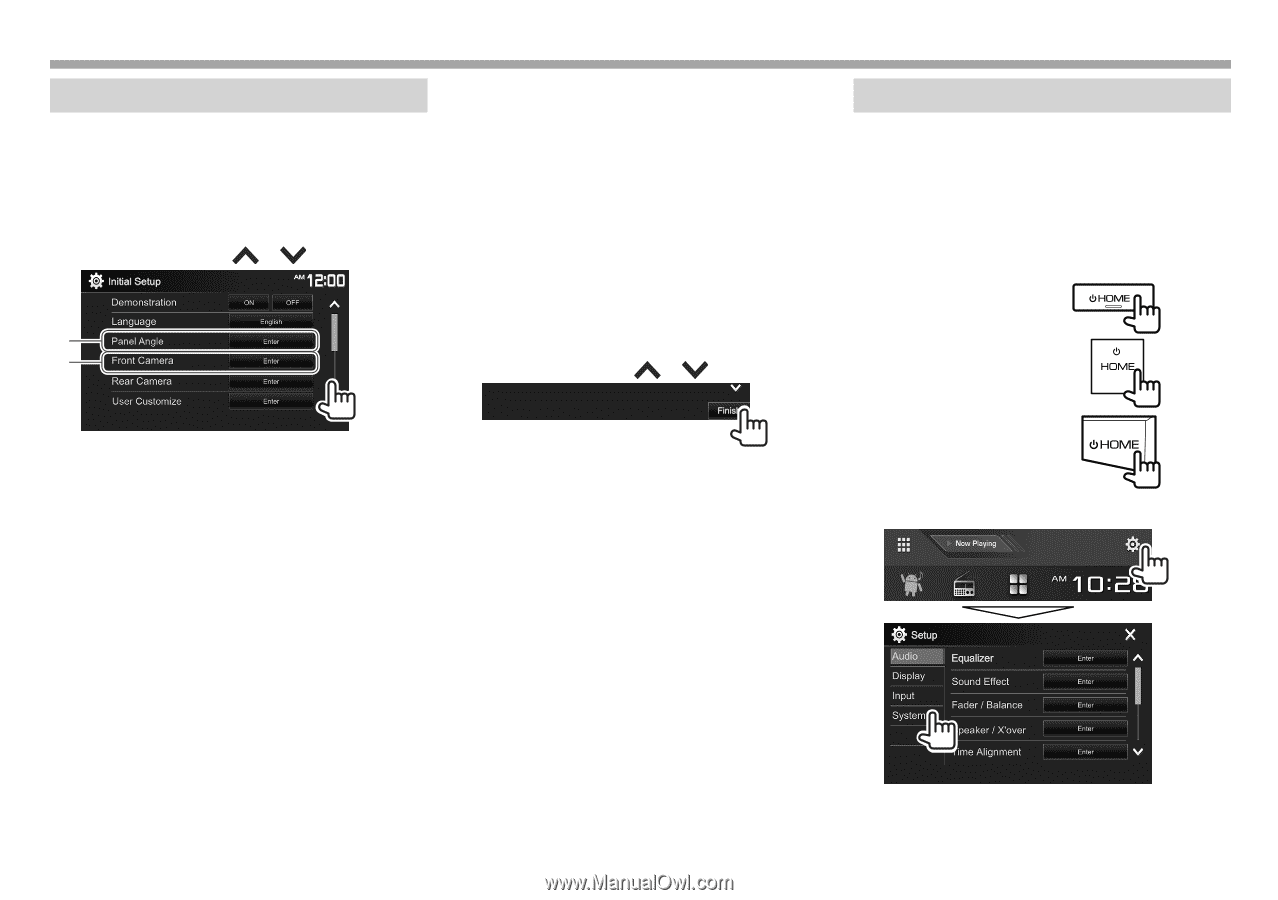
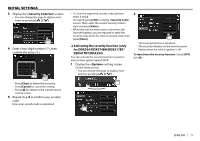
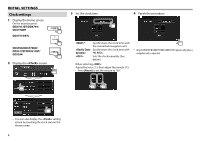
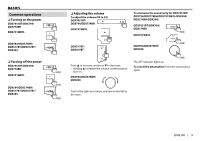
INITIAL SETTINGS Initial setup When you power on the unit for the first time or reset the unit, the initial setting screen appears. • You can also change the settings on the screen. (Page 70) 1 Perform the initial settings. • You can change the page to display more items by pressing [ ]/[ ]. *1 *2 (Page 47) (Page 66) (Page 72) Configure the settings to display the picture from the connected rear view camera. Change the display design. Select the viewing angle in relation to the monitor panel to make the panel easier to see. 2 Finish the procedure. • You can change the page to display more items by pressing [ ]/[ ]. Setting the security function ❏ Registering a security code (only for DDX7051BT/DDX751WBTL/DDX517BT/ DDX417BT) You can set a security code to protect your receiver system against theft. 1 Display the Home screen. On the monitor panel: DDX7051BT DDX751WBTL Activate or deactivate the (Page 72) display demonstration. Select the text language (Page 73) used for on-screen information. • Set to display the operation buttons and menu items in the selected language ([Local]) or English ([English]). *1 Adjust the panel angle. (Page 10) *2 Configure the settings to (Page 47) display the picture from the connected front view camera. The Home screen is displayed. *1 Only for DDX7051BT/DDX794/DDX774BH/DDX751WBTL. *2 Only for DDX794/DDX774BH/DDX751WBTL/DDX594/DDX574BH/ DDX394. DDX517BT/DDX417BT 2 Display the setting screen. 4
-
 1
1 -
 2
2 -
 3
3 -
 4
4 -
 5
5 -
 6
6 -
 7
7 -
 8
8 -
 9
9 -
 10
10 -
11
-
12
-
13
-
14
-
15
-
16
-
17
-
18
-
19
-
20
-
21
-
22
-
23
-
24
-
25
-
26
-
27
-
28
-
29
-
30
-
31
-
32
-
33
-
34
-
35
-
36
-
37
-
38
-
39
-
40
-
41
-
42
-
43
-
44
-
45
-
46
-
47
-
48
-
49
-
50
-
51
-
52
-
53
-
54
-
55
-
56
-
57
-
58
-
59
-
60
-
61
-
62
-
63
-
64
-
65
-
66
-
67
-
68
-
69
-
70
-
71
-
72
-
73
-
74
-
75
-
76
-
77
-
78
-
79
-
80
-
81
-
82
-
83
-
84
-
85
-
86
-
87
-
88
-
89
-
90
-
91
-
92
-
93
-
94
-
95
-
96
 |
 |