Konica Minolta bizhub C25 bizhub C25 Facsimile User Guide - Page 47
Select, Stop/Reset, Start
 |
View all Konica Minolta bizhub C25 manuals
Add to My Manuals
Save this manual to your list of manuals |
Page 47 highlights
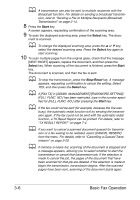
d A transmission can also be sent to multiple recipients with the Broadcast function. For details on sending a broadcast transmission, refer to "Sending a Fax to Multiple Recipients (Broadcast Transmission)" on page 3-14. 8 Press the Start key. A screen appears, requesting confirmation of the scanning area. 9 To scan the displayed scanning area, press the Select key. The docu- ment is scanned. d To change the displayed scanning area, press the + or , key, select the desired scanning area. Press the Select key again to start scanning. 10 To scan multiple pages from the original glass, check that the message [NEXT PAGE?] appears, replace the document, and then press the Select key. When scanning of the document is finished, press the Start key. The document is scanned, and then the fax is sent. d To stop the transmission, press the Stop/Reset key. A message appears, requesting confirmation to cancel the setting. Select YES, and then press the Select key. d If [FAX TX] in [ADMIN. MANAGEMENT]/[PASSWORD SETTING]/ [FULL FUNC. NO.] has been restricted, type in the number specified for [FULL FUNC. NO.] after pressing the Start key. d If the fax could not be sent (for example, because the line was busy), the automatic redial function will try sending the transmission again. If the fax could not be sent with the automatic redial function, a TX Result Report can be printed. For details, refer to "TX RESULT REPORT" on page 7-4. d If you want to cancel a scanned document queued for transmis- sion or a fax waiting to be redialed, select [CANCEL RESERV.] from the menu. For details, refer to "Cancelling a Queued Transmission" on page 3-25. d If memory is nearly full, scanning of the document is stopped and a message appears, allowing you to select whether to start the transmission or cancel that transmission job. If the selection is made to cancel the job, the pages of the document that have been scanned for that job are deleted. If the selection is made to begin the transmission, transmission begins. After the scanned pages have been sent, scanning of the document starts again. 3-6 Basic Fax Operation
-
 1
1 -
2
-
3
-
4
-
5
-
6
-
7
-
8
-
9
-
10
-
11
-
12
-
13
-
14
-
15
-
16
-
17
-
18
-
19
-
20
-
21
-
22
-
23
-
24
-
25
-
26
-
27
-
28
-
29
-
30
-
31
-
32
-
33
-
34
-
35
-
36
-
37
-
38
-
39
-
40
-
41
-
 42
42 -
 43
43 -
 44
44 -
 45
45 -
 46
46 -
 47
47 -
 48
48 -
 49
49 -
 50
50 -
 51
51 -
 52
52 -
53
-
54
-
55
-
56
-
57
-
58
-
59
-
60
-
61
-
62
-
63
-
64
-
65
-
66
-
67
-
68
-
69
-
70
-
71
-
72
-
73
-
74
-
75
-
76
-
77
-
78
-
79
-
80
-
81
-
82
-
83
-
84
-
85
-
86
-
87
-
88
-
89
-
90
-
91
-
92
-
93
-
94
-
95
-
96
-
97
-
98
-
99
-
100
-
101
-
102
-
103
-
104
-
105
-
106
-
107
-
108
-
109
-
110
-
111
-
112
-
113
-
114
-
115
-
116
-
117
-
118
-
119
-
120
-
121
 |
 |
