Konica Minolta bizhub C25 bizhub C25 Facsimile User Guide - Page 48
Selecting the Image Quality, Selecting the Resolution
 |
View all Konica Minolta bizhub C25 manuals
Add to My Manuals
Save this manual to your list of manuals |
Page 48 highlights
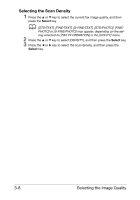
Selecting the Image Quality The image quality of a document can be adjusted before it is sent as a fax. Selecting the Resolution 1 Press the + or , key to select the current fax image quality, and then press the Select key. d [STD/TEXT], [FINE/TEXT], [S-FINE/TEXT], [STD/PHOTO], [FINE/ PHOTO] or [S-FINE/PHOTO] may appear, depending on the setting selected for [FAX TX OPERATION] in the [UTILITY] menu. 2 Check that [QUALITY (ORIGINAL)] is selected, and then press the Select key. 3 Press the + or , key to select the fax resolution, and then press the Select key. d Select the resolution appropriate for the document. - [STD/TEXT]: Select this setting for documents containing hand- writing or for computer printouts. - [FINE/TEXT]: Select this setting for documents containing small print. - [S-FINE/TEXT]: Select this setting for documents containing small print, such as newspapers, and documents containing detailed illustrations. - [STD/PHOTO]: Select this setting for photo documents containing regular photos. - [FINE/PHOTO]: Select this setting for photo documents contain- ing fine images. - [S-FINE/PHOTO]: Select this setting for photo documents con- taining finer images. d The resolution returns to the default setting after the document is scanned with a normal transmission or after transmission after manual transmission. The default setting can be changed. This is useful for specifying a frequently used resolution setting as the default. For details, refer to "FAX TX OPERATION Menu" on page 2-19. Selecting the Image Quality 3-7
-
 1
1 -
2
-
3
-
4
-
5
-
6
-
7
-
8
-
9
-
10
-
11
-
12
-
13
-
14
-
15
-
16
-
17
-
18
-
19
-
20
-
21
-
22
-
23
-
24
-
25
-
26
-
27
-
28
-
29
-
30
-
31
-
32
-
33
-
34
-
35
-
36
-
37
-
38
-
39
-
40
-
41
-
42
-
 43
43 -
 44
44 -
 45
45 -
 46
46 -
 47
47 -
 48
48 -
 49
49 -
 50
50 -
 51
51 -
 52
52 -
 53
53 -
54
-
55
-
56
-
57
-
58
-
59
-
60
-
61
-
62
-
63
-
64
-
65
-
66
-
67
-
68
-
69
-
70
-
71
-
72
-
73
-
74
-
75
-
76
-
77
-
78
-
79
-
80
-
81
-
82
-
83
-
84
-
85
-
86
-
87
-
88
-
89
-
90
-
91
-
92
-
93
-
94
-
95
-
96
-
97
-
98
-
99
-
100
-
101
-
102
-
103
-
104
-
105
-
106
-
107
-
108
-
109
-
110
-
111
-
112
-
113
-
114
-
115
-
116
-
117
-
118
-
119
-
120
-
121
 |
 |