Kyocera FS 1100 Service Manual - Page 22
Installing the expanded memory (option), <Procedure>,
 |
View all Kyocera FS 1100 manuals
Add to My Manuals
Save this manual to your list of manuals |
Page 22 highlights
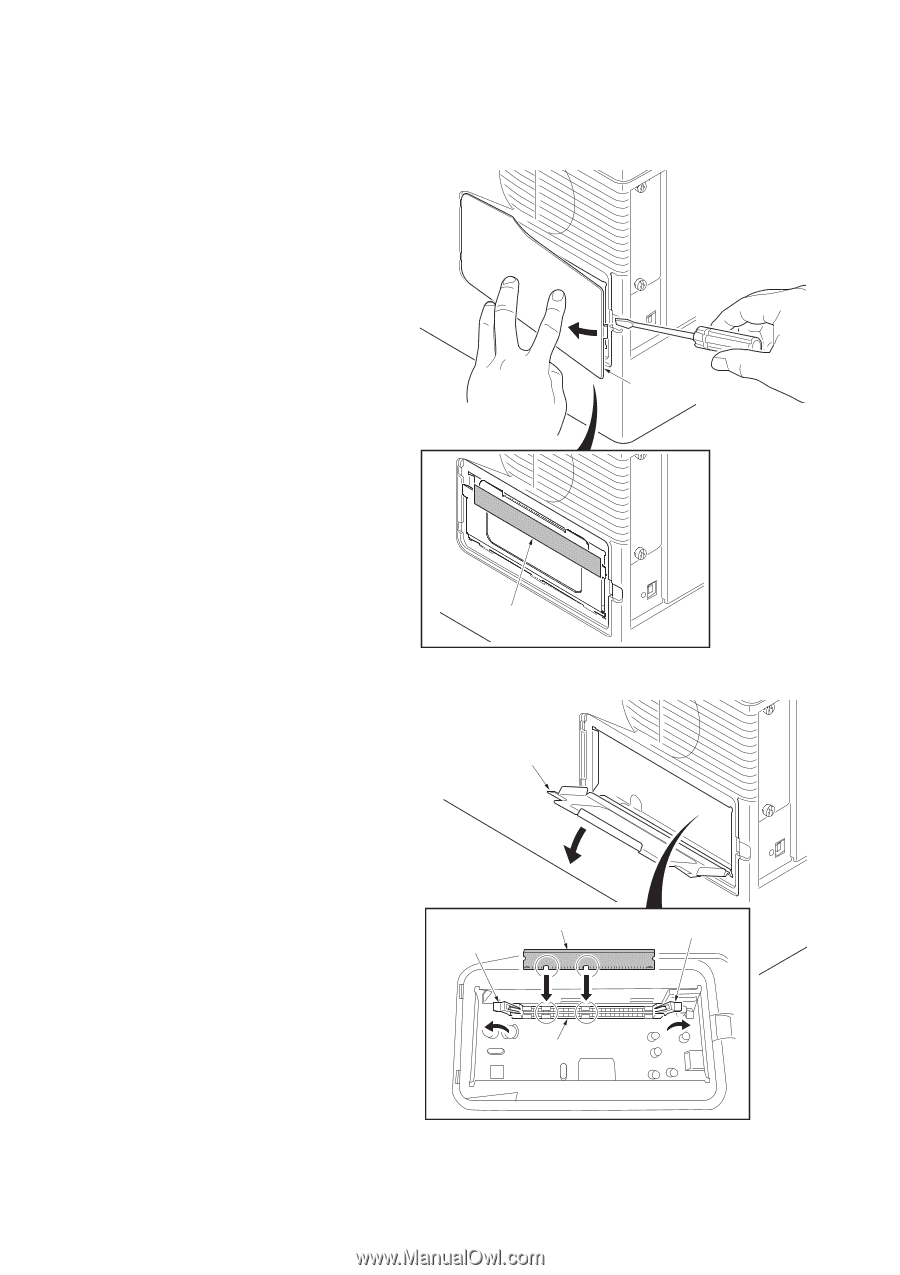
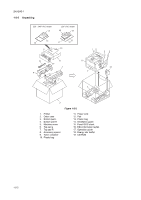
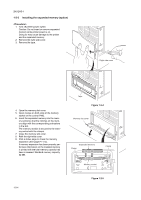
2H5/2HS-1 1-2-3 Installing the expanded memory (option) 1. Turn off printer power switch. Caution: Do not insert or remove expanded memory while printer power is on. Doing so may cause damage to the printer and the expanded memory. 2. Remove the right side cover. 3. Remove the tape. Right side cover 4. Open the memory slot cover. 5. Open clamps on both ends of the memory socket on the control PWB. 6. Insert the expanded memory into the mem- ory socket so that the notches on the memory align with the corresponding protrusions in the slot. The memory module is secured to the memory socket with the clamps. 7. Close the memory slot cover. 8. Refit the right side cover. 9. Print a status page to check the memory expansion (See page P.1-3-2). If memory expansion has been properly performed, information on the installed memory is printed with the total memory capacity has been increased. Standard memory capacity 32 MB. Tape Figure 1-2-4 Memory slot cover Expanded memory Clamp Clamp Memory socket 1-2-4 Figure 1-2-5
-
 1
1 -
2
-
3
-
4
-
5
-
6
-
7
-
8
-
9
-
10
-
11
-
12
-
13
-
14
-
15
-
16
-
 17
17 -
 18
18 -
 19
19 -
 20
20 -
 21
21 -
 22
22 -
 23
23 -
 24
24 -
 25
25 -
 26
26 -
 27
27 -
28
-
29
-
30
-
31
-
32
-
33
-
34
-
35
-
36
-
37
-
38
-
39
-
40
-
41
-
42
-
43
-
44
-
45
-
46
-
47
-
48
-
49
-
50
-
51
-
52
-
53
-
54
-
55
-
56
-
57
-
58
-
59
-
60
-
61
-
62
-
63
-
64
-
65
-
66
-
67
-
68
-
69
-
70
-
71
-
72
-
73
-
74
-
75
-
76
-
77
-
78
-
79
-
80
-
81
-
82
-
83
-
84
-
85
-
86
-
87
-
88
-
89
-
90
-
91
-
92
-
93
-
94
-
95
-
96
-
97
-
98
-
99
-
100
-
101
-
102
-
103
-
104
-
105
-
106
-
107
-
108
-
109
-
110
-
111
-
112
-
113
-
114
-
115
-
116
-
117
-
118
-
119
-
120
-
121
-
122
-
123
-
124
 |
 |