LG LGP990HN User Guide - Page 79
Video size, White balance, Incandescent, Sunny, Fluorescent, Cloudy, Color effect, Video quality,
 |
View all LG LGP990HN manuals
Add to My Manuals
Save this manual to your list of manuals |
Page 79 highlights
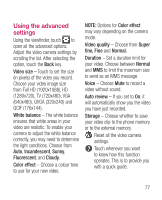
Using the advanced settings Using the viewfinder, touch to open all the advanced options. Adjust the video camera settings by scrolling the list. After selecting the option, touch the Back key. Video size - Touch to set the size (in pixels) of the video you record. Choose your video image size from Full HD (1920x1088), HD (1280x720), TV (720x480), VGA (640x480), QVGA (320x240) and QCIF (176x144). White balance - The white balance ensures that white areas in your video are realistic. To enable your camera to adjust the white balance correctly, you may need to determine the light conditions. Choose from Auto, Incandescent, Sunny, Fluorescent, and Cloudy. Color effect - Choose a colour tone to use for your new video. NOTE: Options for Color effect may vary depending on the camera mode. Video quality - Choose from Super fine, Fine and Normal. Duration - Set a duration limit for your video. Choose between Normal and MMS to limit the maximum size to send as an MMS message. Voice - Choose Mute to record a video without sound. Auto review - If you set to On, it will automatically show you the video you have just recorded. Storage - Choose whether to save your video clip to the phone memory or to the external memory. Reset all the video camera settings. Touch whenever you want to know how this function operates. This is to provide you with a quick guide. 77
-
 1
1 -
2
-
3
-
4
-
5
-
6
-
7
-
8
-
9
-
10
-
11
-
12
-
13
-
14
-
15
-
16
-
17
-
18
-
19
-
20
-
21
-
22
-
23
-
24
-
25
-
26
-
27
-
28
-
29
-
30
-
31
-
32
-
33
-
34
-
35
-
36
-
37
-
38
-
39
-
40
-
41
-
42
-
43
-
44
-
45
-
46
-
47
-
48
-
49
-
50
-
51
-
52
-
53
-
54
-
55
-
56
-
57
-
58
-
59
-
60
-
61
-
62
-
63
-
64
-
65
-
66
-
67
-
68
-
69
-
70
-
71
-
72
-
73
-
 74
74 -
 75
75 -
 76
76 -
 77
77 -
 78
78 -
 79
79 -
 80
80 -
 81
81 -
 82
82 -
 83
83 -
 84
84 -
85
-
86
-
87
-
88
-
89
-
90
-
91
-
92
-
93
-
94
-
95
-
96
-
97
-
98
-
99
-
100
-
101
-
102
-
103
-
104
-
105
-
106
-
107
-
108
-
109
-
110
-
111
-
112
-
113
-
114
-
115
-
116
-
117
-
118
 |
 |
