LG RC897T Owner's Manual (English) - Page 10
Connections to your TV HDMI - problems
 |
UPC - 719192173231
View all LG RC897T manuals
Add to My Manuals
Save this manual to your list of manuals |
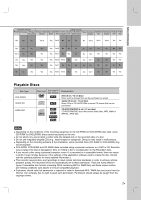
Page 10 highlights
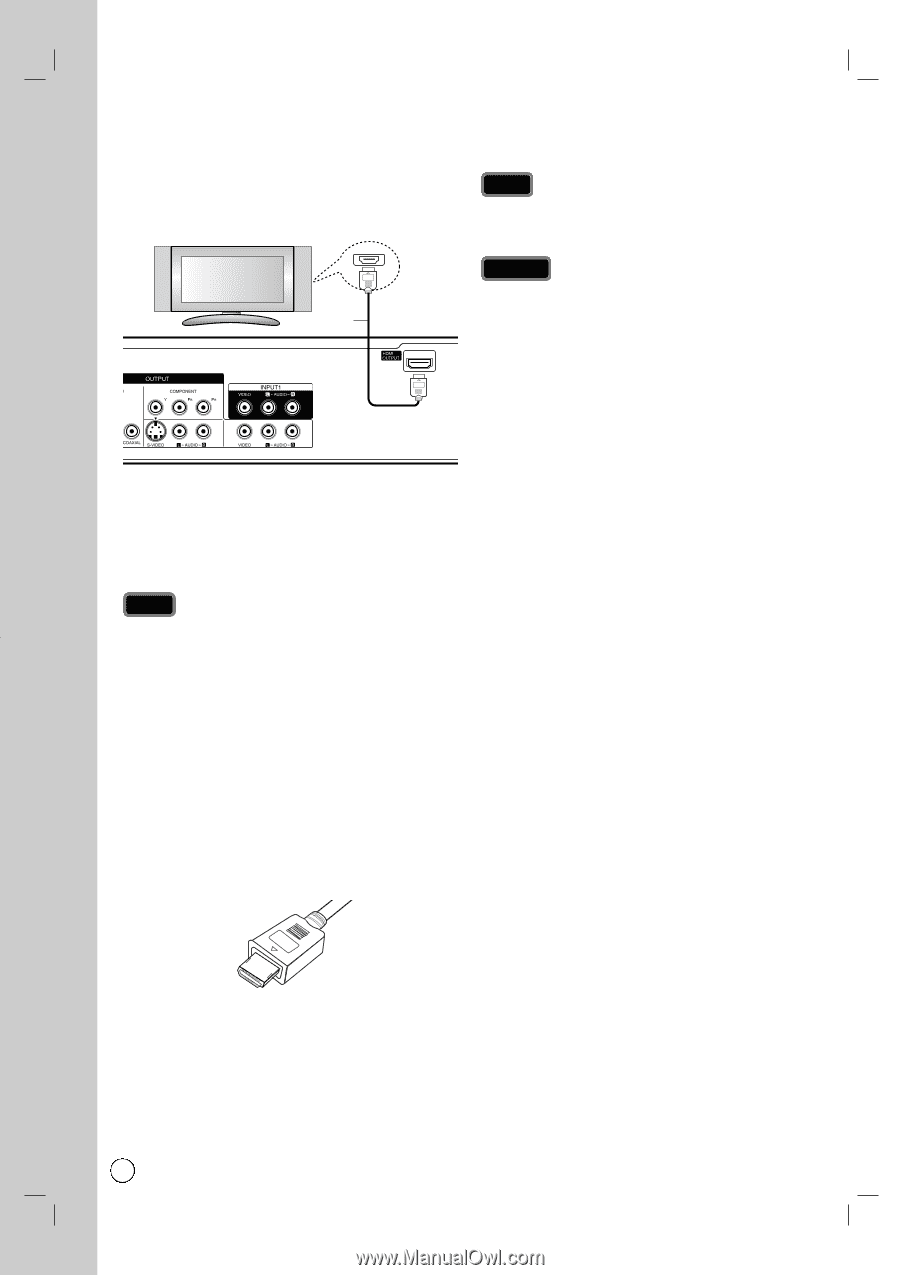
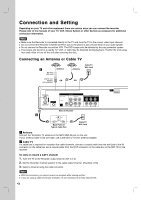
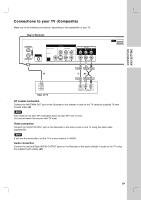
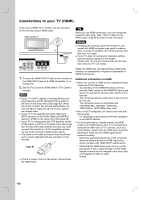
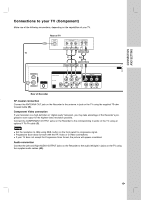
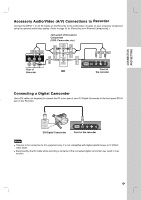
Connections to your TV (HDMI) If you have a HDMI TV or monitor, you can connect it to this recorder using a HDMI cable. HDMI compatible TV HDMI H Tip When you use HDMI connection, you can change the resolution (480i, 480p, 720p, 1080i or 1080p) for the HDMI output using RES. button on the front panel. Caution Changing the resolution when the recorder is connected with HDMI connector may result in malfunctions. To solve the problem, turn off the recorder and then turn it on again. If your TV does not accept your resolution setting, abnormal picture appears on the screen. Please read TV's owner's manual then set the resolution that your TV can accept. 1. Connect the HDMI OUTPUT jack on the recorder to the HDMI INPUT jack on a HDMI compatible TV or monitor (H). 2. Set the TV's source to HDMI (refer to TV's Owner's manual). Notes If your TV is NOT capable of handling 96 kHz sampling frequency, set the [Sampling Freq.] option to [48 kHz] on the setup menu (See page 53). When this choice is made, this unit will automatically convert any 96 kHz signals to 48 kHz so your system can decode them. If your TV is not equipped with Dolby Digital and MPEG decoder, set the [Dolby Digital] and [MPEG] options to [PCM] on the setup menu (See page 53). If your TV is not equipped with DTS decoder, set the [DTS] options to [OFF] on the setup menu (See page 53). To enjoy DTS multi channel surround, you must connect this recorder to a DTS compatible receiver via one of this recorder's digital audio outputs. The arrow on the cable connector body should face up for correct alignment with the connector on the recorder. (Type A) If there is noise or lines on the screen, please check the HDMI cable. HDMI, the HDMI logo and High-Definition Multimedia Interface are trademarks or registered trademarks of HDMI licensing LLC. Additional Information for HDMI When you connect a HDMI or DVI compatible device make sure of the followings: - Try switching off the HDMI/DVI device and this recorder. Next, switch on the HDMI/DVI device and leave it for around 30 seconds, then switch on this recorder. - The connected device's video input is set correctly for this unit. - The connected device is compatible with 720(1440)x480i, 720x480p, 1280x720p, 1920x1080i or 1920x1080p video input. Not all HDCP-compatible DVI devices will work with this recorder. - It's impossible copy protected-DVD title's playback in non-HDCP devices. For best performance, directly connect the HDMI output to an HDMI input on your TV. If connecting to some device other than a TV or monitor, such as a home theater receiver with an HDMI input, check the following to make sure the HDMI signal will be received correctly: - Check the operating instructions of the connected device to make sure that the HDMI input of the device complies with HDMI-HDCP specifications. - Check that the HDMI setup menu of any non-display device is set to "pass-through" so that HDMI signals received are not changed in any way (such as changing the video or audio format). 10
-
 1
1 -
2
-
3
-
4
-
 5
5 -
 6
6 -
 7
7 -
 8
8 -
 9
9 -
 10
10 -
 11
11 -
 12
12 -
 13
13 -
 14
14 -
 15
15 -
16
-
17
-
18
-
19
-
20
-
21
-
22
-
23
-
24
-
25
-
26
-
27
-
28
-
29
-
30
-
31
-
32
-
33
-
34
-
35
-
36
-
37
-
38
-
39
-
40
-
41
-
42
-
43
-
44
-
45
-
46
-
47
-
48
-
49
-
50
-
51
-
52
-
53
-
54
-
55
-
56
-
57
-
58
-
59
-
60
-
61
-
62
-
63
-
64
-
65
-
66
-
67
-
68
-
69
-
70
-
71
-
72
-
73
-
74
-
75
 |
 |