LG RC897T Owner's Manual (English) - Page 60
Front Panel - 1080p
 |
UPC - 719192173231
View all LG RC897T manuals
Add to My Manuals
Save this manual to your list of manuals |
Page 60 highlights
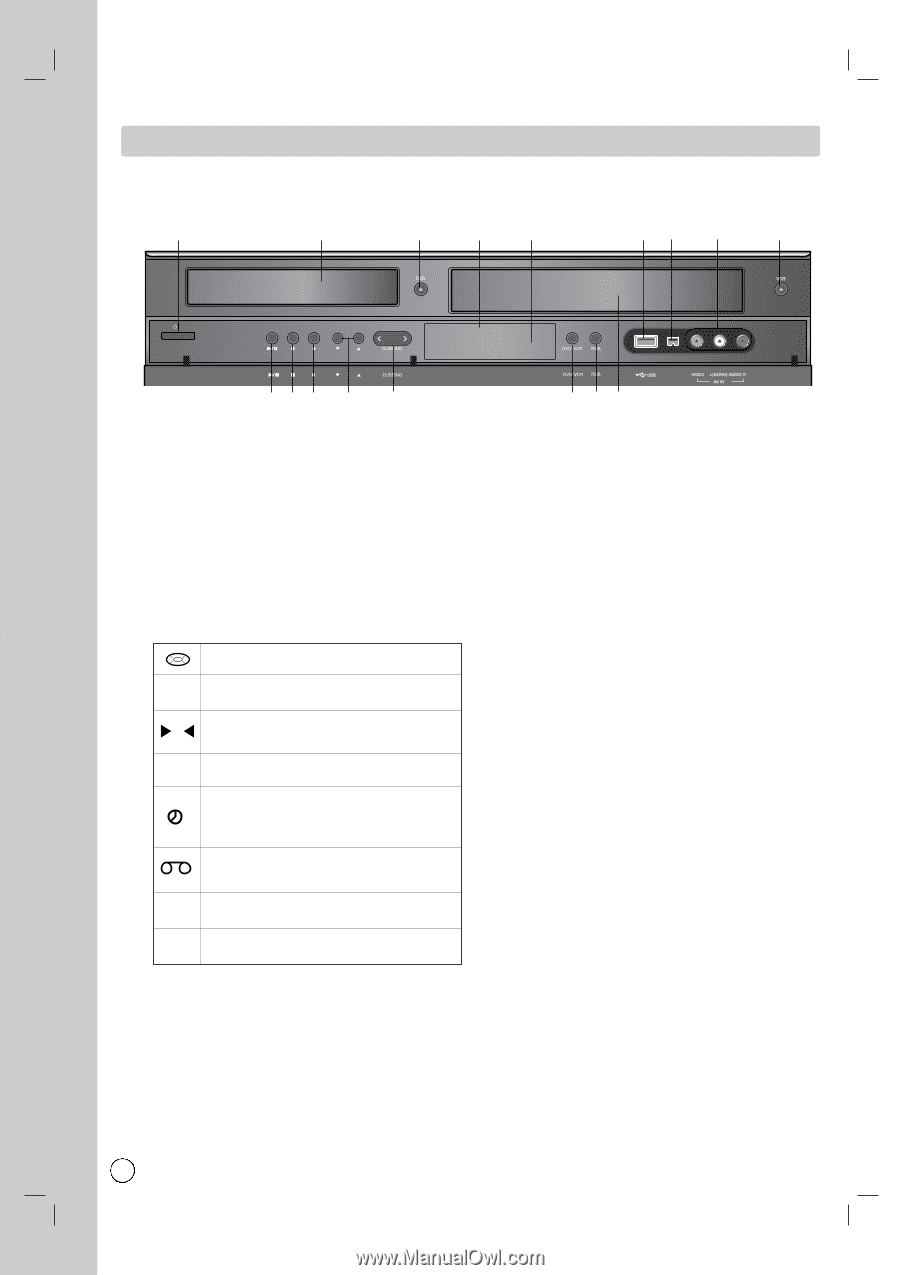
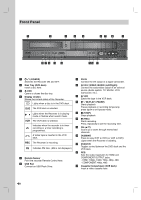
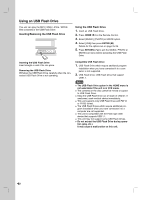
Front Panel a b c d e fg h i / I CH CH jkl m n DV IN 2 op q a 1 / I (POWER) Switches the Recorder ON and OFF. b Disc Tray (DVD deck) Insert a disc here. c Z DVD Opens or closes the disc tray. d Display window Shows the current status of the Recorder. Lights when a disc is in the DVD deck. DVD The DVD deck is selected. Lights when the Recorder is in playing mode or flashes when search mode. VCR The VCR deck is selected. Indicates when the recorder is in timer recording or a timer recording is programmed. A Video tape is inserted in the VCR deck. REC The Recorder is recording. PM Indicates PM time. (AM is not displayed.) e Remote Sensor Point the recorder Remote Control here. f USB Port Connect an USB Flash Drive. g DV IN Connect the DV output of a digital camcorder. h AV IN 2 (VIDEO /AUDIO (Left/Right)) Connect the audio/video output of an external source (Audio system, TV/ Monitor, VCR, Camcorder, etc.). i Z VCR Ejects the tape in the VCR deck. j N / X (PLAY / PAUSE) Starts playback. Pause playback or recording temporarily, press again to exit pause mode. k x (STOP) Stops playback l z (REC) Starts recording. Press repeatedly to set the recording time. m CH (v/V) Scans up or down through memorized channels. n DUBBING Press to copy DVD to VCR (or VCR to DVD). Lights when the Recorder is dubbing. o DVD/VCR Toggles control between the DVD deck and the VCR deck. p RES. Sets the output resolution for HDMI and COMPONENT OUTPUT jacks. - HDMI: 1080p, 1080i, 720p, 480p, 480i - COMPONENT: 480p, 480i q Cassette Compartment (VCR deck) Insert a video cassette here. 60
-
 1
1 -
2
-
3
-
4
-
5
-
6
-
7
-
8
-
9
-
10
-
11
-
12
-
13
-
14
-
15
-
16
-
17
-
18
-
19
-
20
-
21
-
22
-
23
-
24
-
25
-
26
-
27
-
28
-
29
-
30
-
31
-
32
-
33
-
34
-
35
-
36
-
37
-
38
-
39
-
40
-
41
-
42
-
43
-
44
-
45
-
46
-
47
-
48
-
49
-
50
-
51
-
52
-
53
-
54
-
 55
55 -
 56
56 -
 57
57 -
 58
58 -
 59
59 -
 60
60 -
 61
61 -
 62
62 -
 63
63 -
 64
64 -
 65
65 -
66
-
67
-
68
-
69
-
70
-
71
-
72
-
73
-
74
-
75
 |
 |