LG RC897T Owner's Manual (English) - Page 45
Checking Timer Recording Details, Canceling a Timer Recording - vcr with tuner
 |
UPC - 719192173231
View all LG RC897T manuals
Add to My Manuals
Save this manual to your list of manuals |
Page 45 highlights
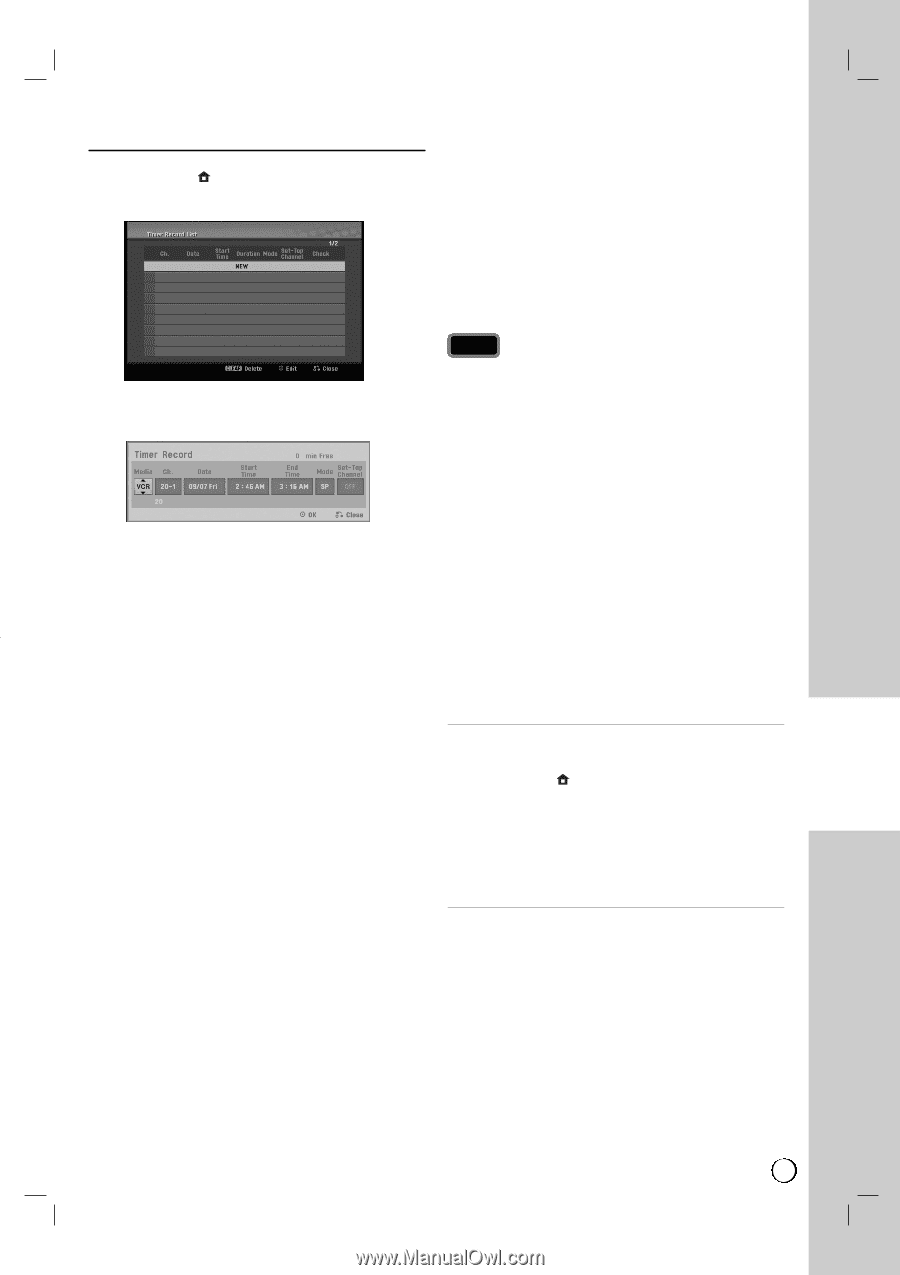
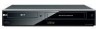
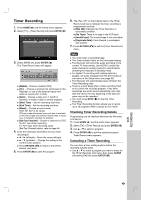
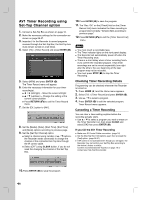
Timer Recording 1. Press HOME ( ) and the Home menu appears. 2. Select [TV] > [Timer Record] and press ENTER ( ). 3. Select [NEW] and press ENTER ( ). The Timer Record menu will appear. [Media] - Choose a media (VCR). [Ch.] - Choose a channel that memorized in this Recorder, or one of the external inputs from which to record (AV1 or AV2). [Date] - Choose a date up to 1 month in advance, or select a daily or weekly program. [Start Time] - Set the recording start time. [End Time] - Set the recording end time. [Mode] - Choose a record mode. VCR: SP, SLP or AT (Auto) AT(Auto) mode determines how much time is available on the disc or tape and switches record mode, if necessary, to complete recording the program. [Set-Top Channel] - Choose a channel or [OFF] for AV1 input timer recording. For AV1 input timer recording using [Set-Top Channel] option, refer to page 46. 4. Enter the necessary information for your timer recording(s). b / B (left/right) - Move the cursor left/right v / V (up/down) - Change the setting at the current cursor position. Press RETURN (O) to return to the [Timer Record List] menu. 5. Press ENTER ( ) to save the program. 6. The "Rec. OK" on the [Check] field on the [Timer Record List] menu indicates the timer recording is programmed correctly. [Rec OK]: Indicates the Timer Record is in recordable condition. [No Tape]: There is no tape in the VCR deck. [Invalid tape]: The inserted tape is not recordable. [Duplicate Date]: Timer Record is overlapped with another. 7. Press RETURN (O) to exit the [Timer Record List] menu. Notes You must insert a recordable tape. The Timer indicator lights on the front panel display. The Recorder will record the audio according to the current TV tuner setting. Use AUDIO to select the audio channel for analog channel to record before switching the Recorder to Standby mode. For digital TV recording with multiple audio languages, set audio language from the [DTV Audio] in sub-menu of the Setup menu (see page 52). The Recorder will automatically power off when the Timer Recording ends. There is a short delay when a timer recording finishes to confirm the recorded program. If two timer recordings are set to record sequentially (one right after the other), the very beginning of the later program may not be recorded. You must press STOP (x) to stop the Timer Recording. The Timer Recording function allows you to record up to 16 programs within a period of one month. Checking Timer Recording Details Programming can be checked whenever the Recorder is turned on. 1. Press HOME ( ) and the Home menu appears. 2. Select [TV] > [Timer Record] and press ENTER ( ). 3. Use v / V to select a program. 4. Press ENTER ( ) to edit the selected program. Timer Record menu appears. Canceling a Timer Recording You can clear a timer setting anytime before the recording actually starts. Use v / V to select a program you want to erase on the [Timer Recorder List] menu, then press CLEAR and select [OK] then press ENTER ( ). VCR RECORDING 45
-
 1
1 -
2
-
3
-
4
-
5
-
6
-
7
-
8
-
9
-
10
-
11
-
12
-
13
-
14
-
15
-
16
-
17
-
18
-
19
-
20
-
21
-
22
-
23
-
24
-
25
-
26
-
27
-
28
-
29
-
30
-
31
-
32
-
33
-
34
-
35
-
36
-
37
-
38
-
39
-
 40
40 -
 41
41 -
 42
42 -
 43
43 -
 44
44 -
 45
45 -
 46
46 -
 47
47 -
 48
48 -
 49
49 -
 50
50 -
51
-
52
-
53
-
54
-
55
-
56
-
57
-
58
-
59
-
60
-
61
-
62
-
63
-
64
-
65
-
66
-
67
-
68
-
69
-
70
-
71
-
72
-
73
-
74
-
75
 |
 |