Lenovo NetVista A22 User guide for NetVista 2254, 2256, 2257, 6336, 6337, 6339 - Page 47
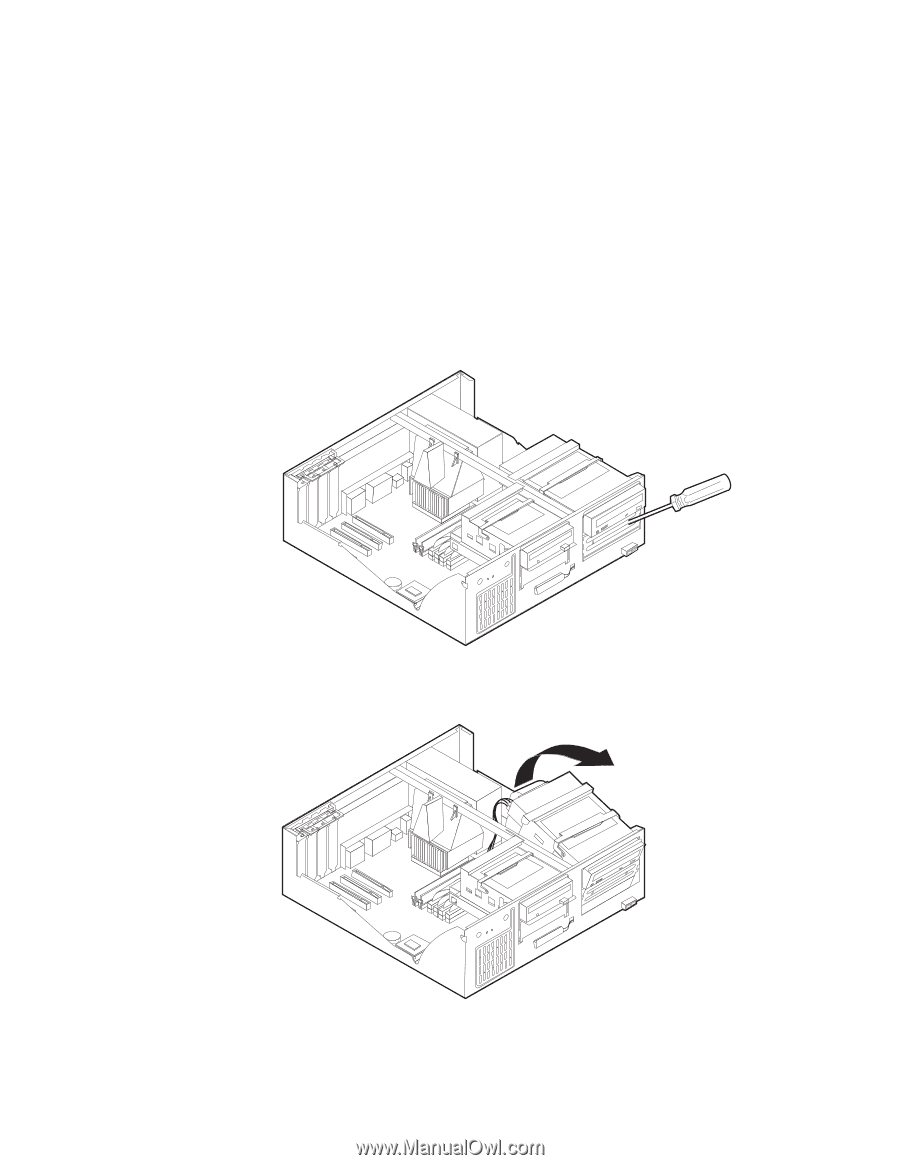
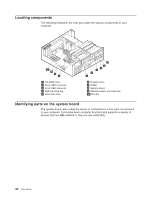
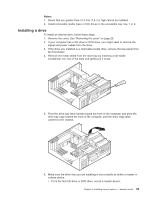
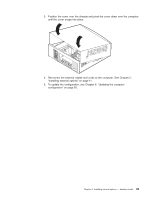
Installing a drive, Pivot the drive bay latch handle toward the front of the computer and pivot
 |
View all Lenovo NetVista A22 manuals
Add to My Manuals
Save this manual to your list of manuals |
Page 47 highlights
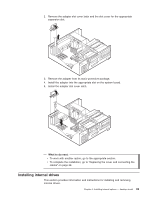
Notes: 1. Drives that are greater than 41.3 mm (1.6 in.) high cannot be installed. 2. Install removable media (tape or CD) drives in the accessible bay: bay 1 or 2. Installing a drive To install an internal drive, follow these steps. 1. Remove the cover. See "Removing the cover" on page 29. 2. If your computer has a CD drive or DVD drive, you might need to remove the signal and power cables from the drive. 3. If the drive you installed is a removable-media drive, remove the bay panel from the front bezel. 4. Remove the metal shield from the drive bay by inserting a flat-blade screwdriver into one of the slots and gently pry it loose. 5. Pivot the drive bay latch handle toward the front of the computer and pivot the drive bay cage toward the front of the computer until the drive cage latch catches to the chassis. 6. Make sure the drive that you are installing is set correctly as either a master or a slave device. v If it is the first CD drive or DVD drive, set as a master device. Chapter 4. Installing internal options - desktop model 35
-
 1
1 -
2
-
3
-
4
-
5
-
6
-
7
-
8
-
9
-
10
-
11
-
12
-
13
-
14
-
15
-
16
-
17
-
18
-
19
-
20
-
21
-
22
-
23
-
24
-
25
-
26
-
27
-
28
-
29
-
30
-
31
-
32
-
33
-
34
-
35
-
36
-
37
-
38
-
39
-
40
-
41
-
 42
42 -
 43
43 -
 44
44 -
 45
45 -
 46
46 -
 47
47 -
 48
48 -
 49
49 -
 50
50 -
 51
51 -
 52
52 -
53
-
54
-
55
-
56
-
57
-
58
-
59
-
60
-
61
-
62
-
63
-
64
-
65
-
66
-
67
-
68
-
69
-
70
-
71
-
72
-
73
-
74
-
75
-
76
-
77
-
78
-
79
-
80
-
81
-
82
-
83
-
84
-
85
-
86
 |
 |