Lenovo NetVista A22 User guide for NetVista 2254, 2256, 2257, 6336, 6337, 6339 - Page 48
To connect the first IDE CD drive or DVD drive, the new drive.
 |
View all Lenovo NetVista A22 manuals
Add to My Manuals
Save this manual to your list of manuals |
Page 48 highlights
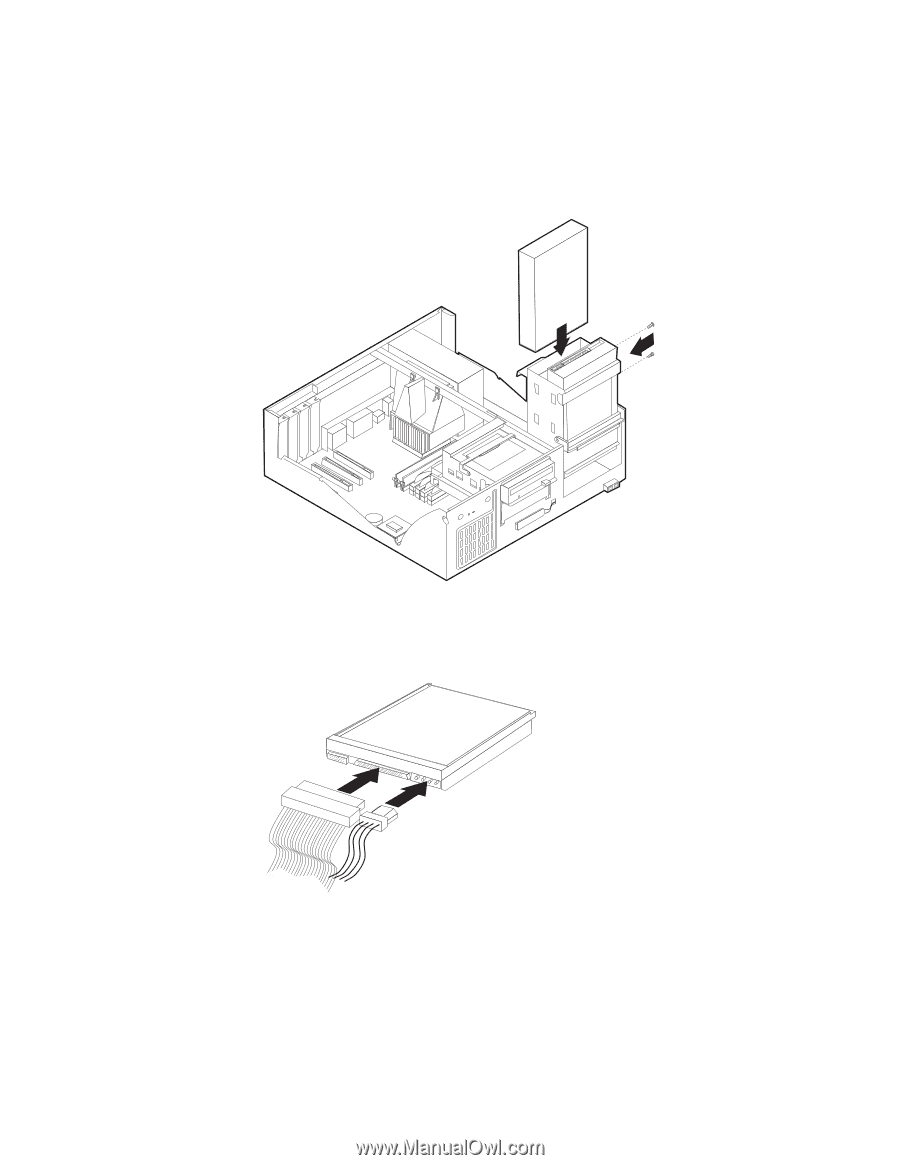
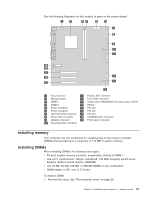
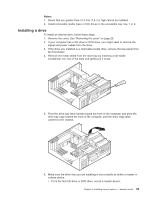
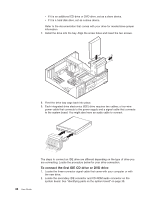
v If it is an additional CD drive or DVD drive, set as a slave device. v If it is a hard disk drive, set as a slave device. Refer to the documentation that comes with your drive for master/slave jumper information. 7. Install the drive into the bay. Align the screw holes and insert the two screws. 8. Pivot the drive bay cage back into place. 9. Each integrated drive electronics (IDE) drive requires two cables; a four-wire power cable that connects to the power supply and a signal cable that connects to the system board. You might also have an audio cable to connect. 36 User Guide The steps to connect an IDE drive are different depending on the type of drive you are connecting. Locate the procedure below for your drive connection. To connect the first IDE CD drive or DVD drive 1. Locate the three-connector signal cable that came with your computer or with the new drive. 2. Locate the secondary IDE connector and CD-ROM audio connector on the system board. See "Identifying parts on the system board" on page 30.
-
 1
1 -
2
-
3
-
4
-
5
-
6
-
7
-
8
-
9
-
10
-
11
-
12
-
13
-
14
-
15
-
16
-
17
-
18
-
19
-
20
-
21
-
22
-
23
-
24
-
25
-
26
-
27
-
28
-
29
-
30
-
31
-
32
-
33
-
34
-
35
-
36
-
37
-
38
-
39
-
40
-
41
-
42
-
 43
43 -
 44
44 -
 45
45 -
 46
46 -
 47
47 -
 48
48 -
 49
49 -
 50
50 -
 51
51 -
 52
52 -
 53
53 -
54
-
55
-
56
-
57
-
58
-
59
-
60
-
61
-
62
-
63
-
64
-
65
-
66
-
67
-
68
-
69
-
70
-
71
-
72
-
73
-
74
-
75
-
76
-
77
-
78
-
79
-
80
-
81
-
82
-
83
-
84
-
85
-
86
 |
 |