Lenovo ThinkCentre A30 Hardware Maintenance Manual (HMM) for ThinkCentre 2296, - Page 51
Replacing, internal, drives
 |
View all Lenovo ThinkCentre A30 manuals
Add to My Manuals
Save this manual to your list of manuals |
Page 51 highlights
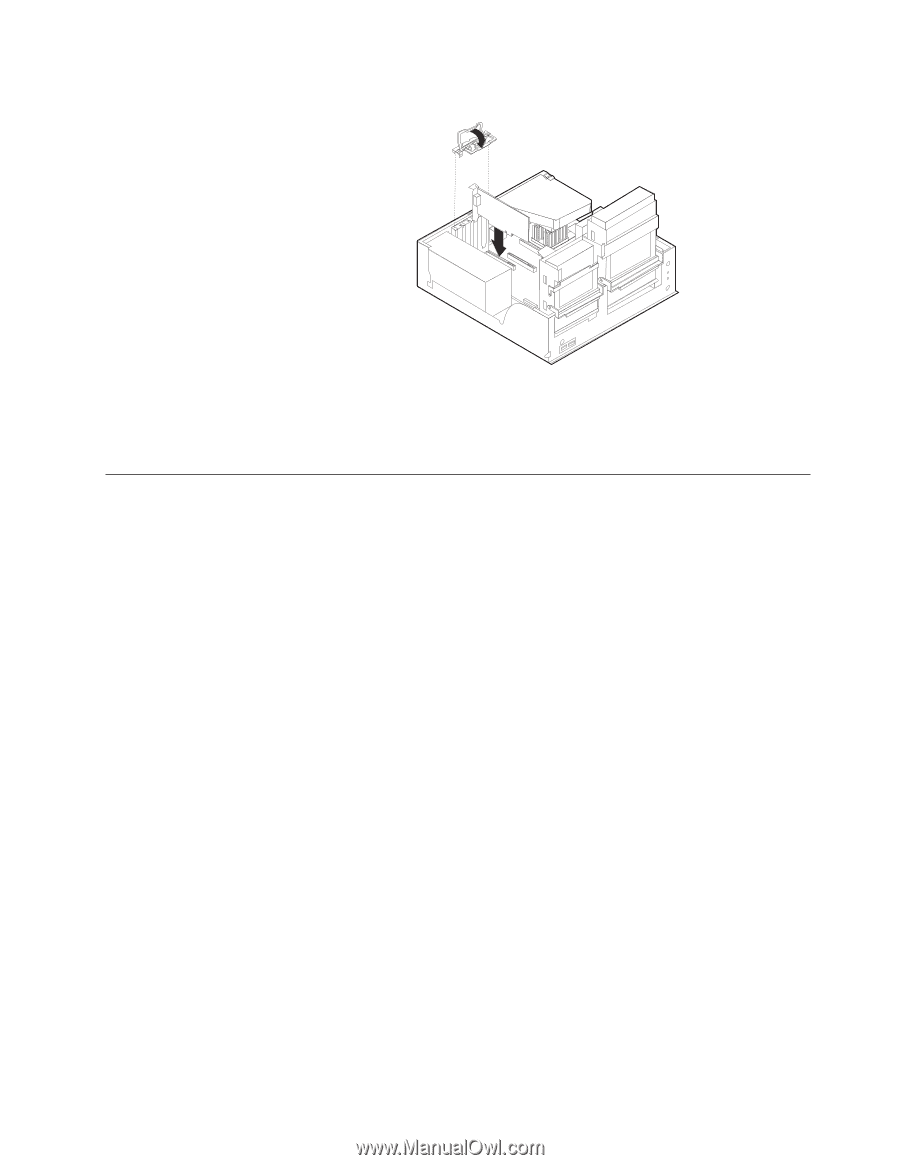
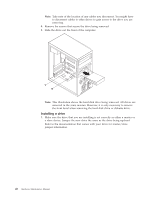
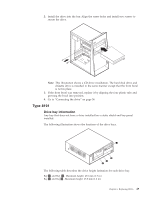
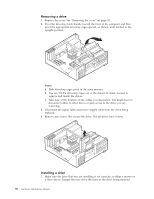
8. Install the adapter-slot-cover latch. 9. Clear any cables that might impede the replacement of the drive bays. 10. Replace the support bar and pivot the two drive bays back to their original positions. 11. Go to "Replacing the cover and connecting the cables" on page 64. Replacing internal drives This section provides information and instructions for replacing internal drives. v Hard disk drives v CD drives or DVD drives v Removable media drives Note: These different drives are also referred to as integrated drive electronics (IDE) drives. Internal drives are installed in bays. In this book, the bays are referred to as bay 1, bay 2, and so on. When you install an internal drive, it is important to note what type and size of drive that you can install in each bay. Also, it is important to correctly connect the internal drive cables to the installed drive. Chapter 6. Replacing FRUs 45
-
 1
1 -
2
-
3
-
4
-
5
-
6
-
7
-
8
-
9
-
10
-
11
-
12
-
13
-
14
-
15
-
16
-
17
-
18
-
19
-
20
-
21
-
22
-
23
-
24
-
25
-
26
-
27
-
28
-
29
-
30
-
31
-
32
-
33
-
34
-
35
-
36
-
37
-
38
-
39
-
40
-
41
-
42
-
43
-
44
-
45
-
 46
46 -
 47
47 -
 48
48 -
 49
49 -
 50
50 -
 51
51 -
 52
52 -
 53
53 -
 54
54 -
 55
55 -
 56
56 -
57
-
58
-
59
-
60
-
61
-
62
-
63
-
64
-
65
-
66
-
67
-
68
-
69
-
70
-
71
-
72
-
73
-
74
-
75
-
76
-
77
-
78
-
79
-
80
-
81
-
82
-
83
-
84
-
85
-
86
-
87
-
88
-
89
-
90
-
91
-
92
-
93
-
94
-
95
-
96
-
97
-
98
-
99
-
100
-
101
-
102
-
103
-
104
-
105
-
106
-
107
-
108
-
109
-
110
-
111
-
112
-
113
-
114
-
115
-
116
-
117
-
118
-
119
-
120
-
121
-
122
-
123
-
124
-
125
-
126
-
127
-
128
-
129
-
130
-
131
-
132
-
133
-
134
-
135
-
136
-
137
-
138
-
139
-
140
-
141
-
142
-
143
-
144
-
145
-
146
-
147
-
148
-
149
-
150
-
151
-
152
-
153
-
154
-
155
-
156
-
157
-
158
-
159
-
160
-
161
-
162
-
163
-
164
-
165
-
166
-
167
-
168
-
169
-
170
-
171
-
172
-
173
-
174
-
175
-
176
-
177
-
178
-
179
-
180
-
181
-
182
-
183
-
184
-
185
-
186
-
187
-
188
-
189
-
190
-
191
-
192
 |
 |