Lenovo ThinkCentre A70z Hardware Maintenance Manual for ThinkCentre A70z - Page 75
Adjusting the computer stand, - lcd panel
 |
View all Lenovo ThinkCentre A70z manuals
Add to My Manuals
Save this manual to your list of manuals |
Page 75 highlights
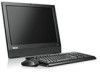
7 Data cables for hard disk drive and optical 16 drive 8 Rear I/O assembly - 30 pin 17 9 Battery Integrated webcam LCD panel Adjusting the computer stand Your computer comes with a stand that you can use to position the computer. Pull the stand open and adjust the position of the computer at an angle of 10° to 35° as shown in the following illustration. CAUTION: Make sure the angle is at least 10° from the vertical; otherwise, the computer might be unstable and fall over. 35° 10° Your computer also supports UL (Underwriters Laboratories) certified 100 mm × 100 mm (3.94 inches × 3.94 inches) wall mounts. For proper mounting, use four screws of the following specifications: Diameter × Pitch × Length: 4 mm × 0.7 mm × 10 mm (0.16 inch × 0.03 inch × 0.39 inch) Removing the computer stand This section provides instructions on how to remove the computer stand. To remove the computer stand, do the following: 1. Turn off the computer. 2. Disconnect all cables, power cords, and external options from your computer. See "Rear connectors" on page 65. 3. Place a soft, clean towel or cloth on the desk or surface. Hold the sides of your computer and gently lay it down so that the screen is against the surface and the cover is facing up. 4. Use a screwdriver to remove the four screws. Keep the four screws, and put them aside. You will need them when installing the computer stand. Chapter 8. Replacing FRUs 69
-
 1
1 -
2
-
3
-
4
-
5
-
6
-
7
-
8
-
9
-
10
-
11
-
12
-
13
-
14
-
15
-
16
-
17
-
18
-
19
-
20
-
21
-
22
-
23
-
24
-
25
-
26
-
27
-
28
-
29
-
30
-
31
-
32
-
33
-
34
-
35
-
36
-
37
-
38
-
39
-
40
-
41
-
42
-
43
-
44
-
45
-
46
-
47
-
48
-
49
-
50
-
51
-
52
-
53
-
54
-
55
-
56
-
57
-
58
-
59
-
60
-
61
-
62
-
63
-
64
-
65
-
66
-
67
-
68
-
69
-
 70
70 -
 71
71 -
 72
72 -
 73
73 -
 74
74 -
 75
75 -
 76
76 -
 77
77 -
 78
78 -
 79
79 -
 80
80 -
81
-
82
-
83
-
84
-
85
-
86
-
87
-
88
-
89
-
90
-
91
-
92
-
93
-
94
-
95
-
96
-
97
-
98
-
99
-
100
-
101
-
102
-
103
-
104
-
105
-
106
-
107
-
108
-
109
-
110
-
111
-
112
-
113
-
114
-
115
-
116
-
117
-
118
-
119
-
120
-
121
-
122
-
123
-
124
-
125
-
126
-
127
-
128
-
129
-
130
-
131
-
132
-
133
-
134
-
135
-
136
-
137
-
138
-
139
-
140
-
141
-
142
-
143
-
144
-
145
-
146
-
147
-
148
-
149
-
150
-
151
-
152
-
153
-
154
-
155
-
156
-
157
-
158
-
159
-
160
-
161
-
162
-
163
-
164
-
165
-
166
-
167
-
168
-
169
-
170
-
171
-
172
-
173
-
174
-
175
-
176
-
177
-
178
-
179
-
180
-
181
-
182
-
183
-
184
-
185
-
186
-
187
-
188
-
189
-
190
-
191
-
192
-
193
-
194
 |
 |
