Lexmark X8350 User's Guide for Windows - Page 103
does not print, Start, Settings, Printers and Faxes, Control Panel, Printers - windows 8 1
 |
UPC - 734646098717
View all Lexmark X8350 manuals
Add to My Manuals
Save this manual to your list of manuals |
Page 103 highlights
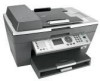
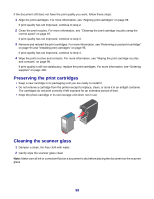
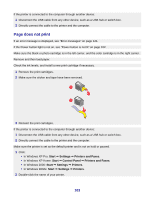
If the printer is connected to the computer through another device: 1 Disconnect the USB cable from any other device, such as a USB hub or switch box. 2 Directly connect the cable to the printer and the computer. Page does not print If an error message is displayed, see "Error messages" on page 121. If the Power button light is not on, see "Power button is not lit" on page 102. Make sure the black or photo cartridge is in the left carrier, and the color cartridge is in the right carrier. Remove and then load paper. Check the ink levels, and install a new print cartridge if necessary. 1 Remove the print cartridges. 2 Make sure the sticker and tape have been removed. 1 2 3 Reinsert the print cartridges. If the printer is connected to the computer through another device: 1 Disconnect the USB cable from any other device, such as a USB hub or switch box. 2 Directly connect the cable to the printer and the computer. Make sure the printer is set as the default printer and is not on hold or paused. 1 Click: • In Windows XP Pro: Start Œ Settings Œ Printers and Faxes. • In Windows XP Home: Start Œ Control Panel Œ Printers and Faxes. • In Windows 2000: Start Œ Settings Œ Printers. • In Windows 98/Me: Start Œ Settings Œ Printers. 2 Double-click the name of your printer. 103
-
 1
1 -
2
-
3
-
4
-
5
-
6
-
7
-
8
-
9
-
10
-
11
-
12
-
13
-
14
-
15
-
16
-
17
-
18
-
19
-
20
-
21
-
22
-
23
-
24
-
25
-
26
-
27
-
28
-
29
-
30
-
31
-
32
-
33
-
34
-
35
-
36
-
37
-
38
-
39
-
40
-
41
-
42
-
43
-
44
-
45
-
46
-
47
-
48
-
49
-
50
-
51
-
52
-
53
-
54
-
55
-
56
-
57
-
58
-
59
-
60
-
61
-
62
-
63
-
64
-
65
-
66
-
67
-
68
-
69
-
70
-
71
-
72
-
73
-
74
-
75
-
76
-
77
-
78
-
79
-
80
-
81
-
82
-
83
-
84
-
85
-
86
-
87
-
88
-
89
-
90
-
91
-
92
-
93
-
94
-
95
-
96
-
97
-
 98
98 -
 99
99 -
 100
100 -
 101
101 -
 102
102 -
 103
103 -
 104
104 -
 105
105 -
 106
106 -
 107
107 -
 108
108 -
109
-
110
-
111
-
112
-
113
-
114
-
115
-
116
-
117
-
118
-
119
-
120
-
121
-
122
-
123
-
124
-
125
-
126
-
127
-
128
-
129
-
130
-
131
-
132
-
133
-
134
-
135
-
136
 |
 |