Lexmark X8350 User's Guide for Windows - Page 36
Using the Saved Images tab, See More Copy Settings, Show More Printing Options
 |
UPC - 734646098717
View all Lexmark X8350 manuals
Add to My Manuals
Save this manual to your list of manuals |
Page 36 highlights
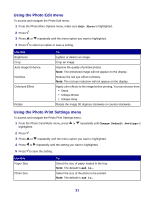
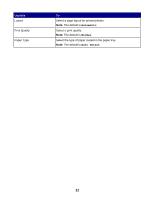
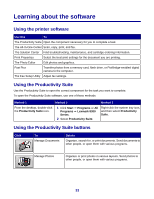
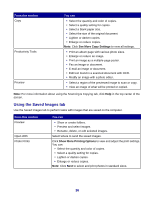
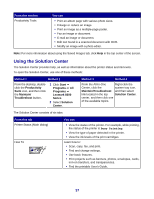
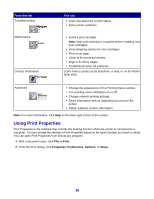
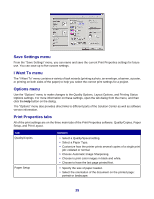
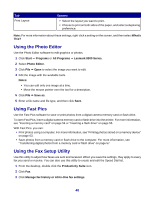
From this section Copy Productivity Tools Preview You can • Select the quantity and color of copies. • Select a quality setting for copies. • Select a blank paper size. • Select the size of the original document. • Lighten or darken copies. • Enlarge or reduce copies. Note: Click See More Copy Settings to view all settings. • Print an album page with various photo sizes. • Enlarge or reduce an image. • Print an image as a multiple-page poster. • Fax an image or document. • E-mail an image or document. • Edit text found in a scanned document with OCR. • Modify an image with a photo editor. • Select a region of the previewed image to scan or copy. • View an image of what will be printed or copied. Note: For more information about using the Scanning & Copying tab, click Help in the top center of the screen. Using the Saved Images tab Use the Saved Images tab to perform tasks with images that are saved on the computer. From this section Preview Open With Photo Prints You can • Show or create folders. • Preview and select images. • Rename, delete, or edit selected images. Select where to send the saved images. Click Show More Printing Options to view and adjust the print settings. You can: • Select the quantity and color of copies. • Select a quality setting for copies. • Lighten or darken copies. • Enlarge or reduce copies. Note: Click Next to select and print photos in standard sizes. 36
-
 1
1 -
2
-
3
-
4
-
5
-
6
-
7
-
8
-
9
-
10
-
11
-
12
-
13
-
14
-
15
-
16
-
17
-
18
-
19
-
20
-
21
-
22
-
23
-
24
-
25
-
26
-
27
-
28
-
29
-
30
-
 31
31 -
 32
32 -
 33
33 -
 34
34 -
 35
35 -
 36
36 -
 37
37 -
 38
38 -
 39
39 -
 40
40 -
 41
41 -
42
-
43
-
44
-
45
-
46
-
47
-
48
-
49
-
50
-
51
-
52
-
53
-
54
-
55
-
56
-
57
-
58
-
59
-
60
-
61
-
62
-
63
-
64
-
65
-
66
-
67
-
68
-
69
-
70
-
71
-
72
-
73
-
74
-
75
-
76
-
77
-
78
-
79
-
80
-
81
-
82
-
83
-
84
-
85
-
86
-
87
-
88
-
89
-
90
-
91
-
92
-
93
-
94
-
95
-
96
-
97
-
98
-
99
-
100
-
101
-
102
-
103
-
104
-
105
-
106
-
107
-
108
-
109
-
110
-
111
-
112
-
113
-
114
-
115
-
116
-
117
-
118
-
119
-
120
-
121
-
122
-
123
-
124
-
125
-
126
-
127
-
128
-
129
-
130
-
131
-
132
-
133
-
134
-
135
-
136
 |
 |