Lexmark X8350 User's Guide for Windows - Page 74
Scanning documents or images for e-mailing using the computer, Scanning documents to edit text - installation software
 |
UPC - 734646098717
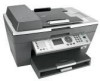
View all Lexmark X8350 manuals
Add to My Manuals
Save this manual to your list of manuals |
Page 74 highlights
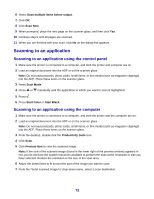
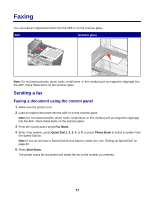
Scanning documents or images for e-mailing using the computer 1 Make sure the printer is connected to a computer, and both the printer and the computer are on. 2 Load an original document into the ADF or on the scanner glass. Note: Do not load postcards, photo cards, small items, or thin media (such as magazine clippings) into the ADF. Place these items on the scanner glass. 3 From the desktop, double-click the Productivity Suite icon. 4 Click Attach to E-mail. 5 Click Scan and e-mail a document or photo. 6 Click Preview Now. 7 From the "What is being scanned?" menu, select a document type. 8 Click Next. 9 Follow the instructions on the screen to prepare the document or image for e-mailing. 10 Click Attach. 11 Write a note to accompany the attached document or image, and then send it. Scanning documents to edit text Use the Optical Character Recognition (OCR) software feature to turn scanned images into text you can edit with a word-processing application. Note: Make sure that ABBYY Fine Reader is installed. 1 Load an original document into the ADF or on the scanner glass. Note: Do not load postcards, photo cards, small items, or thin media (such as magazine clippings) into the ADF. Place these items on the scanner glass. 2 Double-click the Productivity Suite icon. 3 Click Scan & Edit Text (OCR). 4 Click Preview Now. 5 Select a word-processing program to edit the text. 6 Click Send Now. 7 Edit and save the document. 74
-
 1
1 -
2
-
3
-
4
-
5
-
6
-
7
-
8
-
9
-
10
-
11
-
12
-
13
-
14
-
15
-
16
-
17
-
18
-
19
-
20
-
21
-
22
-
23
-
24
-
25
-
26
-
27
-
28
-
29
-
30
-
31
-
32
-
33
-
34
-
35
-
36
-
37
-
38
-
39
-
40
-
41
-
42
-
43
-
44
-
45
-
46
-
47
-
48
-
49
-
50
-
51
-
52
-
53
-
54
-
55
-
56
-
57
-
58
-
59
-
60
-
61
-
62
-
63
-
64
-
65
-
66
-
67
-
68
-
 69
69 -
 70
70 -
 71
71 -
 72
72 -
 73
73 -
 74
74 -
 75
75 -
 76
76 -
 77
77 -
 78
78 -
 79
79 -
80
-
81
-
82
-
83
-
84
-
85
-
86
-
87
-
88
-
89
-
90
-
91
-
92
-
93
-
94
-
95
-
96
-
97
-
98
-
99
-
100
-
101
-
102
-
103
-
104
-
105
-
106
-
107
-
108
-
109
-
110
-
111
-
112
-
113
-
114
-
115
-
116
-
117
-
118
-
119
-
120
-
121
-
122
-
123
-
124
-
125
-
126
-
127
-
128
-
129
-
130
-
131
-
132
-
133
-
134
-
135
-
136
 |
 |
