Lexmark X8350 User's Guide for Windows - Page 29
Customizing photo settings using the control panel, Using the Photo Card Mode menu - printer ink
 |
UPC - 734646098717
View all Lexmark X8350 manuals
Add to My Manuals
Save this manual to your list of manuals |
Page 29 highlights
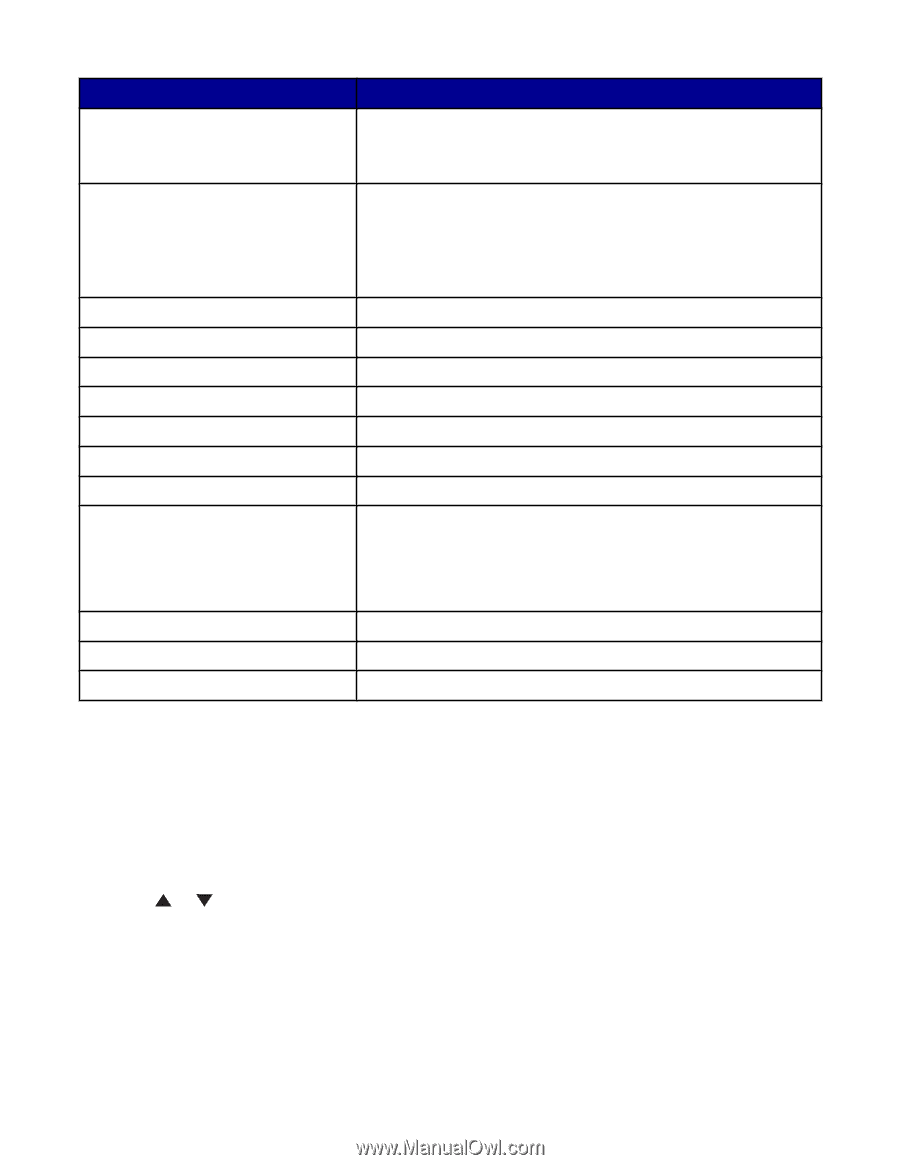
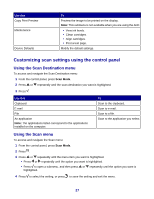
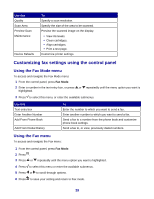
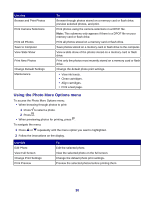
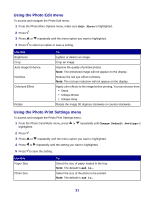
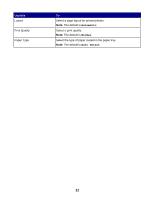
Use this Delay Sending Fax On Hook Dial Quality Brightness History and Reports Ringing and Answering Fax Printing Dialing and Sending Junk Fax Blocking Maintenance Device Defaults Block Host Settings Print Fax Settings List To Enter a specific time to send a fax. Note: Make sure the date and time are entered correctly before setting a specific time to send a fax. Dial a telephone number while listening to the call through a speaker on the printer. This is useful when you must navigate an automated answering system before sending your fax. Note: For more information, see "Faxing while listening to a call (On Hook Dial)" on page 84. Choose a print quality for sending faxes. Lighten or darken a fax. View and print fax history reports. Modify ringing and answering options. Specify fax printing options. Specify the fax dialing and sending options. Block faxes from the numbers you specify. • View ink levels. • Clean cartridges. • Align cartridges. • Print a test page. Modify the default settings. Block unwanted changes to fax settings. Print a list of the current fax settings. Customizing photo settings using the control panel Using the Photo Card Mode menu To access and navigate the Photo Card Mode menu: 1 Insert a memory card or flash drive. For more information, see "Inserting a memory card" on page 54 or "Inserting a flash drive" on page 55. 2 Press or repeatedly until the menu option you want is highlighted. 3 Follow the instructions on the display to navigate the menu option. 29
-
 1
1 -
2
-
3
-
4
-
5
-
6
-
7
-
8
-
9
-
10
-
11
-
12
-
13
-
14
-
15
-
16
-
17
-
18
-
19
-
20
-
21
-
22
-
23
-
 24
24 -
 25
25 -
 26
26 -
 27
27 -
 28
28 -
 29
29 -
 30
30 -
 31
31 -
 32
32 -
 33
33 -
 34
34 -
35
-
36
-
37
-
38
-
39
-
40
-
41
-
42
-
43
-
44
-
45
-
46
-
47
-
48
-
49
-
50
-
51
-
52
-
53
-
54
-
55
-
56
-
57
-
58
-
59
-
60
-
61
-
62
-
63
-
64
-
65
-
66
-
67
-
68
-
69
-
70
-
71
-
72
-
73
-
74
-
75
-
76
-
77
-
78
-
79
-
80
-
81
-
82
-
83
-
84
-
85
-
86
-
87
-
88
-
89
-
90
-
91
-
92
-
93
-
94
-
95
-
96
-
97
-
98
-
99
-
100
-
101
-
102
-
103
-
104
-
105
-
106
-
107
-
108
-
109
-
110
-
111
-
112
-
113
-
114
-
115
-
116
-
117
-
118
-
119
-
120
-
121
-
122
-
123
-
124
-
125
-
126
-
127
-
128
-
129
-
130
-
131
-
132
-
133
-
134
-
135
-
136
 |
 |