Lexmark Z32 Color Jetprinter User's Guide for Windows 95, Windows 98, and Maci - Page 17
On the Paper Type/Quality pane, select Trans
 |
View all Lexmark Z32 Color Jetprinter manuals
Add to My Manuals
Save this manual to your list of manuals |
Page 17 highlights
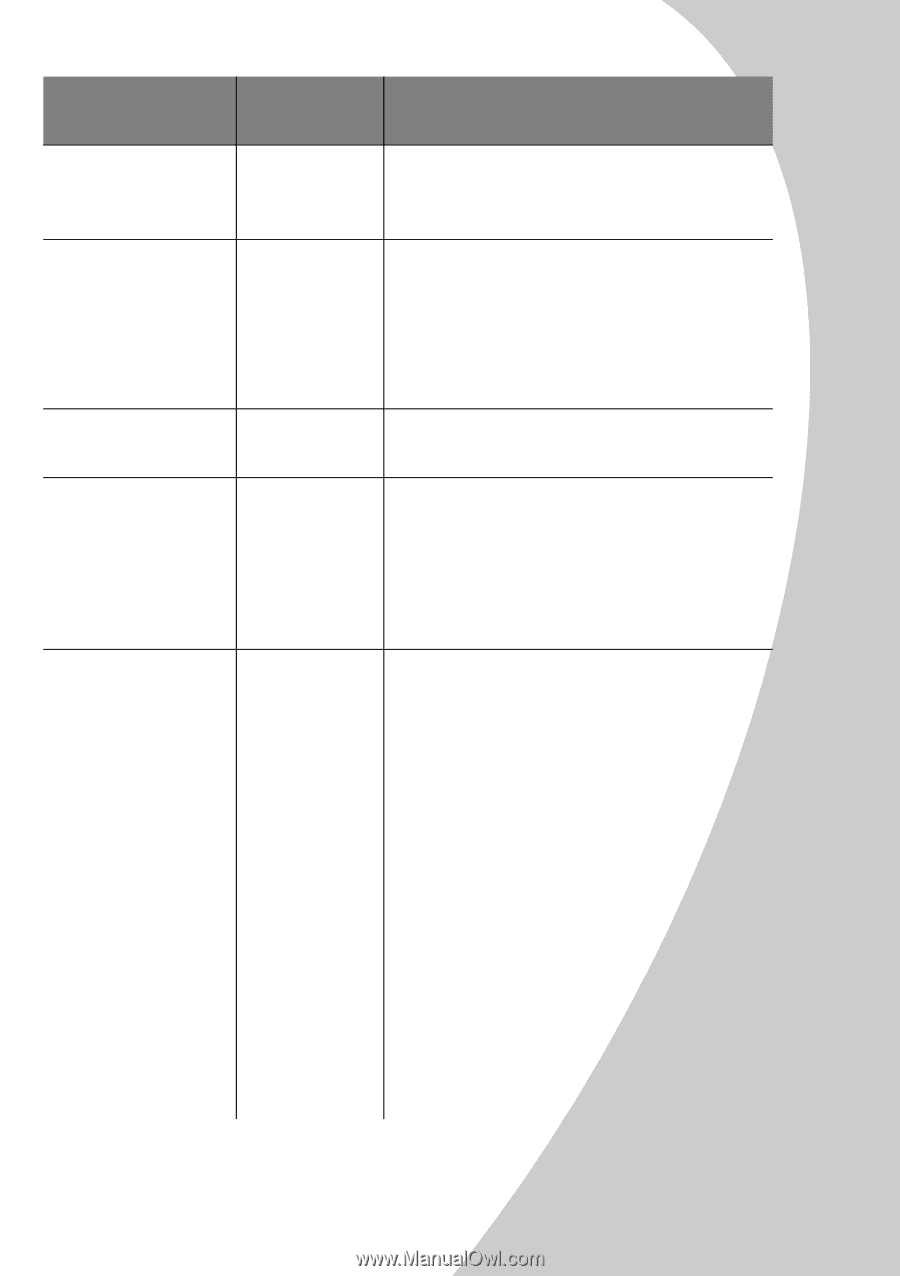
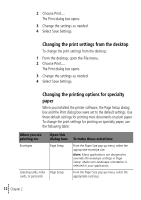
Basic printing for Macintosh When you are printing on: Sheets of custom size paper Iron-On transfers Banner paper Transparencies Photo or glossy paper Open this dialog box: Page Setup Print Page Setup Print Print To make these selections: From the Paper Size pop-up menu, select Edit Custom Paper Sizes and enter the dimensions for your custom paper size. On the Paper Type/Quality pane, select IronOn Transfer for the Paper Type. Note: To ensure that the iron-on transfer will print correctly, you may want to print on plain paper before printing on an ironon transfer. From the Paper Size pop-up menu, select Banner (Letter) or Banner (A4). On the Paper Type/Quality pane, select Transparency for the Paper Type and Normal (600 dpi) for the Print Quality. Note: When printing transparencies, remove each transparency as it exits the printer and allow it to dry before stacking. 1 On the Paper Type/Quality pane, select Glossy/Photo Paper for the Paper Type. 2 Select High (1200 dpi) for the Print Quality. 3 On the Color pane, select Built-In Color Matching. 4 From the Document Color pop-up menu, select Natural Color. Notes: If you are using two cartridges, you can print quality photos with the black and color cartridge combination. However, for the best possible photo quality, replace the black cartridge, Lexmark part number 17G0050, with a photo cartridge, Lexmark part number 12A1990. For help, see page 17. When printing photos, remove each photo as it exits the printer and allow it to dry before stacking. • Basic printing for Macintosh • • • 13 •
-
 1
1 -
2
-
3
-
4
-
5
-
6
-
7
-
8
-
9
-
10
-
11
-
 12
12 -
 13
13 -
 14
14 -
 15
15 -
 16
16 -
 17
17 -
 18
18 -
 19
19 -
 20
20 -
 21
21 -
 22
22 -
23
-
24
-
25
-
26
-
27
-
28
-
29
-
30
-
31
-
32
-
33
-
34
-
35
-
36
-
37
-
38
-
39
-
40
-
41
-
42
-
43
-
44
 |
 |