NEC DTL-6DE-1 User Manual
NEC DTL-6DE-1 - DT310 - 6 Button Display Digital Phone Manual
 |
UPC - 722580004475
View all NEC DTL-6DE-1 manuals
Add to My Manuals
Save this manual to your list of manuals |
NEC DTL-6DE-1 manual content summary:
- NEC DTL-6DE-1 | User Manual - Page 1
NWA-039300-001 ISSUE 4.0 DT730/DT710/DT330/DT310 USER'S GUIDE NEC Corporation 2010 August - NEC DTL-6DE-1 | User Manual - Page 2
this document for use by its employees and customers. The information contained herein is the property of NEC Corporation and shall not be reproduced without prior written approval from NEC Corporation. All brand names and product names on this document are trademarks or registered trademarks of - NEC DTL-6DE-1 | User Manual - Page 3
SIMPLE OPERATION BY MENU KEY AND CURSOR KEY 16 ICON DISPLAY 16 SHORTCUT MENU 17 PROGRAMMABLE FEATURE KEYS 19 SOFT KEYS 21 CONDITIONS FOR DT700 SERIES 25 2.INSTALLATION PROCEDURE ADJUSTING ANGLE OF TILT LEG 27 TO REMOVE TILT LEG 28 TO ATTACH TILT LEG 28 CONNECTING LAN CABLE 29 CONNECTING - NEC DTL-6DE-1 | User Manual - Page 4
TABLE OF CONTENTS 4.BASIC OPERATION TO LOGIN 96 TO LOGOUT 96 TO MAKE AN EXTERNAL CALL 97 TO MAKE AN INTERNAL CALL 99 TO ANSWER AN EXTERNAL CALL 101 TO ANSWER AN INTERNAL CALL 103 MULTILINE APPEARANCE 104 TO HOLD A CALL 104 TO PLACE A CALL ON EXCLUSIVE HOLD 105 TO TRANSFER A CALL 105 HOW TO - NEC DTL-6DE-1 | User Manual - Page 5
TABLE OF CONTENTS TO ANSWER A VOICE CALL HANDS FREE 133 AUTOMATIC INTERCOM 133 MANUAL INTERCOM 134 DIAL INTERCOM 135 CONFERENCE 136 TO ESTABLISH A BROKER CALL 136 TO ANSWER A CAMPED-ON CALL 136 CALL WAITING - ORIGINATING 137 CALL PARK 139 - NEC DTL-6DE-1 | User Manual - Page 6
TO DELETE ALL DATA 202 TO DELETE A SPECIFIC DATA 203 7.CALL HISTORY OPERATION FOR DT730 SERIES TO VIEW CALL HISTORY 206 TO MAKE A CALL FROM CALL HISTORY 208 TO ADD CALL HISTORY 215 TO DELETE A SPECIFIC DATA 216 FOR DT330 SERIES TO VIEW CALL HISTORY 218 TO MAKE A CALL FROM CALL HISTORY 221 iv - NEC DTL-6DE-1 | User Manual - Page 7
TO DELETE ALL DATA 222 TO DELETE A SPECIFIC DATA 223 8.SPECIFICATIONS TECHNICAL SPECIFICATIONS 225 9.MENU LIST MENU LIST FOR DT730 SERIES 227 MENU LIST FOR DT710 Series 234 MENU LIST FOR DT330 Series 237 10.WEB PROGRAMMING OUTLINE 239 TO LOGIN 240 TO LOGOUT 242 HOW TO OPERATE 244 v - NEC DTL-6DE-1 | User Manual - Page 8
This page is for your notes. - NEC DTL-6DE-1 | User Manual - Page 9
FACE LAYOUT ITL-8LD-1 (DT730 Series) 179 [mm] DTL-8LD-1 (DT330 Series) 179 [mm] 264 [mm] 264 [mm] Exit Help Scroll 1 2 3 ABC DEF 4 5 6 GHI JKL MNO 7 8 9 PQRS TUV WXYZ Recall Answer Feaututre Mic Menu HOLD 0 Transfer # Redial Speaker Exit Help Scroll 1 2 3 ABC DEF - NEC DTL-6DE-1 | User Manual - Page 10
ABC DEF 4 5 6 GHI JKL MNO 7 8 9 PQRS TUV WXYZ Recall Answer Feature Mic Menu HOLD 0 Transfer # Redial Speaker DTL-32D-1 (DT330 Series) 205.8 [mm] Exit Help 1 2 3 ABC DEF 4 5 6 GHI JKL MNO 7 8 9 PQRS TUV WXYZ Recall Answer Feature Mic Menu HOLD 0 Transfer - NEC DTL-6DE-1 | User Manual - Page 11
3 ABC DEF 4 5 6 GHI JKL MNO 7 8 9 PQRS TUV WXYZ Recall Answer Feature Mic Menu HOLD 0 Transfer # Redial Speaker DTL-24D-1 (DT330 Series) 179 [mm] Exit Help 1 2 3 ABC DEF 4 5 6 GHI JKL MNO 7 8 9 PQRS TUV WXYZ Recall Answer Feature Mic Menu HOLD 0 Transfer - NEC DTL-6DE-1 | User Manual - Page 12
3 ABC DEF 4 5 6 GHI JKL MNO 7 8 9 PQRS TUV WXYZ Recall Answer Feature Mic Menu HOLD 0 Transfer # Redial Speaker DTL-12D-1 (DT330 Series) 179 [mm] Exit Help 1 2 3 ABC DEF 4 5 6 GHI JKL MNO 7 8 9 PQRS TUV WXYZ Recall Answer Feature Mic Menu HOLD 0 Transfer - NEC DTL-6DE-1 | User Manual - Page 13
3 ABC DEF Recall Feature 4 5 6 GHI JKL MNO Answer Mic 7 8 9 PQRS TUV WXYZ Menu HOLD 0 Transfer # Redial Speaker DTL-12PA-1 (DT330 Series) 193 [mm] Exit Help Line 1 2 3 ABC DEF Recall Feature 4 5 6 GHI JKL MNO Answer Mic 7 8 9 PQRS TUV WXYZ Menu HOLD - NEC DTL-6DE-1 | User Manual - Page 14
DEF 4 5 6 GHI JKL MNO 7 8 9 PQRS TUV WXYZ Recall Answer Feature Mic Menu HOLD 0 Transfer # Redial Speaker DTL-6DE-1 (DT310 Series) 179 [mm] Exit Help 1 2 3 ABC DEF 4 5 6 GHI JKL MNO 7 8 9 PQRS TUV WXYZ 0 # Recall Feature Redial Conf Answer Mic Directory - NEC DTL-6DE-1 | User Manual - Page 15
1. ITL-2E-1 (DT710 Series) 179 [mm] DTL-2E-1 (DT310 Series) 179 [mm] 1 2 3 ABC DEF 4 5 6 GHI JKL MNO 7 8 9 PQRS TUV WXYZ 0 # Recall Feature Redial Conf Answer Mic Directory Message HOLD Transfer Speaker 1 2 3 ABC DEF 4 5 6 GHI JKL - NEC DTL-6DE-1 | User Manual - Page 16
to the terminal. Also, when using Voice Mail service, the Lamp lights steadily when a message has been left. (3) LCD LCD (Liquid Crystal Display) provides DT Series activity information plus date, time and Soft Key Operation. (4) Exit To exit Menu or Help mode and go back to the time display - NEC DTL-6DE-1 | User Manual - Page 17
the keys, contact your Telephony Server Administrator. ** When two telephone numbers are assigned on A side and B side of "One Terminal Setting. (13) Cursor By using this key, DT Series user can access to various features with simple operation. Details on service, see 6.DIRECTORY OPERATION. 9 - NEC DTL-6DE-1 | User Manual - Page 18
DT330/DT730 Series active. * DT730/DT330 support for full duplex hands-free mode. DT710/DT310 user to transfer established calls to another station, without attendant assistance. (16)Hold Press this key to place an internal or external call on hold. • THE OTHER KEYS AND PARTS Redial (only for DTL - NEC DTL-6DE-1 | User Manual - Page 19
Press ( ) or ( ) key during ringing. 8LD Display (only for DTL-8LD-1/ITL-8LD-1) 32 (8 keys x 4 pages) additional programmable keys ( the programmable keys, you can assign any numbers (ex. Telephone number, etc.) to the key (see TO ORIGINATE A CALL User Status Icon Flashing Pattern No Icon - 11 - NEC DTL-6DE-1 | User Manual - Page 20
1. User Status Icon • Call Hold (Individual Hold/Individual Hold on Call Park Group) • Call Hold (Other Party Hold/Other Party Hold on Call Park Group) • Recall ( - NEC DTL-6DE-1 | User Manual - Page 21
automatically switched from Page 1 to page 3. You must display Page 3 manually and then answer the incoming call. The following shows LCD indication of displayed according to the feature. These displays cannot be changed by user. The following shows each LCD indication when One-Touch Speed Dial - NEC DTL-6DE-1 | User Manual - Page 22
is stored in the server (system) memory. On the other hand, the history data is stored in the memory of the telephone (see 7.1FOR DT730 SERIES in chapter 7Call History Operation). To use Directory features.There are the following three types of directory features. • Personal Directory: Controlled - NEC DTL-6DE-1 | User Manual - Page 23
Description To view Call History. For details, see 1 Call History 7.2FOR DT330 SERIES in chapter 7Call History Operation. 2 Directory To use Phonebook function. For , see SETUP WITH MENU KEY FOR DT300 SERIES. Note: DTL-6DE-1/ITL-2E-1/DTL-2E-1 does not have Menu key. Note: Unavailable Menu items are - NEC DTL-6DE-1 | User Manual - Page 24
CURSOR KEY By using Menu key and key, DT Series user can access Call History, Directory and terminal settings with System Up Down Back OK Press Directory key ICON DISPLAY The LCD of DT730 Series/DT330 Series displays Desktop Icons which provide notification when events (such as missed call and - NEC DTL-6DE-1 | User Manual - Page 25
DT330 Series has Shortcut Menu for frequently-used features. You can access to Shortcut Menu by pressing (Enter) key. GHI Answer 9 WXYZ # Redial Speaker Mic Menu Press Enter Key [Shortcut Menu] 1/2 1 Missed Calls: 2 2 Voice Mail 3 Receive IM Back OK Note: DT710 Series/DT310 Series do not support - NEC DTL-6DE-1 | User Manual - Page 26
/former records. For unanswered incoming calls, played on the left of the name. will be dis- If you make/answer a call to/from the telephone number which is registered to Personal Directory, the corresponding name will be displayed as call history data. STEP 4: Press (Enter) key while displaying - NEC DTL-6DE-1 | User Manual - Page 27
Series features available by pressing the programmable keys. Some features using feature access code may be programmed by the user. Others must be programmed by the telephone Don't Answer" feature. MICM: Press key to activate "Manual Intercom". MSG (Message): Press key to leave message indication at - NEC DTL-6DE-1 | User Manual - Page 28
. (If turned off, this lamp will still light to indicate message waiting.) Feature + 8 = Selects between Normal, Dynamic Dial Pad, and Preset Dial. Note: * indicates the services which are not available for DT700 Series. 20 - NEC DTL-6DE-1 | User Manual - Page 29
Soft Keys on the DT Series provide a set of functions on the LCD that adapt to the changing state of the telephone. While default Soft Key settings the state of the phone and/or when the Next/Previous key is pressed. 4051 7:35 AM MON 12 JUL 2010 MIC DND >>> Exit Help Note: Soft Key function - NEC DTL-6DE-1 | User Manual - Page 30
Dterm whose LOGGED OUT IP STATION - CALL DESTINATION has already been registered is in logout status. E-OVR (Executive Override) Enables selected station users, upon encountering a busy condition at an internal station, to bridge into the busy connection. CW (Call Waiting) Enables a busy station to - NEC DTL-6DE-1 | User Manual - Page 31
the conversation of a station already engaged in communication. DND (Do Not Disturb) Allows a station user to deny access to the station line for incoming calls. MIC (Microphone On/Off) Allows you to on One-Touch Speed Calling key. HSET (Headset) Allows you to go off- and on-hook when using the - NEC DTL-6DE-1 | User Manual - Page 32
release the current call when using the headset, without waiting for the party to hang up. SIG (Manual Signaling) Permits station users to send a one-second ring to a predetermined station. If the signaled station is ringing from another call, the manual intercom signal will interrupt that ringing - NEC DTL-6DE-1 | User Manual - Page 33
terminal settings (by Feature Key + Digit Key) cannot be used for DT700 Series. • Feature+0 =Side Tone On/Off (for handset) For the settings, +6 =Deactivates hands-free operation Not Available Note: When pressing and holding Help key, the menu of "Online Monitoring" will be displayed. For details - NEC DTL-6DE-1 | User Manual - Page 34
1. This page is for your notes. 26 - NEC DTL-6DE-1 | User Manual - Page 35
2. INSTALLATION PROCEDURE ADJUSTING ANGLE OF TILT LEG DT730/710 DT330/310 The angle of the tilt leg can be adjusted in four levels. Fourth Level Third Level Second Level First Level • TO LOWER TILT LEG STEP 1: Turn the telephone set upside down. STEP 2: While lifting the center of the stopper, - NEC DTL-6DE-1 | User Manual - Page 36
indicated portions (a and b) of the stopper from grooves (A and B) on the tilt leg and then widen the tilt leg. b TO ATTACH TILT LEG DT730/710 DT330/310 STEP 1: Turn the telephone set upside down. STEP 2: Align the hooks (c-h) of the tilt leg over the appropriate slots (C-H) of the - NEC DTL-6DE-1 | User Manual - Page 37
network device using the LAN cable. STEP 3: Thread the LAN cable through the groove on the back of the telephone. To LAN Telephone To PC AC Adapter Plug Connector for AC Adapter Telephone Groove AC Adapter Cord LAN Straight Cable Groove STEP 4: When AC adapter is used to supply power to the - NEC DTL-6DE-1 | User Manual - Page 38
LINE CORD DT330/DT310 STEP 1: Insert Line cord plug into Line connector on the back of the telephone set until you hear it click. Telephone Line Connector Tilt Leg Groove Line Cord Line Cord Plug STEP 2: Thread the line cord through the groove on the back of the telephone. Telpehone Line - NEC DTL-6DE-1 | User Manual - Page 39
card and then attach it to the directory card holder. Directory Card Cover ATTACHING HANDSET DT730/710 DT330/310 STEP 1: Insert the coiled cord plug into HANDSET connector on the back of the telephone until you hear it click. STEP 2: Thread the coiled cord through the groove as shown in the - NEC DTL-6DE-1 | User Manual - Page 40
INSTALLING/REMOVING KEY SET UNIT DT730/710 DT330/310 • TO REMOVE KEY SET UNIT STEP 1: Insert a tapered rod lightly into the right side of the line key panel/button panel. STEP 2: Lift out the line key panel/button panel to remove it from the telephone. STEP 3: Remove the line key card. Line Key - NEC DTL-6DE-1 | User Manual - Page 41
30 (approximately) Tab Slots 83.5 60 60 15 (approximately) Space for Modular terminal 35 (approximately) All dimensions in mm Telephone (In the case of 12D/24D) To mount the telephone set on the wall, use the following procedure. STEP 1: Mount the hanger of the handset upside down. Remove the - NEC DTL-6DE-1 | User Manual - Page 42
Terminal Posts The remainder of the procedure varies between DT300 Series and DT700 Series. - In the case of DT300 Series: Go to the next step. - In the case of DT700 Series: Go to Step 8 after the LAN cable is connected to the telephone. STEP 4: Attach the modular terminal to the wall as shown - NEC DTL-6DE-1 | User Manual - Page 43
Line Cord Wall Telephone WM-L Line Connector Groove Modular Plug STEP 8: Insert the four tabs on WM-L UNIT in the tab slots on the back of the telephone. Tuck the excess cord into WM-L UNIT. Wall Tab Slots Tabs 35 - NEC DTL-6DE-1 | User Manual - Page 44
This page is for your notes. 36 - NEC DTL-6DE-1 | User Manual - Page 45
such as display, sounds, password, and language are also available from Menu key. SETUP WITH UP/DOWN KEY • TO ADJUST HANDSET RECEIVER VOLUME DT730/710 DT330/310 Press Up/Down ( or status or during the call. / ) key in the off-hook LCD indication for North America, Latin America, Asia, Middle - NEC DTL-6DE-1 | User Manual - Page 46
STEP 2: Press Feature and 2 key to alternate between Large and Small volume. RCV VOL. LARGE 4:26 PM MON 12 JUL 2010 • TO SELECT RINGER TONE DT330/310 DT Series has 10 kinds of ringer tones that you can select. STEP 1: Press Feature and 3 key. The LCD displays the selected tone number (n=1 ~ 10 - NEC DTL-6DE-1 | User Manual - Page 47
No. Frequency (Hz) Modulation (Hz) 8 Melody 4 9 Melody 5 10 Melody 6 Note: Tone number 5, 6, 8~10 (Melody 1, 2, 4~6) will sound continuously. 39 - NEC DTL-6DE-1 | User Manual - Page 48
OFF 4:26 PM MON 12 JUL 2010 • CALL INDICATOR LAMP ON/OFF DT730/710 DT330/310 You can choose to turn the call indicator lamp either on or off during it is turned off by the above operation. • SELECT DIAL MODE DT730/710 DT330/310 You can select one pattern from Normal, Dynamic Dial Pad or Preset Dial - NEC DTL-6DE-1 | User Manual - Page 49
To Set/Reset Dynamic Dial Pad STEP 1: Press Feature and 8 key. The LCD displays: Direct Dial Pad ON 4:26 PM MON 12 JUL 2010 Direct Dial Pad OFF 4:26 PM MON 12 JUL 2010 Note: When this feature is ON, you may initiate a call by immediately dialing the number and the station will go hands-free off- - NEC DTL-6DE-1 | User Manual - Page 50
SETUP WITH MENU KEY FOR DT700 SERIES • TO ENABLE/DISABLE OFF-HOOK RINGING DT730/DT710 The Highlight an item by using , and then press , or OK soft key. • Press 1 key. [Setting] 1 User Setting 2 Download 3 Data Backup/Restore Back OK STEP 4: Select 1 Incoming Call. Select an item by either of - NEC DTL-6DE-1 | User Manual - Page 51
or OK soft key. • Press 2 key (DT730) / 1 key (DT710) [Incoming Call] 1 Ring Volume 2 Offhook Ring 3 Headset Ring 4 Ring Tone 5 Illumination 6 Headset Ring Volume Back OK STEP 6: To disable/enable the off-hook ringing, select 1 Disable or 2 Enable. Select an item by one of the following - NEC DTL-6DE-1 | User Manual - Page 52
an item by using , and then press , or OK soft key. • Press 1 key. [User Setting] 1 Incoming Call 2 Talk 3 Display 4 Change Password 5 Security 6 Peripherals 0 Setting Reset Back OK STEP 5: Select 3 Headset Ring. Select an item by either of the following operations. • Highlight an item by using - NEC DTL-6DE-1 | User Manual - Page 53
the following operations. • Highlight an item by using , and then press or OK soft key. • Press 1 or 2 key, and then press or OK soft key. [Headset Ring] 1 Disable 2 Enable Back OK Note: Default setting is 1 Disable. Note: The enabled item is highlighted. 45 - NEC DTL-6DE-1 | User Manual - Page 54
an item by either of the following operations. • Highlight an item by using , and then press , or OK soft key. • Press 1 key. [Setting] 1 User Setting 2 Download 3 Data Backup/Restore Back OK STEP 4: Select 1 Incoming Call. Select an item by either of the following operations. • Highlight an item - NEC DTL-6DE-1 | User Manual - Page 55
[Incoming Call] 1 Ring Volume 2 Offhook Ring 3 Headset Ring 4 Ring Tone 5 Illumination 6 Headset Ring Volume Back OK STEP 6: Select 1 External Call when setting the ringer tone for external calls. Select 2 Internal Call when setting the ringer tone for - NEC DTL-6DE-1 | User Manual - Page 56
1100 - - Remarks 8Hz modulation Door Phone No modulation No modulation 16Hz modulation 16Hz modulation Envelope Door Phone Melody Melody 1 Melody 2 Melody can set ringer tone for the telephone set here. Ringer Tone type can be set for "Name", "Group" and "Telephone set". The ringer Tone type set - NEC DTL-6DE-1 | User Manual - Page 57
an item by either of the following operations. • Highlight an item by using , and then press , or OK soft key. • Press 1 key. [Setting] 1 User Setting 2 Download 3 Data Backup/Restore Back OK STEP 4: Select 1 Incoming Call. Select an item by either of the following operations. • Highlight an item - NEC DTL-6DE-1 | User Manual - Page 58
Call] 1 Ring Volume 2 Offhook Ring 3 Headset Ring 4 Ring Tone 5 Illumination 6 Headset Ring Volume Back OK STEP 6: Select 1 External You can set illumination pattern for the telephone set here. Illumination pattern can be set for "Name", "Group" and "Telephone set". The illumination pattern set for - NEC DTL-6DE-1 | User Manual - Page 59
an item by either of the following operations. • Highlight an item by using , and then press , or OK soft key. • Press 1 key. [Setting] 1 User Setting 2 Download 3 Data Backup/Restore Back OK STEP 4: Select 2 Talk. Select an item by either of the following operations. • Highlight an item by using - NEC DTL-6DE-1 | User Manual - Page 60
[Talk] 1 RTP Alarm 2 DTMF Tone 3 Key Touch Tone 4 Hold Music 5 Prefix Back OK STEP 6: Select 0 Automatic, 1 Disable or 2 En- able (see the following table). Select an item by either of the following operations. • Highlight an item by using , and then press or OK soft key. • Press 0 - 2 key, - NEC DTL-6DE-1 | User Manual - Page 61
an item by either of the following operations. • Highlight an item by using , and then press , or OK soft key. • Press 1 key. [Setting] 1 User Setting 2 Download 3 Data Backup/Restore Back OK STEP 4: Select 2 Talk. Select an item by either of the following operations. • Highlight an item by using - NEC DTL-6DE-1 | User Manual - Page 62
[Talk] 1 RTP Alarm 2 DTMF Tone 3 Key Touch Tone 4 Hold Music 5 Prefix Back OK STEP 6: Select 0 Automatic, 1 Disable or 2 En- able (see the following table). Select an item by either of the following operations. • Highlight an item by using , and then press or OK soft key. • Press 0 - 2 - NEC DTL-6DE-1 | User Manual - Page 63
Key Touch Tone is a tone generated when the digit keys are pressed while DT Series is off-hook. STEP 1: While indicating the current time on LCD, press Menu and then press , or OK soft key. • Press 1 key. [Setting] 1 User Setting 2 Download 3 Data Backup/Restore Back OK STEP 4: Select 2 Talk. - NEC DTL-6DE-1 | User Manual - Page 64
[Talk] 1 RTP Alarm 2 DTMF Tone 3 Key Touch Tone 4 Hold Music 5 Prefix Back OK STEP 6: Select 0 Automatic, 1 No Tone, 2 Tone or 3 Voice. Select an item by either of the following operations. • Highlight an item by using , and then press or OK soft key. • Press 0 - 3 key, and then press or - NEC DTL-6DE-1 | User Manual - Page 65
procedure below shows how to set Music on Hold to be heard by DT Series user. STEP 1: While indicating the current time on LCD, press Menu key to open and then press , or OK soft key. • Press 1 key. [Setting] 1 User Setting 2 Download 3 Data Backup/Restore Back OK STEP 4: Select 2 Talk. Select - NEC DTL-6DE-1 | User Manual - Page 66
[Talk] 1 RTP Alarm 2 DTMF Tone 3 Key Touch Tone 4 Hold Music 5 Prefix Back OK STEP 6: Select a desired Music on Hold. You can preview the designated Music on Hold. Select 1 Default when the default data (Minuet) is used as Music on Hold. Select 2 Download when a downloaded data is used as - NEC DTL-6DE-1 | User Manual - Page 67
an item by either of the following operations. • Highlight an item by using , and then press , or OK soft key. • Press 1 key. [Setting] 1 User Setting 2 Download 3 Data Backup/Restore Back OK STEP 4: Select 3 Display. Select an item by either of the following operations. • Highlight an item by - NEC DTL-6DE-1 | User Manual - Page 68
[Display] 1 Time Format 2 Local Volume 3 Screen Saver 4 Back Light 5 Font Size 6 Language Back OK STEP 6: Make a selection from the following list. Select an item by either of the following operations. • Highlight an item by using , and then press or OK soft key. • Press 0 - 2 key, and then - NEC DTL-6DE-1 | User Manual - Page 69
an item by either of the following operations. • Highlight an item by using , and then press , or OK soft key. • Press 1 key. [Setting] 1 User Setting 2 Download 3 Data Backup/Restore Back OK STEP 4: Select 3 Display. Select an item by either of the following operations. • Highlight an item by - NEC DTL-6DE-1 | User Manual - Page 70
[Display] 1 Time Format 2 Local Volume 3 Screen Saver 4 Back Light 5 Font Size 6 Language Back OK STEP 6: Make a selection from the following list. Select an item by either of the following operations. • Highlight an item by using , and then press or OK soft key. • Press 0 - 2 key, and - NEC DTL-6DE-1 | User Manual - Page 71
Saver works after the telephone is idle for a Saver will be displayed. Note: For details on the XML service, contact the Sys- tem Administrator. STEP 1: While indicating the press , or OK soft key. • Press 1 key. [Setting] 1 User Setting 2 Download 3 Data Backup/Restore Back OK STEP 4: Select 3 - NEC DTL-6DE-1 | User Manual - Page 72
Time. Input Wait Time to launch the screen saver (1-999min) and then press or OK soft key. [Wait Time] Input wait time. 1-999(min) 120 BK Back 1 OK Note: Default value is 120 min. 64 - NEC DTL-6DE-1 | User Manual - Page 73
an item by either of the following operations. • Highlight an item by using , and then press , or OK soft key. • Press 1 key. [Setting] 1 User Setting 2 Download 3 Data Backup/Restore Back OK STEP 4: Select 3 Display. Select an item by either of the following operations. • Highlight an item by - NEC DTL-6DE-1 | User Manual - Page 74
[Display] 1 Time Format 2 Local Volume 3 Screen Saver 4 Back Light 5 Font Size 6 Language Back OK STEP 6: Make a selection from the following list. Select an item by either of the following operations. • Highlight an item by using , and then press or OK soft key. • Press 1 or 2 key, and - NEC DTL-6DE-1 | User Manual - Page 75
an item by either of the following operations. • Highlight an item by using , and then press , or OK soft key. • Press 1 key. [Setting] 1 User Setting 2 Download 3 Data Backup/Restore Back OK STEP 4: Select 3 Display. Select an item by either of the following operations. • Highlight an item by - NEC DTL-6DE-1 | User Manual - Page 76
[Display] 1 Time Format 2 Local Volume 3 Screen Saver 4 Back Light 5 Font Size 6 Language Back OK STEP 6: Select either "Standard(16dot)" or "Small(12dot)". Select an item by either of the following operations. • Highlight an item by using , and then press or OK soft key. • Press 1 or 2 - NEC DTL-6DE-1 | User Manual - Page 77
an item by either of the following operations. • Highlight an item by using , and then press , or OK soft key. • Press 1 key. [Setting] 1 User Setting 2 Download 3 Data Backup/Restore Back OK STEP 4: Select 3 Display. Select an item by either of the following operations. • Highlight an item by - NEC DTL-6DE-1 | User Manual - Page 78
- 9 key, and then press or OK soft key. For example, press 1 + 5 to select 15 Spanish. [Language] 0 Automatic 1 Japanese 2 NEC English 3 NEC Portuguese 4 NEC Spanish 5 NEC French 6 German 7 Italian 8 Dutch 9 Norwegian 10 Danish 11 Swedish 12 Greek 13 English 14 Portuguese 15 Spanish 16 French 17 - NEC DTL-6DE-1 | User Manual - Page 79
• To lock/unlock the telephone. • To delete the directory data. • To reset the telephone settings. STEP 1: While indicating Call Func. 5 Setting 6 Presence # Favorite 0 Config Back OK STEP 3: Select 1 User Setting. Select an item by either of the following operations. • Highlight an item by using - NEC DTL-6DE-1 | User Manual - Page 80
or Set soft key. [Change Password] 1 Old Pass New Pass Retry Pass **** BK Set Cancel OK STEP 7: Enter the new password again and then press or OK soft key. [Change Password] 1 Old Pass **** New Pass **** Retry Pass BK Set Cancel OK Note: A maximum of 32 digits (0-9, * and #) can be - NEC DTL-6DE-1 | User Manual - Page 81
The following explains how to clear the personal data off the telephone. STEP 1: While indicating the current time on LCD, press an item by using , and then press , or OK soft key. • Press 0 key. [User Setting] 1 Incoming Call 2 Talk 3 Display 4 Change Password 5 Security 6 Peripherals 0 Setting - NEC DTL-6DE-1 | User Manual - Page 82
[Setting Reset] 1 Input a password. BK Back OK STEP 6: Press or OK soft key to clear the personal data of the telephone. [Setting Reset] Are you sure? Back OK 74 - NEC DTL-6DE-1 | User Manual - Page 83
A FILE DT730/DT710 DT730 Series user can download files for Music on Hold, Ringer Tone and Directory. When downloading these files, the DT Series needs to be connected to the network that has FTP (TFTP server). Note: For details on the FTP/TFTP service, contact the System Administrator. Before - NEC DTL-6DE-1 | User Manual - Page 84
using , and then press , or OK soft key. • Press 4 key. [Download Menu] 1 Download Files 2 Download Address 3 Protocol 4 FTP Settings Back OK STEP 8: Select 1 User ID. Select an item by either of the following operations. • Highlight an item by using , and then press , or OK soft key. • Press 1 key - NEC DTL-6DE-1 | User Manual - Page 85
ID] A Input a user ID. BK Back OK Note: For details on character entry method, Highlight an item by using , and then press , or OK soft key. • Press 3 key. [FTP Settings] 1 User ID 2 Password 3 Folder Back OK STEP 13:Enter the directory where the download file is stored and then press or OK - NEC DTL-6DE-1 | User Manual - Page 86
the Download Menu screen. [FTP Settings] 1 User ID 2 Password 3 Folder Back OK STEP 15:Select 2 .208.205, enter 10*41*208*205 [separate with an asterisk (*)]. [Download Address] 1 '*'For'.' . BK . . Back OK After entering an IP address, press key. or OK soft STEP 17:The display goes back - NEC DTL-6DE-1 | User Manual - Page 87
name is "MOH.wav". [Hold Music] A Input a file name. MOH.wav BK Cancel Exec File Format PCM µ-law 8kHz/s wav. Maximum Size under 32 seconds - "Melody1/2/3/.wav". [Download1/2/3] A Input a file name. Melody 1/2/3.wav BK Cancel Exec File Format PCM µ-law 8kHz/s wav. Maximum Size under - NEC DTL-6DE-1 | User Manual - Page 88
When not changing the file name, go to STEP 22. STEP 21:Press BK soft key once to delete the default file name and then enter a new file Series and TFTP server. from FTP/ Incorrect IP address of FTP/TFTP server has Set the proper IP address of been entered from the FTP/TFTP server. telephone. - NEC DTL-6DE-1 | User Manual - Page 89
SETTINGS DT730/DT710 DT730\DT710 Series user can backup personal settings of DT Series to FTP/TFTP server. To back up the setting data, the DT Series needs to be connected to the network that has FTP (TFTP server). Note: For details on the FTP/TFTP service, contact the System Administrator. Before - NEC DTL-6DE-1 | User Manual - Page 90
then press , or OK soft key. • Press 5 key. [Backup/Restore] 1 Data Backup 2 Data Restore 3 Server Address 4 Protocol 5 FTP Settings Back OK STEP 8: Select 1 User ID. Select an item by either of the following operations. • Highlight an item by using , and then press , or OK soft key. • Press 1 key - NEC DTL-6DE-1 | User Manual - Page 91
ID] A Input a user ID. BK Back OK Note: For details on character entry method, see Highlight an item by using , and then press , or OK soft key. • Press 3 key. [FTP Settings] 1 User ID 2 Password 3 Folder Back OK STEP 13:Enter the destination directory of the FTP/ TFTP server and then press or - NEC DTL-6DE-1 | User Manual - Page 92
or Back soft key to display the Backup/Restore screen. [FTP Settings] 1 User ID 2 Password 3 Folder Back OK STEP 15:Select 3 Server Address. 41*208*205 [separate with an asterisk (*)]. [Server Address] 1 '*'For'.' . BK . . Back OK After entering an IP address, press or OK soft key. STEP - NEC DTL-6DE-1 | User Manual - Page 93
The setting data of the telephone can only be backed up as a.tgz file. Note: When changing the default file name, press BK soft key once to delete name is Set the same file name specified between from both DT700 Series DT700 Series and FTP/ and FTP/TFTP server. TFTP server. Incorrect IP address - NEC DTL-6DE-1 | User Manual - Page 94
SETTINGS DT730/DT710 DT730/DT710 Series user can restore the personal settings of DT Series. To download the backup file to the telephone, the DT Series needs to be connected to the network that has FTP (TFTP server). Note: For details on the FTP/TFTP service, contact the System Administrator - NEC DTL-6DE-1 | User Manual - Page 95
then press , or OK soft key. • Press 5 key. [Backup/Restore] 1 Data Backup 2 Data Restore 3 Server Address 4 Protocol 5 FTP Settings Back OK STEP 8: Select 1 User ID. Select an item by either of the following operations. • Highlight an item by using , and then press , or OK soft key. • Press 1 key - NEC DTL-6DE-1 | User Manual - Page 96
ID] A Input a user ID. BK Back OK Note: For details on character entry method, see Highlight an item by using , and then press , or OK soft key. • Press 3 key. [FTP Settings] 1 User ID 2 Password 3 Folder Back OK STEP 13:Enter the directory where the backup file is stored and then press or OK - NEC DTL-6DE-1 | User Manual - Page 97
the Backup/Restore screen. [FTP Settings] 1 User ID 2 Password 3 Folder Back OK STEP 15:Select .208.205, enter 10*41*208*205 [separate with an asterisk (*)]. [Server Address] 1 '*'For'.' . BK . . Back OK After entering an IP address, press or OK soft key. STEP 17:The display goes - NEC DTL-6DE-1 | User Manual - Page 98
cannot be restored properly. Note: When changing the default file name, press BK soft key once to delete the default file name and then enter a telephone. While downloading the backup data, the LCD displays "Downloading..." first and then "Saving...". Note: Be sure not to turn OFF the DT700 Series - NEC DTL-6DE-1 | User Manual - Page 99
SETUP WITH MENU KEY FOR DT300 SERIES • TO CHANGE RINGER TONE VOLUME DT330 The procedure below shows how to OK soft key. • Press 1 key. [Settings] 1 Ring Volume 2 Off Hook Ring 3 Back Light 4 Headset 5 Peripherals Back OK STEP 3: Ring Volume can be set in 13 levels (0 - 12). Adjust the ringer tone - NEC DTL-6DE-1 | User Manual - Page 100
• TO ENABLE/DISABLE OFF-HOOK RINGING DT330 The procedure below shows how to STEP 1: While OK soft key. • Press 2 key. [Settings] 1 Ring Volume 2 Off Hook Ring 3 Back Light 4 Headset 5 Peripherals Back OK STEP 3: To disable/enable the off-hook ringing, select 1 Disable or 2 Enable. Select an - NEC DTL-6DE-1 | User Manual - Page 101
• TO ENABLE/DISABLE BACKLIGHT DT330 The following explains how to enable/disable the OK soft key. • Press 3 key. [Settings] 1 Ring Volume 2 Off Hook Ring 3 Back Light 4 Headset 5 Peripherals Back OK STEP 3: Make a selection from the following list. Select an item by either of the following - NEC DTL-6DE-1 | User Manual - Page 102
SET RINGING OF HEADSET DT330 The procedure below shows how to enable/disable the ringing of headset. STEP 1: While Press 3 key. [Menu] 1 Call History 2 Directory 3 Settings Back OK STEP 2: Select 4 Headset. Select an item by either of the following operations. • Highlight an item by using , and then - NEC DTL-6DE-1 | User Manual - Page 103
4. BASIC OPERATION This chapter describes the following basic operation of DT Series. • TO LOGIN • TO LOGOUT • TO MAKE AN EXTERNAL CALL • TO MAKE AN INTERNAL CALL • TO ANSWER AN EXTERNAL CALL • TO ANSWER AN INTERNAL CALL • MULTILINE - NEC DTL-6DE-1 | User Manual - Page 104
Note: This feature is only available for DT700 Series. STEP 1: When login mode is activated, the telephone prompts for Login ID and Password. Login ID Feature Key on the terminal. Note: This feature is only available for DT700 Series. Note: The soft key location is an example. Note: Logout key is - NEC DTL-6DE-1 | User Manual - Page 105
TO MAKE AN EXTERNAL CALL DT730/710 DT330/310 When dialed telephone number is registered in Personal Directory, the corresponding name information will be displayed on LCD of DT730 Series while you are hearing a ringback tone or are engaged in a conversation. According to the initial settings, the - NEC DTL-6DE-1 | User Manual - Page 106
Time Dialed Code + Number 00:05 9XXXXXXXXX MIC DND >>> Note: My Line is an actual line that is directly associated with station number of the telephone. You can make/answer a call via this line. Usually, My line is seized automatically only by lifting the handset or pressing the Speaker key - NEC DTL-6DE-1 | User Manual - Page 107
TO MAKE AN INTERNAL CALL DT730/710 DT330/310 When dialed station number is registered in Personal Directory, the corresponding name information will be displayed on LCD of DT730 Series while you are hearing a ringback tone or are engaged in a conversation. According to the initial settings, the - NEC DTL-6DE-1 | User Manual - Page 108
31314 1:25 PM MON 12 JUL 2010 MIC DND >>> Note: My Line is an actual line that is directly associated with station number of the telephone. You can make/answer a call via this line. Usually, My line is seized automatically only by lifting the handset or pressing the Speaker key. 100 - NEC DTL-6DE-1 | User Manual - Page 109
TO ANSWER AN EXTERNAL CALL DT730/710 DT330/310 When calling party telephone number is registered in Personal Directory, the corresponding name information will be displayed on LCD of DT730 Series while you are hearing a ringing tone or are engaged in a conversation. According to the initial settings - NEC DTL-6DE-1 | User Manual - Page 110
• When caller ID is not received Elapsed Time Trunk Trunk Type Number 00:05 DDD 3 1:25 PM MON 12 JUL 2010 MIC DND >>> Note: When an incoming call is terminated to My Line of the telephone, you can usually answer the call only by lifting the handset or pressing the Speaker Key. 102 - NEC DTL-6DE-1 | User Manual - Page 111
explains how to answer an internal call routed to My Line of the telephone. When calling station number is registered in Personal Directory, the corresponding name information will be displayed on LCD of DT730 Series while you are hearing a ringing tone or are engaged in a conversation. According to - NEC DTL-6DE-1 | User Manual - Page 112
flashing LED alert user to incoming call). STEP 2: Lift handset or press Speaker key. STEP 3: Speak with incoming party. TO HOLD A CALL DT730/710 DT330/310 STEP 1: a flashing green LED on your phone. The same line on other phones shows as a flashing red LED. Recall shows as a flashing green LED on - NEC DTL-6DE-1 | User Manual - Page 113
2: Press held line. Use handset to converse. Note: Only the DT Series that set Exclusive Hold option can retrieve the call. If unanswered STEP 1: green LED on your phone. The same line on other phones appears as a solid red LED. TO TRANSFER A CALL DT730/710 DT330/310 STEP 1: After conversing - NEC DTL-6DE-1 | User Manual - Page 114
STEP 4: If transferring party hangs up, that station's number appears in the center of recipient's display. Transferring station TRANSFER 2000 DDD 3 1:25 PM MON 12 JUL 2010 MIC >>> 106 - NEC DTL-6DE-1 | User Manual - Page 115
such as Name or User ID, etc. • Character Entry Mode When entering characters from the telephone set, the following /Insert Cancel OK Lowercase Alphabetic Character Mode [Name] Aa Input a name. BK Option Back OK BK Option Back OK The enabled entry mode is indicated in the top portion of the - NEC DTL-6DE-1 | User Manual - Page 116
To display the Sub Menu screen, press Menu key or Option Soft Key while the text input screen is displayed. Also, the following operations are available from the Sub Menu screen. Sub Menu Items Change-word Word-case Word-width Delete Copy Cut Paste Space Return Overwrite/Insert SubMenu 1 Change - NEC DTL-6DE-1 | User Manual - Page 117
• Character Code List DIGIT CASE KEY SHIFT 1st 2nd 3rd 4th 5th 6th 7th 8th 9th 10th 11th 12th 13th 1 A . , \ 1? ! "@: ; a Note 2 A A B C 2 a abc2 A DEF3 3 a def3 A GHI4 4 a ghi4 A JKL5 5 a jkl5 A MNO6 6 a mno6 7 A P - NEC DTL-6DE-1 | User Manual - Page 118
A a # A Note1 a A a 1st 2nd 3rd 4th 5th 6th 7th 8th 9th 10th * # . / : ~ ! @ $ % 11th ^ 21th 12th & 22th 13th ( 23th 14th ) 24th 15th ' 25th 16th ? 26th 17th " Note2 27th 18th _ 28th 19th + 29th 20th - 30th = [ ] { } < > , - NEC DTL-6DE-1 | User Manual - Page 119
DIGIT CASE KEY SHIFT 1st 2nd 3rd 4th 5th 6th 7th 8th 9th 10th 11th 12th 13th 14th 15th 1 A . , : ! ?+ - %& / ( ) =¿ ¡ a 2 A A БВГ a абвг A ДЕЁЖЗ 3 a деёжз A ИЙКЛ 4 a ийкл A МНОП 5 a мноп 6 A РСТУ a рсту A ФХЦЧ 7 a фхцч 8 A ШЩЪЫЬ a - NEC DTL-6DE-1 | User Manual - Page 120
DIGIT CASE KEY SHIFT 1st 2nd 3rd 4th 5th 6th 7th 8th 9th 10th 11th 12th 13th 14th 15th 1 A . , : ! ?+ - %& / ( ) =¿ ¡ a 2 A a ABCÇ abcç A DEF 3 a de f A GĞH I İ 4 a gğhI i 5 A a JKL jkl A MNOÖ 6 a mn o ö A PRSŞ 7 a p r s Ş 8 A - NEC DTL-6DE-1 | User Manual - Page 121
DIGIT CASE KEY SHIFT 1st 2nd 3rd 4th 5th 6th 7th 8th 9th 10th 11th 12th 13th 14th 15th 1 A . , : ! ?+ - %& / ( ) =¿ ¡ a 2 A a A B C a b c A DEFÈÉÊË 3 a de f èéêë 4 A GH I a gh i Ì ì Í í Î î Ï ï A JKL 5 a jkl A M N O - NEC DTL-6DE-1 | User Manual - Page 122
DIGIT CASE KEY SHIFT 1st 2nd 3rd 4th 5th 6th 7th 8th 9th 10th 11th 12th 13th 14th 15th 1 11 2 12 3 13 4 14 5 15 6 16 7 17 8 18 9 19 0 10 # 1*# .@/ ( ) , -_ : ' ~& \ * 1 Used as a case shift key. Shifts the characters between alphabetic and numeric. - NEC DTL-6DE-1 | User Manual - Page 123
1: Press 5 key twice to enter "K". [Name] A Input a name. K BK Option Back OK STEP 2: Press Menu key or Option soft key to display Sub the Sub Menu to go back to text input screen. [Name] a Input a name. K BK Option Back OK STEP 4: Enter "en" by using digit keys. Press 3 key twice to enter - NEC DTL-6DE-1 | User Manual - Page 124
OK soft key on the Sub Menu to go back to text input screen. [Name] A Input a name. Ken BK Option Back OK STEP 8: Press 5 key twice to enter "K". [Name] A Input a name. Ken K BK Option Back OK STEP 9: Press Menu key or Option soft key to display SubMenu screen, and then select 2 Wordcase - NEC DTL-6DE-1 | User Manual - Page 125
STEP 10:Press or OK soft key on the Sub Menu to go back to text input screen. [Name] a Input a name. Ken K BK Option Back OK STEP 11:Enter "obus" by using digit keys. Press 6 key three times to enter "o". Press 2 key twice to enter "b". Press 8 key twice - NEC DTL-6DE-1 | User Manual - Page 126
• To Overwrite Characters STEP 1: Place the cursor at the left of the characters to be overwritten. [Name] A Input a name. ABCDE BK Option Back OK STEP 2: Press Menu key or Option soft key. STEP 3: On the following Sub Menu screen, select 10 Overwrite/Insert and then press , - NEC DTL-6DE-1 | User Manual - Page 127
Copy and Paste Characters STEP 1: While characters which you want to copy are displayed, press Menu key or Option soft key. [Name] A Input a name. ABCDE BK Option Back OK STEP 2: On the Sub Menu screen, press or OK soft key while 5 Copy is highlighted, or press 5 key. SubMenu 1 Change-word - NEC DTL-6DE-1 | User Manual - Page 128
-width 4 Delete 5 Copy 6 Cut 7 Paste 8 Space 9 Return 10 Overwrite/Insert Cancel OK STEP 7: The copied characters "CD" are inserted as follows: [Name] A Input a name. CDABCDE BK Option Back OK 120 - NEC DTL-6DE-1 | User Manual - Page 129
is reset for any reason (such as power-off, etc.) while the telephone is placed in security mode, the lock is not released. • TO LOCK THE TELEPHONE Before placing DT700 Series in Security mode, you can set a password. For details on the password setting, see TO CHANGE PASSWORD in chapter 3 Terminal - NEC DTL-6DE-1 | User Manual - Page 130
Series is placed in Security mode, Security Lamp lights red and the screen saver will be activated. Note: When the password entry ends in failure, the following error message is issued. In that case, press or OK soft key and then retry. Security Lock • TO UNLOCK THE TELEPHONE tele- phone locks - NEC DTL-6DE-1 | User Manual - Page 131
on the setting of the emergency number, contact the system administrator. Note: You can make a call to only the predetermined number. When telephone numbers other than the predetermined emergency number are dialed, the following message appears (after a few seconds, the display goes back to "Dial - NEC DTL-6DE-1 | User Manual - Page 132
This page is for your notes. 124 - NEC DTL-6DE-1 | User Manual - Page 133
1:25 PM MON 12 JUL 2010 MIC >>> Note: Pressing the Speaker Key or going off-hook is not necessary. Preset Dial DT730/710 DT330 STEP 1: Enter desired telephone number (Digit Keys 0-9, *, and #). STEP 2: The dialed number appears on the top of LCD. Input Dial Number Clr 2000 Cnl STEP 3: Lift - NEC DTL-6DE-1 | User Manual - Page 134
and One-Touch Speed Calling key. To Program (Available only on DT Series with One-Touch Speed Calling key.) STEP 2: Press Feature key. STEP 3: Press desired One-Touch Speed Calling key. STEP 4: Enter desired telephone number or feature access code on the keypad. Display indicates the digits dialed - NEC DTL-6DE-1 | User Manual - Page 135
CHARACTER CHARACTER LCD Indication of 8LD Display STEP 1: Press the desired One-Touch Speed Calling key and originate a call. Registered name will be displayed as follows. For the key to which no name information is registered, the character "SPD" will be displayed. When registering Name - NEC DTL-6DE-1 | User Manual - Page 136
EUROPEAN CHARACTER (LOWERCASE) DIGIT KEY 1 2 3 4 5 6 7 8 9 0 # . a d g j mp t w0 # , behknqux : c f i l orvy ! àè ì 5ñsùz ?áé í òú9 - âê î ó7û CHARACTER +ãë ï ô ü %ä 3 4 õ 8 &å ö /æ œ (ç ø )2 6 = ¿ ¡ 1 Note: The shaded area indicates the characters which - NEC DTL-6DE-1 | User Manual - Page 137
desired name on the keypad. Display indicates the name entered. NEC BNET ^ SET CANCEL CLEAR >>> STEP 4: Press SET Note: To delete the entry, press DEL or BK key and delete each one character. To delete A CALL USING SPEED CALLING - SYSTEM DT730/710 DT330/310 To Program Speed Calling - System Key ( - NEC DTL-6DE-1 | User Manual - Page 138
Operate From Speed Calling - System Key STEP 1: Press the "Speed Calling - System" key. XXXX 1:25 PM MON 12 JUL 2010 STEP 2: If the DT Series does not have the "Speed Calling - System" key, dial the "Speed Calling - System" access code, then the abbreviated call code. To Operate From Directory Key - NEC DTL-6DE-1 | User Manual - Page 139
may be up to 20 digits combined (or 34 digits combined). FORCED ACCOUNT CODE DT730/710 DT330/310 STEP 1: Lift handset or press Speaker key, receive dial tone. STEP 2: Enter feature access code, receive service set tone. STEP 3: Enter "Forced Account Code" (up to 10 digits), receive dial tone. Note - NEC DTL-6DE-1 | User Manual - Page 140
. To Enter With Account Code (see above) Service set tone is optional depending upon system programming. Note all of the digits dialed. VOICE CALL DT730/710 DT330/310 STEP 1: Lift handset. STEP 2: Dial desired station (V displays if programming on an DT Series with LCD. Save by pressing One-Touch - NEC DTL-6DE-1 | User Manual - Page 141
Respond hands-free. Calling station VOICE 2001 1:25 PM MON 12 JUL 2010 Note: If privacy is required, lift handset. AUTOMATIC INTERCOM DT730/710 DT330/310 To Initiate STEP 1: Lift handset or press Speaker key. STEP 2: Press the AICM key. STEP 3: Hear ringback tone. Called party ICM 2 1:25 - NEC DTL-6DE-1 | User Manual - Page 142
established. CONF 1:25 PM MON 12 JUL 2010 MANUAL INTERCOM DT730/710 DT330/310 To Initiate STEP 1: Press MICM, lift handset corresponding station when speaking over the intercom path is unnecessary. Two-button Manual Intercom provides one button for signalling and one for talking. A separate - NEC DTL-6DE-1 | User Manual - Page 143
DIAL INTERCOM DT730/710 DT330/310 To Initiate STEP 1: Lift handset or press the Speaker key. STEP 2: Press DICM key. STEP 3: Dial desired intercom station number. Receive ringback tone. Called - NEC DTL-6DE-1 | User Manual - Page 144
MON 12 JUL 2010 Note: The Conf key is accommodated on only DTL-2E1, ITL-2E-1 and DTL-6DE-1. If using the termi- nals without Conf key, use remain con- nected. Conf LED goes out. TO ESTABLISH A BROKER CALL DT730/710 DT330/310 STEP 1: While engaged in a call and wishing to consult a third party, - NEC DTL-6DE-1 | User Manual - Page 145
4: Call waiting tone is sent to busy station. Called station number C WAIT 2000 1:25 PM MON 12 JUL 2010 CALL WAITING - ORIGINATING DT730/710 DT330/310 To Program Call Waiting Key (On OneTouch Speed Calling Key) STEP 1: Press Feature key. STEP 2: Press desired One-Touch Speed Calling key. STEP - NEC DTL-6DE-1 | User Manual - Page 146
PM MON 12 JUL 2010 Calling station number C WAIT 2001 1:25 PM MON 12 JUL 2010 MIC >>> To Disconnect STEP 1: Press Recall key. Station user is automatically connected to original party. Using Soft Key STEP 1: Hear burst of tone Display indicates "C WAIT" and Answer key flashes. STEP 2: Press - NEC DTL-6DE-1 | User Manual - Page 147
CALL PARK DT730/710 DT330/310 To Program Call Park Key (On One-Touch Speed Calling Key) Retrieve A Parked Call From A Remote Station STEP 1: Dial "Call Park" local retrieval code. STEP 2: Station user is connected to parked call. Station that parked the call 2000 DDD 2 1:25 PM MON 12 JUL 2010 To - NEC DTL-6DE-1 | User Manual - Page 148
calling party is established. Called station Calling party PICK UP 2000 2001 1:25 PM MON 12 JUL 2010 MIC >>> CALL PICK-UP (DIRECT) DT730/710 DT330/310 To Program Pick-up Direct Key (OneTouch Speed Calling Key) STEP 1: Press Feature key. STEP 2: Press One-Touch Speed Calling key. STEP 3: Dial - NEC DTL-6DE-1 | User Manual - Page 149
DT330/310 STEP 1: Press Speaker key, receive dial tone. STEP 2: Dial desired telephone number. Encounter a trunk busy condition. STEP 3: Station user receives service 12 JUL 2010 Note: The Conf key is accommodated on only DTL-2E1, ITL-2E-1 and DTL-6DE-1. Using Soft Key STEP 1: Press E-OVR Soft Key. - NEC DTL-6DE-1 | User Manual - Page 150
by storing the Recall and Override access code. LAST NUMBER REDIAL DT730/710 DT330/310 To Recall Last Number Dialed STEP 1: Press Redial key. Last number station or external telephone number. Receive service set tone. STEP 5: FWD LED lights (at your station or at the DT Series of the multiline - NEC DTL-6DE-1 | User Manual - Page 151
12 JUL 2010 Using Soft Key STEP 1: Press FDA Soft Key. STEP 2: Receive service set tone and "FORWARD CANCEL" is displayed. FORWARD CANCEL 1:25 PM MON 12 JUL - All Calls" cancel code. Receive service set tone. LED goes out at your station (or the DT Series of the multiline station). STEP 3: Press - NEC DTL-6DE-1 | User Manual - Page 152
- Busy Line" access code. Receive special dial tone. STEP 4: Dial destination station or external telephone number. Receive service set tone. STEP 5: FWD-BY LED lights (at your station or at the DT Series of the multiline station you are setting). STEP 6: Press Speaker key. Call Forwarding - Busy - NEC DTL-6DE-1 | User Manual - Page 153
PM MON 12 JUL 2010 MIC >>> CALL FORWARDING - DON'T ANSWER DT730/710 DT330/310 To Set STEP 1: Press Speaker key. Receive dial tone. STEP 2: If station or external telephone number. Receive service set tone. STEP 5: FWD-NA LED lights (at your station or at the DT Series of the multiline station - NEC DTL-6DE-1 | User Manual - Page 154
station, press MULTILINE APPEARANCE. STEP 2: Press FWD-NA or dial "Call Forwarding Don't Answer" cancel code. Receive service set tone. LED goes out at your station (or the DT Series of the multiline station). STEP 3: Press Speaker key. Call Forwarding - Don't Answer is cancelled. FORWARD CANCEL - NEC DTL-6DE-1 | User Manual - Page 155
handset or press Speaker key; receive Dial Tone. STEP 2: Press the FDL Key or dial "Logged Out IP Station - Call Destination" cancel code; receive service set tone. STEP 3: Replace handset or press Speaker key. Logged Out IP Station - Call Destination is canceled. FORWARD CANCEL 1:25 PM MON 12 JUL - NEC DTL-6DE-1 | User Manual - Page 156
Key and receive service set tone. STEP 2: "CALLBACK SET" is displayed and the CB Soft Key flashes on the display. CALLBACK SET 1:25 PM MON 12 JUL 2010 MIC >>> TO SAVE AND REPEAT A NUMBER DT730/710 DT330/310 To Save STEP 1: Press Speaker key. STEP 2: Dial desired telephone number. STEP 3: Press - NEC DTL-6DE-1 | User Manual - Page 157
Terminal With LCD) STEP 1: While idle, press S&R. STEP 2: Display indicates digits sorted. To Repeat STEP 1: Press Speaker key. STEP 2: Press S&R. DT Series automatically redials the programmed number. STEP 3: S&R automatically cancelled. LED goes out. Note: If saved number is busy or no answer is - NEC DTL-6DE-1 | User Manual - Page 158
TO LEAVE A MESSAGE DT730/710 DT330/310 STEP 1: Press Speaker key. Receive dial tone. STEP 2: Dial desired station number. Encounter no answer or busy condition. STEP 3: Press MSG. Message is sent to called DT Series. STEP 4: Called station MSG LED lights. Called station MESSAGE SET 2001 1:25 PM - NEC DTL-6DE-1 | User Manual - Page 159
party that a message return was attempted. VOICE MAIL SYSTEM DT730/710 DT330/310 To Set STEP 1: Press Feature key. STEP 2: Press (Enter Voice Mail System. STEP 4: Hear ringback tone. MEET-ME PAGING DT730/710 DT330/310 Example: Station A can page Station B. When Station B dials answer code - NEC DTL-6DE-1 | User Manual - Page 160
rings. STEP 2: When station A goes off-hook, they are con- nected. Note: Paging function can not be supported with IP enabled DT700 Series. PAGING TRANSFER DT730/710 DT330/310 Example: Station A receives an important call for Station B who is not at a desk. Station A can page Station B. When Station - NEC DTL-6DE-1 | User Manual - Page 161
calling party are connected. DDD 3 1:25 PM MON 12 JUL 2010 If Station A hung up STEP 1: Station B dials "Paging" answer code. Station A DT Series rings. Stations A and B each display the other's number, flashing TRANSFER DDD 3 1:25 PM MON 12 JUL 2010 STEP 2: Station A picks up and announces - NEC DTL-6DE-1 | User Manual - Page 162
1: Secretary presses boss' line to return to calling party. BOSS/SECRETARY - MW LAMP CONTROL DT730/710 DT330/310 To Set MW at Boss' Station With caller on the line STEP 1: Lift handset or press Speaker Press the MW-SET line/feature key. Receive service set tone. MW SET 1:25 PM MON 12 JUL 2010 154 - NEC DTL-6DE-1 | User Manual - Page 163
on the line STEP 1: While engaged in conversation on boss' multiline, press MW-CANCEL key. No service set tone is heard. MW CANCEL 1:25 PM MON 12 JUL 2010 BOSS SECRETARY OVERRIDE DT730/710 DT330/310 Example: Station 2000 is boss, Station 2001 is secretary. Boss is connected to Trunk A. Incoming - NEC DTL-6DE-1 | User Manual - Page 164
on hold. STEP 2: Boss denies call, presses Transfer key to re- turn to Trunk A. STEP 3: Secretary is returned to Trunk B. DO NOT DISTURB DT730/710 DT330/310 While Idle (On Hook) STEP 1: Press DND. LED lights. DND SET 1:25 PM MON 12 JUL 2010 Note: With Soft Key operation, "DND" flashes - NEC DTL-6DE-1 | User Manual - Page 165
>>> Note: DND must be programmed by the Telephony Server Admin. on a Programmable feature key. CALL REDIRECT DT730/710 DT330/310 Example: DT Series Station A views on the DT Series display the Station Number or Caller ID of an Incoming Call and immediately redirects the call by pressing a Function - NEC DTL-6DE-1 | User Manual - Page 166
Station A presses the REDIR Soft Key. STEP 5: REDIRECTING is displayed on Station A and the call immediately recalls to Station C. PRIVACY DT730/710 DT330/310 While Off-Hook STEP 1: Press DND. LED lights. STEP 2: Privacy feature prevents interruptions for the duration of the call. PRIVACY SET 1:25 - NEC DTL-6DE-1 | User Manual - Page 167
flashing DND Soft Key. PRIVACY CANCEL 1:25 PM MON 12 JUL 2010 MIC DND >>> PRIVACY RELEASE DT730/710 DT330/310 Example: DT Series Station B is engaged in a conversation, and allows DT Series Station A to enter the call in progress. STEP 1: Station A lifts handset or presses Speaker key. Station - NEC DTL-6DE-1 | User Manual - Page 168
Series. Up to six parties can break into a two-party conversation (additional devise is required). PHONEBOOK DT730/710 DT330 /310 There are two types of Phonebook features: Local Phonebook and System Phonebook. Note: This feature is available for DT series operation from the telephone. Up to 32 - NEC DTL-6DE-1 | User Manual - Page 169
system side, go to STEP 2. If Local Phone is disabled, the display changes as follows. cannot be activated from the Menu key on DT710 Series (ITL-6DE-1). STEP 2: Press Sys soft key. NEC": Press 6 key twice to enter "N". Press 3 key four times to enter "E". Press 2 key twice to enter "C". Name: NEC - NEC DTL-6DE-1 | User Manual - Page 170
, you can make a call by going off-hook or pressing Speaker key. Name: NEC BNET Number: XXXXXXXX More Cnl Note: More soft key appears in Phonebook data screen when the number of characters (name) or digits (telephone number) are exceeding displayable limit (Up to 17 characters or digits can be - NEC DTL-6DE-1 | User Manual - Page 171
• LOCAL PHONEBOOK To Add New Data Example: DT Series Station A registers "NEC" as new name and its Telephone Number. STEP 1: Press Pbook soft key or ( a name and then press key. or OK soft Ex. To enter "NEC": Press 6 key twice to enter "N". Press 3 key twice to enter "E". Press 2 key three times - NEC DTL-6DE-1 | User Manual - Page 172
soft key once STEP 5: Enter the telephone number by using digit keys and press or OK soft key. Name: NEC Number: Clr OK Cnl Note: To phone book empty" appears.) Local Phonebook Srch Add Cnl STEP 2: Name Entry screen appears. Name: Clr OK >>> STEP 3: Enter a name (in this example, "NEC - NEC DTL-6DE-1 | User Manual - Page 173
the displayable limit, press or More soft key to display the last 17 characters/digits of the name/ telephone number. Name: NEC NEC BNET UP DOWN OK Cnl STEP 6: The registered data for "NEC BNET" appears. From this screen, you can make a call by going off-hook or pressing Speaker key. 165 - NEC DTL-6DE-1 | User Manual - Page 174
To Edit An Entry Example: To Modify Name "Home" to "House" and Telephone Number "0123456789" to "0123456712". STEP 1: Press >>> soft key while the target Phonebook data is displayed. Name: Home Number: 0123456789 More Pref Cnl >>> STEP 2: Press EDIT - NEC DTL-6DE-1 | User Manual - Page 175
Name Entry screen. Entry deleted! STEP 1: Press >>> soft key while the target Phonebook data is displayed. Name: NEC ABIKO Number: 0123456789 More Pref Cnl >>> To Add A Prefix To Telephone Number The procedure shown below is available in Local Phonebook. Example: To add a prefix "0184" in front of - NEC DTL-6DE-1 | User Manual - Page 176
digit keys and press or OK Soft Key. Note: More soft key appears in Phonebook data screen when the number of characters (name) or digits (telephone number) are exceeding displayable limit (Up to 17 characters or digits can be displayed at a time). If the name or - NEC DTL-6DE-1 | User Manual - Page 177
Character Character Available Characters In Local Phonebook The following tables show available characters in Local Phonebook. UPPERCASE CHARACTER Digit Code 1 2 3 4 5 6 7 8 9 0 # . A D G J M P T W SP # , B EHKNQUX 0 : CF I LORVY ! ÀÈ Ì 5ÑSÙZ ?ÁÉ Í ÒÚ9 - ÂÊ Î Ó7Û +ÃË Ï - NEC DTL-6DE-1 | User Manual - Page 178
DT330/310 There are two types of Call History features. On the one hand, the history data is stored in the system memory. On the other hand, the history data is stored in the memory of the telephone , select 1 History (for DT730 Series)/ 1 Call History (for DT330 Series) and then press (or press - NEC DTL-6DE-1 | User Manual - Page 179
data has name information, the name is displayed as follows: Name :NEC ABIKO Number :01234531300 More Cnl Note: More soft key appears in Phonebook data screen when the number of characters (name) or digits (telephone number) are exceeding displayable limit (Up to 17 characters or digits can - NEC DTL-6DE-1 | User Manual - Page 180
the Personal Directory (described in 6.DIRECTORY OPERATION) controlled by the telephone. STEP 1: Press Pbook soft key or Phonebook Feature key while name and then press OK soft key. (In this example, "NEC ABIKO" is entered.) Add name: NEC ABIKO Clr OK >>> Note: Note: If name information is stored - NEC DTL-6DE-1 | User Manual - Page 181
STEP 3: The telephone number stored on the call history is displayed. The telephone number can be changed if necessary. Press OK soft key to add the displayed data to Local Phonebook. Name :NEC ABIKO Number :31300 Clr OK Cnl 173 - NEC DTL-6DE-1 | User Manual - Page 182
This page is for your notes. 174 - NEC DTL-6DE-1 | User Manual - Page 183
Series. By using Personal Directory function, you can make a call with simple operation. Personal Directory function can register up to 500 entries (4 telephone Note: Directory feature is available for DT730 Series only. DT710/DT330/DT310 Series does not support the directory feature. Note: On the - NEC DTL-6DE-1 | User Manual - Page 184
operations. • Highlight an item by using , and then press , or OK soft key. • Press 1 key. [[EEddiitt]] 1 NNaammee 2 Gr Group 3 Tel #1 4 Tel #2 5 Tel #3 6 Tel #4 7 Company Name 8 Ring Tone 9 Illumination 0 No 0 Save Back OK STEP 6: Enter a name to be registered in directory. Enter a name - NEC DTL-6DE-1 | User Manual - Page 185
or OK soft key. [Name] A Input a name. BK Option Back OK Note: Up to 32 characters can be press , or OK soft key. • Press 2 key. [Edit] 1 Ken Kobus 2 Gr Group 3 Tel #1 4 Tel #2 5 Tel #3 6 Tel #4 7 Company Name 8 Ring Tone 9 Illumination 0 No 0 Save Back OK STEP 8: Select a desired - NEC DTL-6DE-1 | User Manual - Page 186
5 Others Prev Next Selectable categories are as follows: Category ICON Company Mobile Voice Mail Home Others BK Back Next STEP 11:Select a Category to which the entered telephone number belongs. Select an item by either of the following operations. • Highlight an item by using , and - NEC DTL-6DE-1 | User Manual - Page 187
, or OK soft key. • Press 7 key. Note: A maximum of four telephone numbers can be set to an entry. If two or more telephone numbers are required to be set, set the remaining telephone numbers to Tel #2 - Tel #4. Note: If multiple telephone numbers are registered to an entry and Priority Flag is - NEC DTL-6DE-1 | User Manual - Page 188
8 key. [Edit] 1 Ken Kobus 2 Gr Colleagues 3 31300 4 Tel #2 5 Tel #3 6 Tel #4 7 NEC 8 Ring Tone 9 Illumination 0 No 0 Save Back OK STEP 16:Select here. Ringer Tone type can be set for "Name", "Group" and "Telephone set". The ringer Tone type set for "Name" has higher priority than the - NEC DTL-6DE-1 | User Manual - Page 189
] 1 Ken Kobus 2 Gr Colleagues 3 31300 4 Tel #2 5 Tel #3 6 Tel #4 7 NEC 8 Automatic 9 Illumination 0 No 0 Save Back OK (calling party) here. Illumination type can be set for "Name", "Group" and "Telephone set". The illumination type set for "Name" has higher priority than the types set for - NEC DTL-6DE-1 | User Manual - Page 190
5 Tel #3 6 Tel #4 7 NEC 8 Automatic 9 Automatic 0 No 0 Save Back OK Note: A memory number is automatically set in ascending numeric order. STEP 20:If you need to assign a memory number manually, select 0 Memory ID on the screen of the previous step, and then enter a desired memory number - NEC DTL-6DE-1 | User Manual - Page 191
Setting. Select an item by either of the following operations. • Highlight an item by using , and then press , or OK soft key. • Press 3 key. [Directory] 1 Search 2 Edit 3 Group Setting 4 Own Number 0 Delete All Back OK STEP 3: Select a group name to be changed. In this example, 1 Default is - NEC DTL-6DE-1 | User Manual - Page 192
] A Input a group name. Default BK Option Back OK Note: Up to 32 tone and illumination types can be set for "Name", "Group" and "Telephone set". The ringer tone and illumination types set for "Name" have higher priority than . • Press 1 key. [Search] 1 Group 2 Name 3 Tel Number 4 Others Back OK 184 - NEC DTL-6DE-1 | User Manual - Page 193
top priority telephone number is automatically selected when the Detail screen appears. In the following Detail screen, you can make a call to the selected number by pressing or Call soft key. [Detail] 1 Ken Kobus 2 Gr Colleagues 3 31300 4 0800XXXXXX 5 Tel #3 6 Tel #4 7 NEC 8 Automatic 9 Automatic - NEC DTL-6DE-1 | User Manual - Page 194
key. • Press 2 key. [Search] 1 Group 2 Name 3 Tel Number 4 Others Back OK STEP 4: Enter a target name. After entering the name Press key. or OK soft [Name] A Input a name. BK Option Back OK Note: A distinction is made between upper case and telephone numbers are assigned to an entry, a top priority - NEC DTL-6DE-1 | User Manual - Page 195
, a top priority telephone number is automatically selected when the Detail screen appears. In the following Detail screen, you can make a call to the selected number by pressing or Call soft key. [Detail] 1 Abe Kentaro 2 Gr Colleagues 3 31300 4 0800XXXXXX 5 Tel #3 6 Tel #4 7 NEC 8 Automatic - NEC DTL-6DE-1 | User Manual - Page 196
OK soft key. • Press 3 key. [Search] 1 Group 2 Name 3 Tel Number 4 Others Back OK STEP 4: Enter a target telephone number. After entering the number, press key. or OK soft [Tel Number] 1 Input a Telephone number. BK Back OK Note: Even if the telephone number is not entered to the end, you - NEC DTL-6DE-1 | User Manual - Page 197
entry, a top priority telephone number is automatically selected when the Detail screen appears. In the following Detail screen, you can make a call to the selected number by pressing or Call soft key. [Detail] 1 Abe Kentaro 2 Gr Colleagues 3 31300 4 0800XXXXXX 5 Tel #3 6 Tel #4 7 NEC 8 Automatic - NEC DTL-6DE-1 | User Manual - Page 198
press , or OK soft key. • Press 4 key. [Search] 1 Group 2 Name 3 Tel Number 4 Others Back OK STEP 4: Select 1 Memory ID. Select an item by either of the to the entered number in front. [Memory ID] 1 Input a Memory number. BK Back OK STEP 6: Select a target name by pressing (Up/ down-cursor). - NEC DTL-6DE-1 | User Manual - Page 199
, a top priority telephone number is automatically selected when the Detail screen appears. In the following Detail screen, you can make a call to the selected number by pressing or Call soft key. [Detail] 1 Abe Kentaro 2 Gr Colleagues 3 31300 4 0800XXXXXX 5 Tel #3 6 Tel #4 7 NEC 8 Automatic - NEC DTL-6DE-1 | User Manual - Page 200
by either of the following operations. • Highlight an item by using , and then press , or OK soft key. • Press 4 key. [Search] 1 Group 2 Name 3 Tel Number 4 Others Back OK STEP 4: Select 2 Category. Select an item by one of the following operations. • Highlight an item by using , and then press - NEC DTL-6DE-1 | User Manual - Page 201
, a top priority telephone number is automatically selected when the Detail screen appears. In the following Detail screen, you can make a call to the selected number by pressing or Call soft key. [Detail] 1 Abe Kentaro 2 Gr Colleagues 3 31300 4 0800XXXXXX 5 Tel #3 6 Tel #4 7 NEC 8 Automatic - NEC DTL-6DE-1 | User Manual - Page 202
, or OK soft key. • Press 4 key. [Search] 1 Group 2 Name 3 Tel Number 4 Others Back OK STEP 4: Select 3 Company. Select an item by either of the the name, Press or OK soft key. [Company] A Input a Company name. BK Option Back OK Note: A distinction is made between upper case and lower case - NEC DTL-6DE-1 | User Manual - Page 203
, a top priority telephone number is automatically selected when the Detail screen appears. In the following Detail screen, you can make a call to the selected number by pressing or Call soft key. [Detail] 1 Abe Kentaro 2 Gr Colleagues 3 31300 4 0800XXXXXX 5 Tel #3 6 Tel #4 7 NEC 8 Automatic - NEC DTL-6DE-1 | User Manual - Page 204
by either of the following operations. • Highlight an item by using , and then press , or OK soft key. • Press 4 key. [Search] 1 Group 2 Name 3 Tel Number 4 Others Back OK STEP 4: Select 4 Alphabet. Select an item by either of the following operations. • Highlight an item by using , and then press - NEC DTL-6DE-1 | User Manual - Page 205
entry, a top priority telephone number is automatically selected when the Detail screen appears. In the following Detail screen, you can make a call to the selected number by pressing or Call soft key. [Detail] 1 Abe Kentaro 2 Gr Colleagues 3 31300 4 0800XXXXXX 5 Tel #3 6 Tel #4 7 NEC 8 Automatic - NEC DTL-6DE-1 | User Manual - Page 206
Detail screen appears. [Detail] 1 Abe Kentaro 2 Gr Colleagues 3 31300 4 0800XXXXXX 5 Tel #3 6 Tel #4 7 NEC 8 Automatic 9 Automatic 0 No 0 Back Call STEP 2: Select a target telephone number and then make a call. Select a target telephone number by pressing , and then press or Call soft key to - NEC DTL-6DE-1 | User Manual - Page 207
Tel #3 6 Tel #4 7 NEC 8 Automatic 9 Automatic 0 No 0 Back Call TO ADD PREFIX TO NUMBER DT730 • To Set Prefix When making a call, a prefix can be added to telephone then press , or OK soft key. • Press 1 key. [Setting] 1 User Setting 2 Download 3 Data Backup/Restore Back OK STEP 4: Select 2 Talk. - NEC DTL-6DE-1 | User Manual - Page 208
Prefix 3 Back OK STEP 7: Enter a prefix by using the digit keys. After entering the prefix, press or OK soft key. [Prefix 1] 1 Input a prefix number. BK Back OK STEP 8: The display goes back the Prefix screen at STEP 5. If multiple prefixes need to be set, repeat STEP 6 and STEP 7. In that - NEC DTL-6DE-1 | User Manual - Page 209
soft key. [Directory] Abe Ichiro Abe Jiro Abe Kentaro Detail Option Back Call Note: If multiple telephone numbers are registered to a target party, a call is made to the first priority telephone number. STEP 3: Select 1 Prefix. Select an item by one of the following operations. • Highlight an - NEC DTL-6DE-1 | User Manual - Page 210
. After the data modification is complete, press Save soft key on the Edit screen. [Edit] 1 Abe Kentaro 2 Gr Colleagues 3 31300 4 0800XXXXXX 5 Tel #3 6 Tel #4 7 NEC 8 Automatic 9 Automatic 0 No 0 Save Back OK TO DELETE ALL DATA DT730 STEP 1: Open the Directory screen (see TO ADD NEW DATA - NEC DTL-6DE-1 | User Manual - Page 211
[Directory] 1 Search 2 Edit 3 Group Setting 4 Own Number 0 Delete All Back OK STEP 3: Press ta. or OK soft key to delete all the da- [Directory] Delete All Directory? Back OK Note: To cancel the data deletion, press soft key. or Back STEP 4: After all the directory data is deleted, the - NEC DTL-6DE-1 | User Manual - Page 212
SubMenu 1 Prefix 2 Delete One 3 Delete All 4 Edit Cancel OK STEP 4: The following confirmation message appears. Press or OK soft key to delete the appropriate directory data. [Directory] Delete this entry? STEP 6: Press or OK soft key. Back OK Note: To cancel the data deletion, press soft - NEC DTL-6DE-1 | User Manual - Page 213
. By using Call History, you can make a call with simple operation. Call History feature allows the telephone to register up to 50 records (for DT730 Series)/10 records (for DT330 Series) into its memory. If exceeding 50 records/10 records, a record will be deleted in order of occurrence. FOR DT730 - NEC DTL-6DE-1 | User Manual - Page 214
Menu key to open the Menu screen. Note: This feature is available for DT730 Series. DT710 Series does not support this feature. The following are examples of LCD display of DT730 Series. DT730 Series [Menu] 1 History 2 Directory 3 Tool Back OK STEP 2: Select 1 History. Select an item by either - NEC DTL-6DE-1 | User Manual - Page 215
: Note: Note: Note: For unanswered incoming calls, played on the left of the name. will be dis- If you make/answer a call to/from the telephone number which is registered to Personal Directory, the corresponding name will be displayed as call history data. If there is no history data, "No data - NEC DTL-6DE-1 | User Manual - Page 216
number. (CASE 2) STEP 1: Display call history data of a target telephone number (see TO VIEW CALL HISTORY). The following is an example when a history data of Incoming Calls is displayed. [Incoming] 2 12/JUL/2010 (MON) 9:58 Abe Kentaro Tel: 7207 Back Option STEP 2: On the above screen, press Menu - NEC DTL-6DE-1 | User Manual - Page 217
/2010 (MON) 11:00 31312 31312 Back Option Press Menu key or Option soft key while displaying the call history data for the target telephone number. STEP 2: The following Sub Menu is displayed. Select 2 Directory Add. Select an item by either of the following operations. • Highlight an item by - NEC DTL-6DE-1 | User Manual - Page 218
2 Enable. A maximum of four telephone numbers can be set to an entry. If 2 Enable is selected here, the telephone number which is being edited will be etc) to directory. [Edit] 1 Name 2 Gr Group 3 31312 4 Tel #2 5 Tel #3 6 Tel #4 7 Company Name 8 Ring Tone 9 Illumination 0 N0o Save Back OK - NEC DTL-6DE-1 | User Manual - Page 219
Note: If the corresponding data has already stored in the directory, the detailed data (such as name group, etc.) is displayed. 211 - NEC DTL-6DE-1 | User Manual - Page 220
/2010 (MON) 10:00 7205 7205 Back Option Press Menu key or Option soft key while displaying the call history data for the target telephone number. STEP 2: The following Sub Menu is displayed. Select 2 Directory Add. Select an item by either of the following operations. • Highlight an item by - NEC DTL-6DE-1 | User Manual - Page 221
- 4 key, and then press or OK soft key. [Directory] 1 Tel #1: 0800XXXXXXX 2 Tel #2: 3 Tel #3: 4 Tel #4: Back OK Note: In this example, a mobile telephone number "0800XXXXXXX" has already been registered to Tel #1. If you select Tel #1 here, "0800XXXXXXX" will be overwritten with "7205". 213 - NEC DTL-6DE-1 | User Manual - Page 222
telephone four telephone numbers can be set to an entry. If 2 Enable is selected here, the telephone number telephone number is automatically selected when you make a call without specifying a specific telephone Directory. "7205" has been registered to Tel #2. See TO EDIT DIRECTORY DATA in Directory - NEC DTL-6DE-1 | User Manual - Page 223
TO DELETE ALL DATA DT730 STEP 1: While indicating the current time on LCD, press Menu key to open the Menu screen. STEP 2: Select 1 History. Select an item by either of the following operations. • Highlight an item by using , and then press , or OK soft key. • Press 1 key. [Menu] 1 History 2 - NEC DTL-6DE-1 | User Manual - Page 224
2010 (MON) 11:00 Ken Kobus 31310 Back Option Press Menu key or Option soft key while displaying the call history data for the target telephone number. STEP 2: The following Sub Menu is displayed. Select 4 Delete One. Select an item by either of the following operations. • Highlight an item by - NEC DTL-6DE-1 | User Manual - Page 225
STEP 4: After the appropriate call history data is deleted, the display changes as follows. Press or OK soft key. [Incoming] Deleted. OK 217 - NEC DTL-6DE-1 | User Manual - Page 226
time on LCD, press Menu key to open the Menu screen. Note: This feature is DT730 Series and DT330 Series. The following are examples of LCD displays of DT730 Series and DT330 Series. DT330 Series [Menu] 1 Call History 2 Directory Back OK STEP 2: Select 1 Call History. Select an item by either of - NEC DTL-6DE-1 | User Manual - Page 227
without the cursor key, switching between "name" and "telephone number" cannot be performed. Note: To go back to former menu (STEP 3), press Back soft key. Note: If the telephone number of the caller is not received (due to Caller ID blocking, public phone or out of area, etc.), "Private" is - NEC DTL-6DE-1 | User Manual - Page 228
key). For example, press "0" key to display the tenth record. Note: To go back to former menu (STEP 3), press Back soft key. Note: If the telephone number of the caller is not received (due to Caller ID blocking, public phone or out of area, etc.), "Private" is displayed on LCD. 220 - NEC DTL-6DE-1 | User Manual - Page 229
TO MAKE A CALL FROM CALL HISTORY DT330 STEP 1: Display the call history data of the target telephone number (see TO VIEW CALL HISTORY). The STEP 2: Press key while the history data for the target telephone number is displayed on LCD. Note: While the history data is displayed, you cannot make a - NEC DTL-6DE-1 | User Manual - Page 230
TO DELETE ALL DATA DT330 STEP 1: Select 1 Call History on the Menu screen. Select an item by either of the following operations. • Highlight an item by using , and then press , - NEC DTL-6DE-1 | User Manual - Page 231
TO DELETE A SPECIFIC DATA DT330 STEP 1: Display the call history data which you want to delete (see TO VIEW CALL HISTORY). The following is an example when the history data - NEC DTL-6DE-1 | User Manual - Page 232
This page is for your notes. 224 - NEC DTL-6DE-1 | User Manual - Page 233
Series. Telephone Type Display (LCD) Display Color Character on LCD Programmable Key Fixed Feature Key Backlight Soft Key Call History Hands-free Headset Power Consumption Adapter (optional) Color Dimension (WDH) Weight 8LD 32D 24D does not support the display in Russian. Note 2: Optional - NEC DTL-6DE-1 | User Manual - Page 234
The following shows the technical specifications of DT 700 Series. Telephone Type 8LD 32D 24D/12D 6DE 2E Display (LCD) Display Color Programmable (Full-duplex), Wide-band Standard equipment (Full-duplex) Headset Available Not available LAN Interface 2-port, 10BASE-T/100BASE-TX, - NEC DTL-6DE-1 | User Manual - Page 235
menu list for Personal Directory feature. Uses when accessing external XML server. For details, please contact the system administrator. Not used. To access user settings. Not used. Not used. To make the configuration setting of DT Series. For details, please contact the system administrator. 227 - NEC DTL-6DE-1 | User Manual - Page 236
. Edit the directory data. Edit the personal directory data from call history. Search the personal directory. Register the telephone number to the searched directory data. Add Prefix to the telephone number and then make a call. Delete a specific data. Delete all history data of a specific call type - NEC DTL-6DE-1 | User Manual - Page 237
1 Name 2 Group 3-6 Tel #1-Tel #4 Category Set Priority Flag 7 Company Name Description From Menu screen, select 2 Directory 1 Personal. Search the personal directory. Select a group as a search condition. Enter the target name and then perform a search. Enter the target telephone number and then - NEC DTL-6DE-1 | User Manual - Page 238
lamp. 4 Own Number 0 Delete All Displays the number of the telephone itself. Delete all the registered directory data. Note 1: For firmware versions settings) Note 1 - - Menu List For 3 Tool Menu Item 3 Tool 1 Service 2 IM Description Activate XML browser. Not used. Default Value - 230 - NEC DTL-6DE-1 | User Manual - Page 239
Make the user setting of DT Series. Settings for incoming call. Not used. Enable/Disable Off-hook ringing. Enable/Disable the ringing of headset. Select digit keys are pressed while the telephone is off-hook. Select a Music on Hold to be heard by DT Series user. Register Prefix number. Settings for - NEC DTL-6DE-1 | User Manual - Page 240
LCD. Change the password to lock/unlock the telephone. Not used. Not used Reset the telephone settings. Set the data required for the file server (either FTP or TFTP). Set necessary data when using FTP service. Enter a user ID for downloading via FTP server. Enter a password for downloading - NEC DTL-6DE-1 | User Manual - Page 241
Enter an IP address of the FTP/TFTP server. Select a protocol of the server (either FTP or TFTP). Set necessary data when using FTP service. Enter a user ID for the data backup via FTP server. Enter a password for data backup via FTP server. Specify the destination directory of FTP server. Default - NEC DTL-6DE-1 | User Manual - Page 242
0 Config Description Press Menu key while indicating the current time on LCD. Not used. To make the user setting of DT Series. To make the configuration setting of DT Series. For details, please contact the system administrator. Menu List For 1 Tool Menu Item 1 Tool 1 Not used. Description - NEC DTL-6DE-1 | User Manual - Page 243
Menu List For 2 Setting Menu Item 2 Setting 1 User Setting 1 Incoming Call 1 Offhook Ring 2 Ring Tone 3 Headset Ring Volume 2 Talk 1 RTP Alarm 2 DTMF Tone keys are pressed while the telephone is off-hook. Select a Music on Hold to be heard by DT Series user. Settings for LCD display. Determines - NEC DTL-6DE-1 | User Manual - Page 244
Enter an IP address of the FTP/TFTP server. Select a protocol of the server (either FTP or TFTP). Set necessary data when using FTP service. Enter a user ID for the data backup via FTP server. Enter a password for data backup via FTP server. Specify the destination directory of FTP server. Default - NEC DTL-6DE-1 | User Manual - Page 245
MENU LIST FOR DT330 Series Menu Menu Item 1 Call History 2 Directory 3 Settings Description Press Menu key while indicating the current time on LCD. To view call history data. To access Phonebook feature. For details, see PHONEBOOK in chapter 5. To make the user setting of DT Series. Menu List - NEC DTL-6DE-1 | User Manual - Page 246
This page is for your notes. 238 - NEC DTL-6DE-1 | User Manual - Page 247
the same network. When downloading the files for Music on Hold, Ringer Tone and Directory to the DT Series, FTP (TFTP server) is required on the network. For details on the FTP service, contact the System Administrator. Note: Terminal settings through the Web Programming is available while the DT700 - NEC DTL-6DE-1 | User Manual - Page 248
Start up Internet browser on the PC. STEP 2: Enter IP address of the target DT700 Series on the address toolbar and then press Enter key. STEP 3: The Web Programming Login screen appears. Enter a user name (type "USER") and a password (Note 1), then click OK . Note: Enter the same password used when - NEC DTL-6DE-1 | User Manual - Page 249
Note: When the login screen does not appear, check the LAN connection status and entered IP address. If the problem persists, please contact the system administrator. STEP 4: The following Web Programming Home screen appears. 241 - NEC DTL-6DE-1 | User Manual - Page 250
TO LOGOUT Follow the steps below to exit the Web Programming. STEP 1: Click Logout at the lower left of the screen. STEP 2: The confirmation message appears. Click OK to log out of Web Programming. STEP 3: The display changes as follows. Click Back . 242 - NEC DTL-6DE-1 | User Manual - Page 251
the Web Programming Login screen is displayed, close the Internet browser. Note: Make sure to perform the logout operation after the data setting of the telephone. Note: When 15 minutes have passed leaving the PC without operation after log in to Web Programming, you are forcibly logged out from the - NEC DTL-6DE-1 | User Manual - Page 252
terminal. For details on each menu item, see SETUP WITH MENU KEY FOR DT700 SERIES in 3.TERMINAL SETUP. STEP 1: From the Home screen, click User Setting Incoming Call Ring Tone External Call. STEP 2: Select a desired tone type by clicking the corresponding radio button. STEP 3: Click OK to - NEC DTL-6DE-1 | User Manual - Page 253
Printed in Japan 1008-040 - NEC DTL-6DE-1 | User Manual - Page 254
-
 1
1 -
 2
2 -
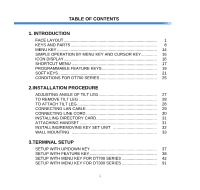 3
3 -
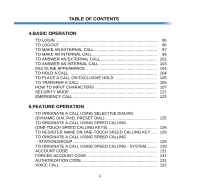 4
4 -
 5
5 -
 6
6 -
 7
7 -
8
-
9
-
10
-
11
-
12
-
13
-
14
-
15
-
16
-
17
-
18
-
19
-
20
-
21
-
22
-
23
-
24
-
25
-
26
-
27
-
28
-
29
-
30
-
31
-
32
-
33
-
34
-
35
-
36
-
37
-
38
-
39
-
40
-
41
-
42
-
43
-
44
-
45
-
46
-
47
-
48
-
49
-
50
-
51
-
52
-
53
-
54
-
55
-
56
-
57
-
58
-
59
-
60
-
61
-
62
-
63
-
64
-
65
-
66
-
67
-
68
-
69
-
70
-
71
-
72
-
73
-
74
-
75
-
76
-
77
-
78
-
79
-
80
-
81
-
82
-
83
-
84
-
85
-
86
-
87
-
88
-
89
-
90
-
91
-
92
-
93
-
94
-
95
-
96
-
97
-
98
-
99
-
100
-
101
-
102
-
103
-
104
-
105
-
106
-
107
-
108
-
109
-
110
-
111
-
112
-
113
-
114
-
115
-
116
-
117
-
118
-
119
-
120
-
121
-
122
-
123
-
124
-
125
-
126
-
127
-
128
-
129
-
130
-
131
-
132
-
133
-
134
-
135
-
136
-
137
-
138
-
139
-
140
-
141
-
142
-
143
-
144
-
145
-
146
-
147
-
148
-
149
-
150
-
151
-
152
-
153
-
154
-
155
-
156
-
157
-
158
-
159
-
160
-
161
-
162
-
163
-
164
-
165
-
166
-
167
-
168
-
169
-
170
-
171
-
172
-
173
-
174
-
175
-
176
-
177
-
178
-
179
-
180
-
181
-
182
-
183
-
184
-
185
-
186
-
187
-
188
-
189
-
190
-
191
-
192
-
193
-
194
-
195
-
196
-
197
-
198
-
199
-
200
-
201
-
202
-
203
-
204
-
205
-
206
-
207
-
208
-
209
-
210
-
211
-
212
-
213
-
214
-
215
-
216
-
217
-
218
-
219
-
220
-
221
-
222
-
223
-
224
-
225
-
226
-
227
-
228
-
229
-
230
-
231
-
232
-
233
-
234
-
235
-
236
-
237
-
238
-
239
-
240
-
241
-
242
-
243
-
244
-
245
-
246
-
247
-
248
-
249
-
250
-
251
-
252
-
253
-
254
 |
 |
DT730/DT710/DT330/DT310
USER’S GUIDE
NEC Corporation
2010 August
NWA-039300-001
ISSUE 4.0