Netgear RND4000 RND4000 User Manual - Page 55
Adding a New Backup Job, Windows/NAS Timestamp, Windows/NAS Archive Bit, Website, FTP site, NFS server - nas server
 |
UPC - 606449053272
View all Netgear RND4000 manuals
Add to My Manuals
Save this manual to your list of manuals |
Page 55 highlights
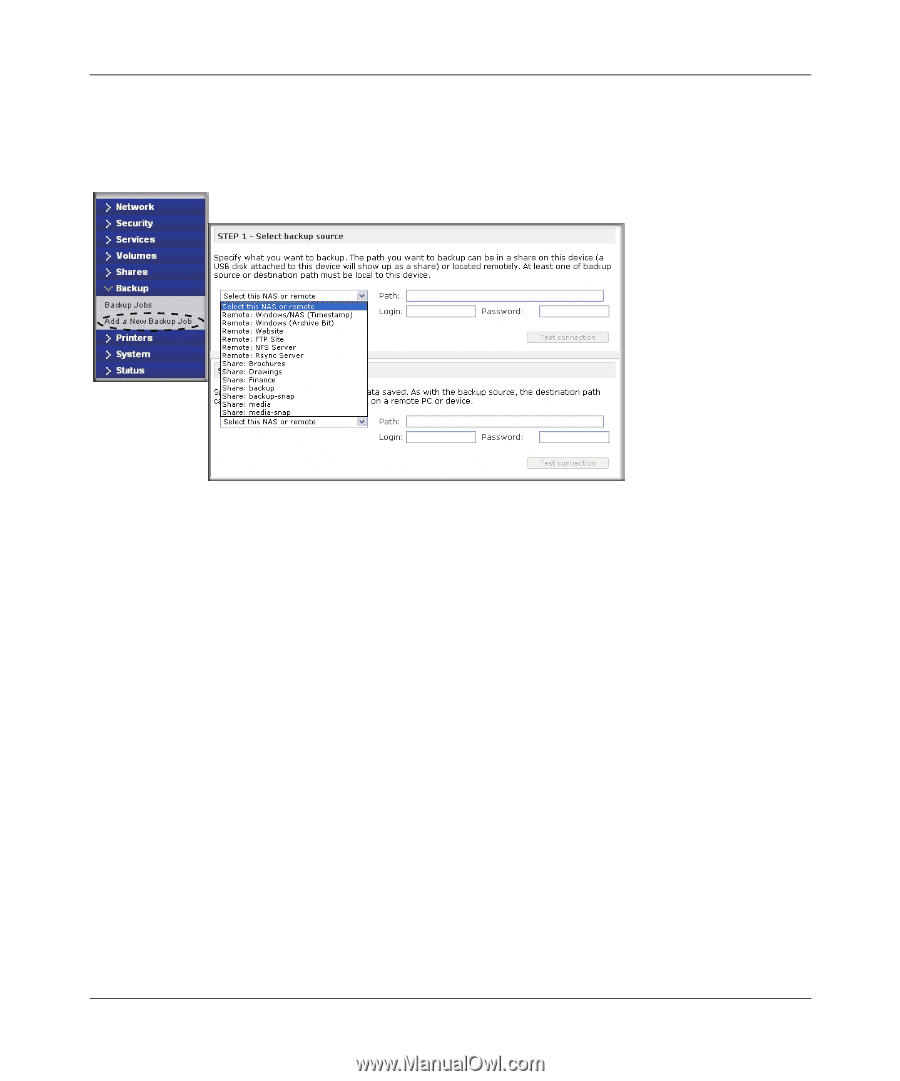
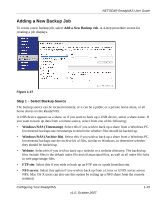
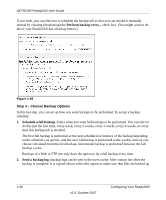
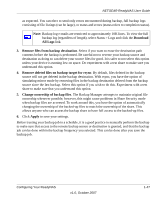
NETGEAR ReadyNAS User Guide Adding a New Backup Job To create a new backup job, select Add a New Backup Job. A 4-step procedure screen for creating a job displays. Figure 1-47 Step 1 - Select Backup Source The backup source can be located remotely, or it can be a public or a private home share, or all home shares on the ReadyNAS. A USB device appears as a share, so if you want to back up a USB device, select a share name. If you want to back up data from a remote source, select from one of the following: • Windows/NAS (Timestamp). Select this if you wish to back up a share from a Windows PC. Incremental backups use timestamps to determine whether files should be backed up. • Windows/NAS (Archive Bit). Select this if you wish to back up a share from a Windows PC. Incremental backups use the archive bit of files, similar to Windows, to determine whether they should be backed up. • Website. Select this if you wish to back up a website or a website directory. The backed up files include files in the default index file and all associated files, as well as all index file links to web page image files. • FTP site. Select this if you wish to back up an FTP site or a path from that site. • NFS server. Select this option if you wish to back up from a Linux or UNIX server across NFS. Mac OS X users can also use this option by setting up a NFS share from the console terminal. Configuring Your ReadyNAS v1.0, October 2007 1-43
-
 1
1 -
2
-
3
-
4
-
5
-
6
-
7
-
8
-
9
-
10
-
11
-
12
-
13
-
14
-
15
-
16
-
17
-
18
-
19
-
20
-
21
-
22
-
23
-
24
-
25
-
26
-
27
-
28
-
29
-
30
-
31
-
32
-
33
-
34
-
35
-
36
-
37
-
38
-
39
-
40
-
41
-
42
-
43
-
44
-
45
-
46
-
47
-
48
-
49
-
 50
50 -
 51
51 -
 52
52 -
 53
53 -
 54
54 -
 55
55 -
 56
56 -
 57
57 -
 58
58 -
 59
59 -
 60
60 -
61
-
62
-
63
-
64
-
65
-
66
-
67
-
68
-
69
-
70
-
71
-
72
-
73
-
74
-
75
-
76
-
77
-
78
-
79
-
80
-
81
-
82
-
83
-
84
-
85
-
86
-
87
-
88
-
89
-
90
-
91
-
92
-
93
-
94
-
95
-
96
-
97
-
98
-
99
-
100
-
101
-
102
-
103
-
104
-
105
-
106
-
107
-
108
-
109
-
110
-
111
-
112
-
113
-
114
-
115
-
116
-
117
-
118
-
119
-
120
 |
 |