Oki OKIPOS408II OKIPOS 408II Software Technical Reference - Page 29
Paper Type, Data Treatment Recover From Error
 |
View all Oki OKIPOS408II manuals
Add to My Manuals
Save this manual to your list of manuals |
Page 29 highlights
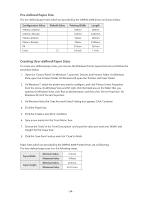
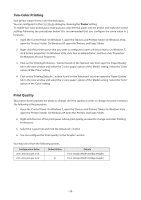
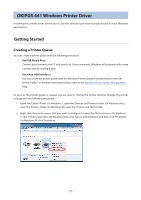
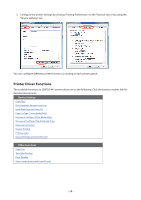
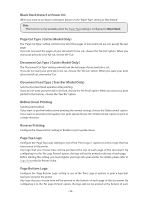
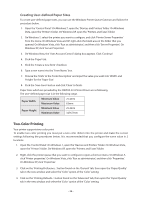
Detailed Usage Device Settings The 'Device Settings' tab of your printer queue's properties window contains many different settings. Open the 'Device Settings' tab with the following procedure. 1. Open the 'Control Panel'. On Windows 7, open the 'Devices and Printers' folder. On Windows Vista, open the 'Printers' folder. On Windows XP, open the 'Printers and Faxes' folder. 2. Right-click the printer queue that you want to configure to open a shortcut menu. On Windows 7, click 'Printer properties'. On Windows Vista, click 'Run as administrator', and then click 'Properties'. On Windows XP, click 'Properties'. 3. Click the 'Device Settings' tab. Memo: Some functions can not be selected at the same time. If you find that the '!' mark appears in your device configuration, please check it by referring to the descriptions on each item. The description of the contents for each function listed below. Paper Type Three kinds of 'Paper Type' setting allow you to print variable-length 'Receipt', fixed-length 'Tickets', or 'Black Mark' delimited pages. Use the 'Receipt' option if your print jobs vary in length and you want them cut immediately following the last line. (You may set your receipt paper size at Paper Size) Use the 'Ticket' option if your want your print jobs to have a consistent length that you set via Paper Size. The paper will be cut when it reaches your set value. Use the 'Black Mark' option if you want the printer to cut the paper based on black marks. Data Treatment Recover From Error When the error occurs, you can handle the unprinted data which has already been sent to the printer as below. If you want to cancel the unprinted data after the recovery from the error, select 'Clear Data By Document' and check 'Enable bidirectional support' box at the 'Ports' tab of 'Printer properties'. If you want to print the unprinted data continuously after the recovery from the error, select 'Store Data' and uncheck 'Enable bidirectional support' box. Note This feature does not operate correctly with old firmware. If you are using version 3.0 or earlier of the firmware, select 'Store Data,' and clear the 'Enable bidirectional support' check box on the 'Ports' tab of the 'Printer properties' dialog box. You can check the firmware version by executing Self-Printing. To update the printer's firmware, contact your dealer. - 29 -
-
 1
1 -
2
-
3
-
4
-
5
-
6
-
7
-
8
-
9
-
10
-
11
-
12
-
13
-
14
-
15
-
16
-
17
-
18
-
19
-
20
-
21
-
22
-
23
-
 24
24 -
 25
25 -
 26
26 -
 27
27 -
 28
28 -
 29
29 -
 30
30 -
 31
31 -
 32
32 -
 33
33 -
 34
34 -
35
-
36
-
37
-
38
-
39
-
40
-
41
-
42
-
43
-
44
-
45
-
46
-
47
-
48
-
49
-
50
-
51
-
52
-
53
-
54
-
55
-
56
-
57
-
58
-
59
-
60
-
61
-
62
-
63
-
64
-
65
-
66
-
67
-
68
-
69
-
70
-
71
-
72
-
73
-
74
-
75
-
76
-
77
-
78
-
79
-
80
-
81
-
82
 |
 |