Panasonic AG DVX100B Dvc Camcorder - Page 36
Backup recording, Switching to manual mode, Adjusting the volume while shooting - audio level
 |
UPC - 791871302231
View all Panasonic AG DVX100B manuals
Add to My Manuals
Save this manual to your list of manuals |
Page 36 highlights
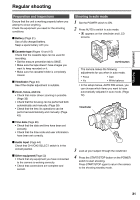
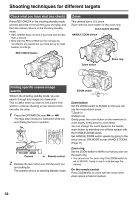
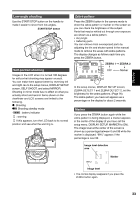
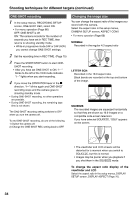
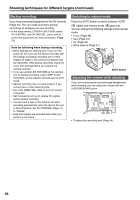
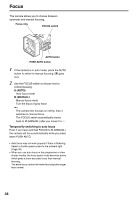
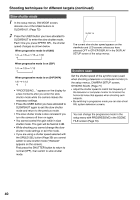
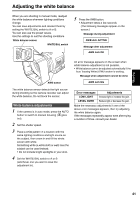
Shooting techniques for different targets (continued) Backup recording If you have connected equipment to the DV terminal (Page 54). You can make automatic backup recordings of whatever you are shooting. • In the setup menus, OTHER FUNCTIONS screen, DV CONTROL and DV CMD SEL, select how to control the equipment you have connected. (Page 77) Note the following when backup recording. • Menu settings are retained even if you turn the power off. So if you use the camera-recorder with the settings for backup recording still in effect, images on tapes in any unit that connected may be overwritten. After backup recording, check the menu item settings before you operate the camera-recorder. • If you use another AG-DVX100B as the external unit for backup recording, select "OFF" for DV CONTROL on the external unit and set it to VCR mode. • Backup recording may not work properly if you connect two or more external units. • Use a DV (IEEE1394) cable of 4.5 m or less for connection. • Set the external unit up to receive DV signals before backup recording. • You can have a tape in the external unit start recording automatically when the tape in this unit is almost finished. Set DV CONTROL (Page 77) to "CHAIN". • Note that images are recorded even when you perform a rec check. Switching to manual mode Press the AUTO button to switch between AUTO ( lights) and manual mode ( goes out). You can change the following settings in the manual mode. • Focus (Page 38) • Gain (Page 43) • Iris (Page 43) • White balance (Page 41) AUTO button Adjusting the volume while shooting If you are monitoring the sound through headphones while shooting, you can adjust the volume with the AUDIO MON/VAR button. • To adjust the recording level (Page 44). 36
-
 1
1 -
2
-
3
-
4
-
5
-
6
-
7
-
8
-
9
-
10
-
11
-
12
-
13
-
14
-
15
-
16
-
17
-
18
-
19
-
20
-
21
-
22
-
23
-
24
-
25
-
26
-
27
-
28
-
29
-
30
-
 31
31 -
 32
32 -
 33
33 -
 34
34 -
 35
35 -
 36
36 -
 37
37 -
 38
38 -
 39
39 -
 40
40 -
 41
41 -
42
-
43
-
44
-
45
-
46
-
47
-
48
-
49
-
50
-
51
-
52
-
53
-
54
-
55
-
56
-
57
-
58
-
59
-
60
-
61
-
62
-
63
-
64
-
65
-
66
-
67
-
68
-
69
-
70
-
71
-
72
-
73
-
74
-
75
-
76
-
77
-
78
-
79
-
80
-
81
-
82
-
83
-
84
-
85
-
86
-
87
-
88
 |
 |