Panasonic AG DVX100B Dvc Camcorder - Page 57
Listening to sound that has been dubbed, Performing audio dubbing as you listen
 |
UPC - 791871302231
View all Panasonic AG DVX100B manuals
Add to My Manuals
Save this manual to your list of manuals |
Page 57 highlights
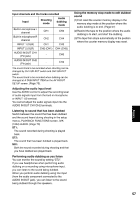
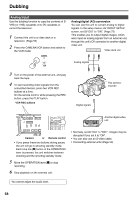
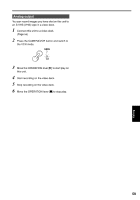
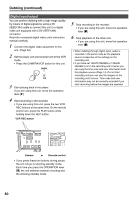
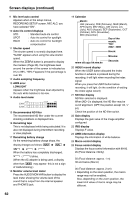
Input channels and the tracks recorded Input Shooting mode Built-in microphone L channel CH1 Audio dubbing mode CH3 Built-in microphone R channel CH2 CH4 INPUT 1 (XLR) INPUT 2 (XLR) AUDIO IN/OUT CH1 (Pin jack) CH1 CH2 (CH1) - CH3 CH4 (CH3) CH3 AUDIO IN/OUT CH2 (Pin jack) - CH4 The sound track to be recorded when shooting can be changed by CH1 SELECT switch and CH2 SELECT switch. The sound track to be recorded when dubbing can be changed at A DUB INPUT ITEM on the AV IN/OUT SETUP screen. (Page 75). Adjusting the audio input level Use the AUDIO control to adjust the recording level of audio signals input from the built-in microphone or INPUT 1/2 terminal. You cannot adjust the audio signals input into the AUDIO IN/OUT CH1/CH2 terminals. Listening to sound that has been dubbed Switch between the sound that has been dubbed and the sound heard during shooting in the setup menus, PLAYBACK FUNCTIONS screen, 32K (12bit) AUDIO. (Page 73) ST1: The sound recorded during shooting is played back. ST2: The sound that has been dubbed is played back. MIX: Both the sound recorded during shooting and that you have dubbed are played back. Performing audio dubbing as you listen You can monitor the sound by setting "ST2". If you use headphones when performing audio dubbing on a recording using microphone input, you can listen to the sound being dubbed. When you perform audio dubbing using line input (from the audio component connected to the AUDIO IN/OUT jack), you can listen to the sound being dubbed through the speakers. Using the memory stop mode to edit dubbed sound (1)First reset the counter memory display in the memory stop mode at the position where the audio dubbing is to end. (Page 57) (2)Rewind the tape to the position where the audio dubbing is to start, and start the dubbing. (3)The tape then stops automatically at the position where the counter memory display was reset. Editing 57
-
 1
1 -
2
-
3
-
4
-
5
-
6
-
7
-
8
-
9
-
10
-
11
-
12
-
13
-
14
-
15
-
16
-
17
-
18
-
19
-
20
-
21
-
22
-
23
-
24
-
25
-
26
-
27
-
28
-
29
-
30
-
31
-
32
-
33
-
34
-
35
-
36
-
37
-
38
-
39
-
40
-
41
-
42
-
43
-
44
-
45
-
46
-
47
-
48
-
49
-
50
-
51
-
 52
52 -
 53
53 -
 54
54 -
 55
55 -
 56
56 -
 57
57 -
 58
58 -
 59
59 -
 60
60 -
 61
61 -
 62
62 -
63
-
64
-
65
-
66
-
67
-
68
-
69
-
70
-
71
-
72
-
73
-
74
-
75
-
76
-
77
-
78
-
79
-
80
-
81
-
82
-
83
-
84
-
85
-
86
-
87
-
88
 |
 |
