Panasonic CYVHD9401U 9" Overhead Monitor - Page 11
Installation - how to install
 |
UPC - 037988757169
View all Panasonic CYVHD9401U manuals
Add to My Manuals
Save this manual to your list of manuals |
Page 11 highlights
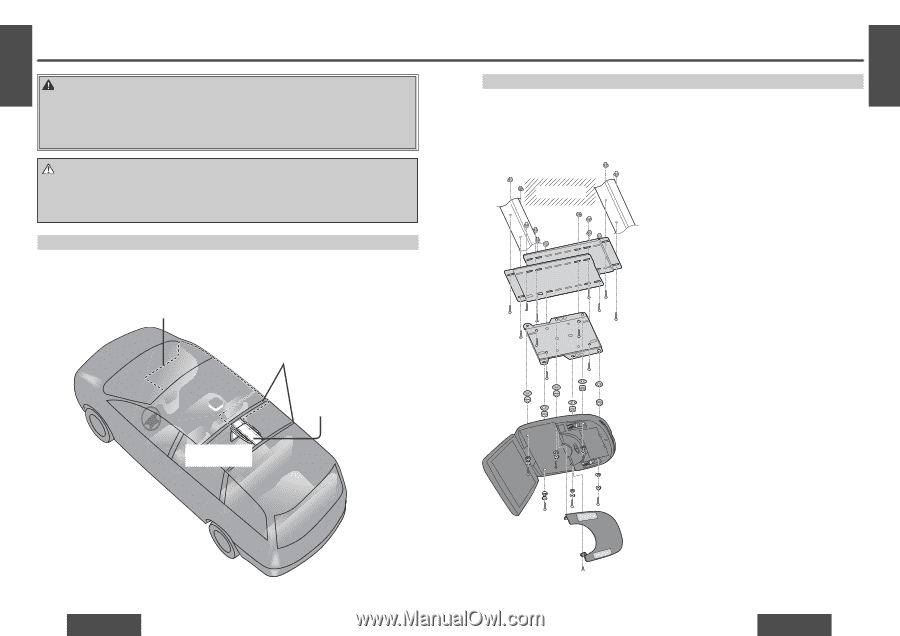
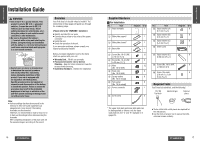
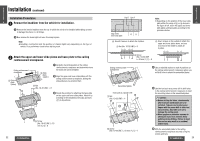
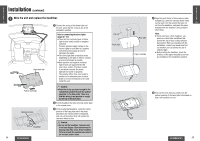
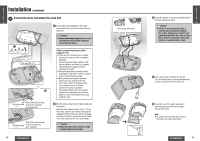
E N Installation G L I S H WARNING: 7 Have a professional technician wire and install the product. Professional skill and experience is required to wire and install the product. Improper installation could result in failure of safety equipment resulting in accident and injury. For safety's sake, always ask the store from which you purchased the product to install and wire it for you. Caution: ≥ Wear gloves for installation work to protect yourself from injuries. Failure to heed this caution may result in an accident and/or injury. ≥ Wear goggles or protective eyewear to shield your eyes from airborne metal particles during drilling. Failure to heed this caution may result in an accident and/or injury. Introduction A sample installation is shown below for your reference. First remove the headliner. Next, firmly attach the included upper and lower slide plates and base plate to the two ceiling reinforcement crosspieces. Finally replace the headliner as it was and attach the main unit. Wiring Ceiling reinforcement crosspieces Slide plate (upper), slide plate (lower), base plate CY-VHD9401U/ CY-VHD9401L E N G L I Work Flow S H Note: There are five main steps to install the main unit. 8 ≥ The figure below shows installation in a simplified For each step, follow the detailed procedures on way. Do not rely on this figure alone as the basis page 22`29. for installation. Instead, be sure to follow the procedure on the following pages. Ceiling panel 1 Ceiling reinforcement Remove the headliner from the vehicle for installation crosspieces (page 22). 2 Attach the upper and lower slide plates and base plate to the ceiling reinforcement crosspieces (page 22, 23). 3 Wire the unit and replace the headliner (page 24, 25). 4 Get ready to attach the main unit (page 26, 27). 5 Connect the wires and attach the main unit (page 28, 29). CY-VHD9401U/ CY-VHD9401L Front cover 20 CY-VHD9401U/L CY-VHD9401U/L 21
-
 1
1 -
2
-
3
-
4
-
5
-
 6
6 -
 7
7 -
 8
8 -
 9
9 -
 10
10 -
 11
11 -
 12
12 -
 13
13 -
 14
14 -
 15
15 -
 16
16 -
17
-
18
-
19
-
20
-
21
-
22
-
23
-
24
-
25
-
26
-
27
-
28
-
29
-
30
-
31
-
32
-
33
-
34
-
35
-
36
-
37
-
38
-
39
-
40
-
41
 |
 |