Panasonic SLPR300 SLPR300 User Guide - Page 12
INSERTING THE BATTERIES, USING THE REMOTE CONTROL, battery polarities with the markings
 |
View all Panasonic SLPR300 manuals
Add to My Manuals
Save this manual to your list of manuals |
Page 12 highlights
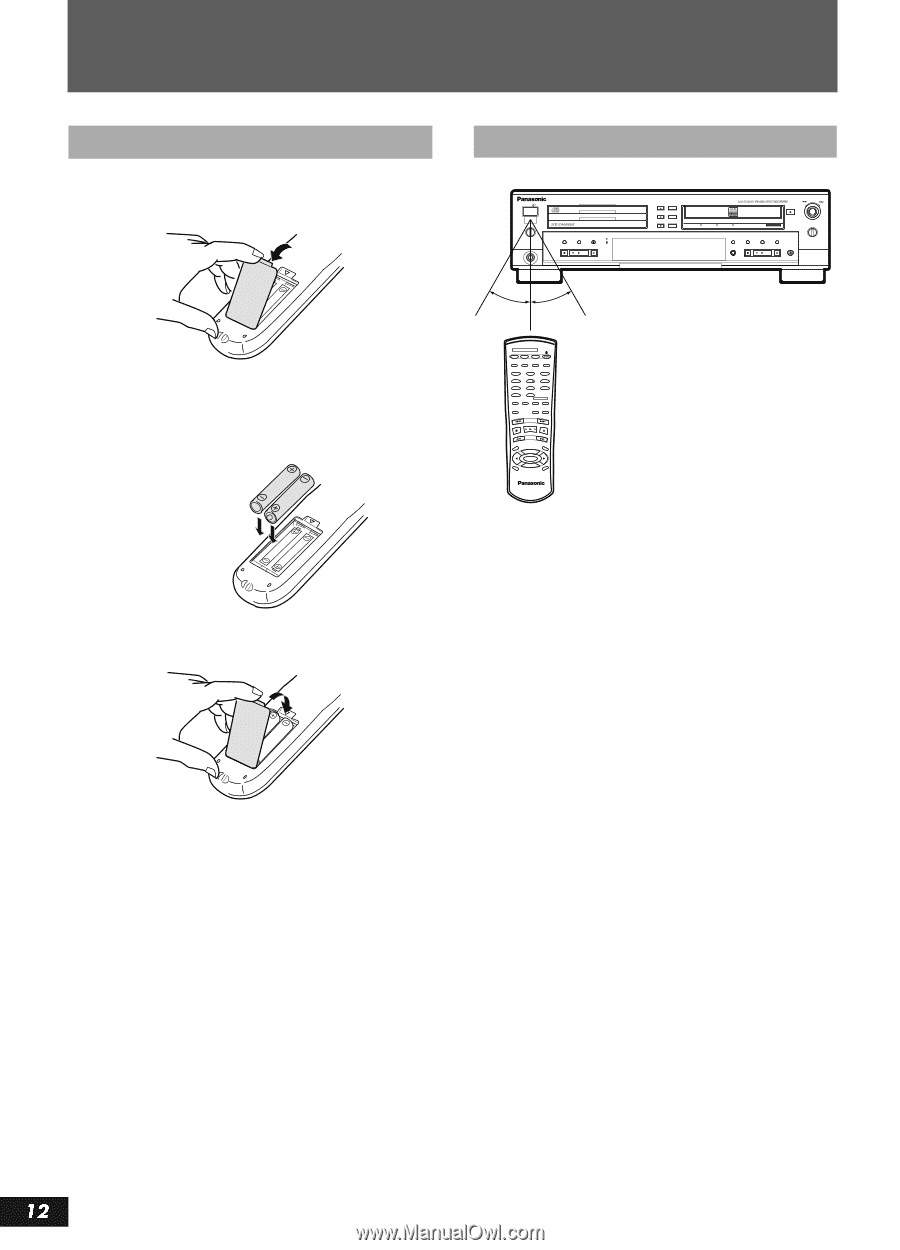
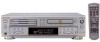
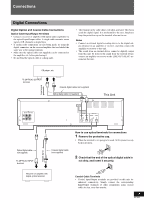
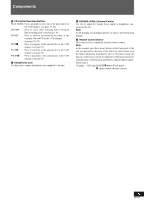
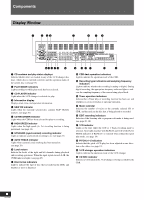
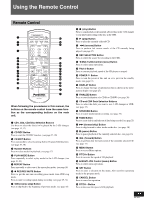
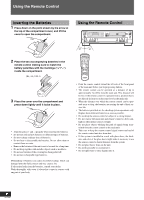
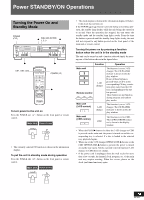
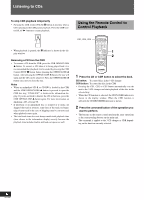
Using the Remote Control Inserting the Batteries 1 Press down on the point shown by the arrow at the top of the compartment cover, and lift the cover to open the compartment. Using the Remote Control POWER COMPACT DISC RECORDER SL-PR300 PHONES MIN MAX PLAY MODE CD EDIT CD REC DISC 3 DISC 2 DISC 1 OPEN / CLOSE DISC SELECTOR 3 2 1 OPEN / CLOSE MULTI JOG REC LEVEL - + DIGITAL CD LINE REC SELECTOR SYNCHRO FINALIZE MENU SET CANCEL REC/ REC MUTE MIX BALANCE LINE CD 2 Place the two accompanying batteries in the remote control making sure to match the battery polarities with the markings ("+"/"-") inside the compartment. (R6, AA, UM-3) 3 Place the cover over the compartment and press down lightly until it locks in place. • Align the poles (+ and -) properly when inserting the batteries. • Do not mix old and new batteries or different types of batteries. • Do not recharge ordinary dry cell batteries. • Do not heat or disassemble the batteries. Do not allow them to contact flame or water. • Remove the batteries if the unit is not to be used for a long time. • Do not keep together with metallic objects such as necklaces. • Do not use batteries if the covering has been peeled off. • Do not use rechargeable type batteries. Mishandling of batteries can cause electrolyte leakage which can damage items the fluid contacts and may cause a fire. If electrolyte leaks from the batteries, consult your dealer. Wash thoroughly with water if electrolyte comes in contact with any part of your body. 30° 30° DISC SELECTOR CD1 CD2 CD3 CD REC CD EDIT FINALIZE DISPLAY 1 2 3 4 5 6 7 8 9 0 PLAY MODE >_10 CONTROL REPEAT CD CD-R/RW •REC REC MUTE FADE SYNCHRO RSEECLECTOR PITCH+ SET PITCH 0 PITCH- MENU CANCEL COMPACT DISC RECORDER RAK-PR300 • Point the remote control toward the left side of the front panel of the main unit before you begin pressing buttons. • The remote control can be operated at a distance of up to approximately 7m (23ft) from the main unit. This distance will be less if the remote control is operated from a position that is not directly in front or on the same level as the main unit. • When the distance over which the remote control can be operated starts to drop, the batteries are nearing the end of their service life. • The batteries provided are for checking system operations only. Replace them with new batteries as soon as possible. • Do not drop the remote control or subject it to strong impact. • Do not expose the main unit and remote control to direct sun- light or other intense sources of light. • Do not place objects blocking the path of signals being trans- mitted from the remote control to the main unit. • Take care to keep the remote control signal sensor and end of the remote control unit free from dust. • If this system is installed in a rack with glass doors, the thick- ness and color of the glass doors might make it necessary to use the remote control a shorter distance from the system. • Do not place heavy items on the unit. • Do not disassemble or reconstruct it. • Do not spill water or other liquids onto it. RQT6087
-
 1
1 -
2
-
3
-
4
-
5
-
6
-
 7
7 -
 8
8 -
 9
9 -
 10
10 -
 11
11 -
 12
12 -
 13
13 -
 14
14 -
 15
15 -
 16
16 -
 17
17 -
18
-
19
-
20
-
21
-
22
-
23
-
24
-
25
-
26
-
27
-
28
-
29
-
30
-
31
-
32
-
33
-
34
-
35
-
36
-
37
-
38
-
39
-
40
-
41
-
42
-
43
-
44
-
45
-
46
-
47
-
48
-
49
-
50
 |
 |