Panasonic SLPR300 SLPR300 User Guide - Page 33
Synchronized Recording From External Sources, Space Off.
 |
View all Panasonic SLPR300 manuals
Add to My Manuals
Save this manual to your list of manuals |
Page 33 highlights
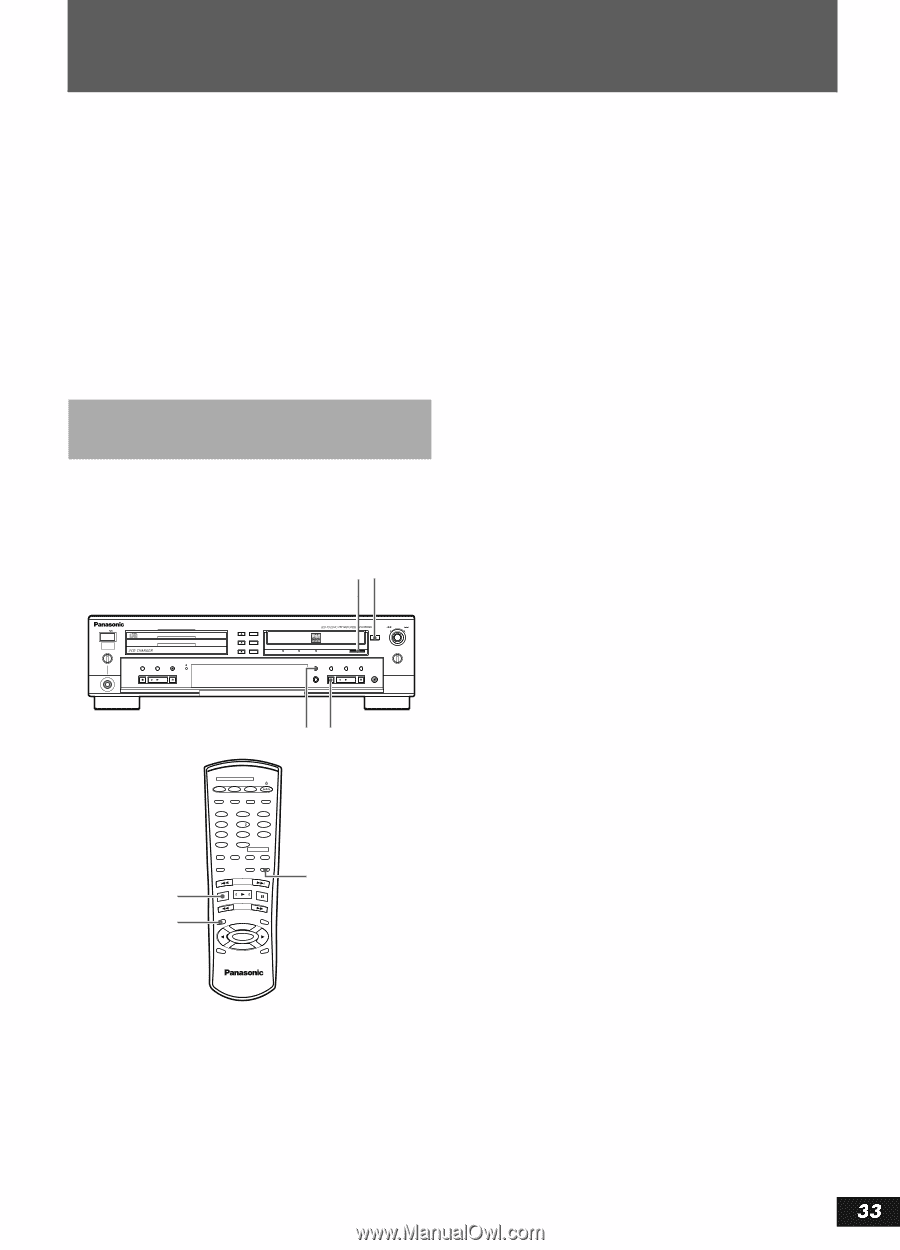
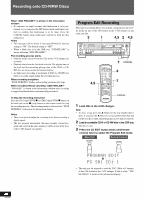
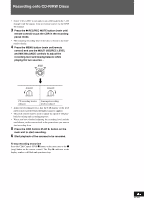
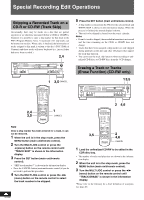
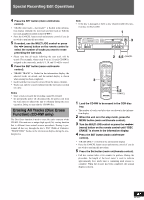
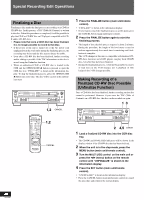
English Recording onto CD-R/RW Discs 4 Turn the MULTI JOG control or press the P/p (menu) button on the remote control and choose the setting "TR SPACE ON" or "TR SPACE OFF". • Press the CANCEL button (main unit/remote control) to cancel the procedure and return to the normal display. 5 Press the SET button. Notes • There is no indicator to show the status of this function. • This function will work when you begin recording from the recording pause mode except when performing synchronized one-button recording. Synchronized Recording from External Sources This unit offers the ability to record from various external sources to the CDR using synchronized START and START&STOP functions. This feature is applicable to external digital audio equipment connected via the DIGITAL IN OPTICAL and COAXIAL terminals and the LINE IN (REC) terminal. 21 POWER COMPACT DISC RECORDER SL-PR300 PHONES MIN MAX PLAY MODE CD EDIT CD REC DISC 3 DISC 2 DISC 1 OPEN / CLOSE DISC SELECTOR 3 2 1 OPEN / CLOSE MULTI JOG REC LEVEL - + DIGITAL CD LINE REC SELECTOR SYNCHRO FINALIZE MENU SET CANCEL REC/ REC MUTE MIX BALANCE LINE CD 3s s 2 DISC SELECTOR CD1 CD2 CD3 CD REC CD EDIT FINALIZE DISPLAY 1 2 3 4 5 6 7 8 9 0 PLAY MODE >_10 CONTROL REPEAT CD CD-R/RW •REC REC MUTE FADE SYNCHRO RSEECLECTOR PITCH+ SET PITCH 0 PITCH- MENU CANCEL COMPACT DISC RECORDER RAK-PR300 3 • Synchronized recording to the CDR from an external source. 1 Load a recordable CD-R or CD-RW disc in the CDR tray. • The disc is read if required. 2 Press the REC SELECTOR button on the main unit or the remote control repeatedly to select the recording source. • Each press of the selection button on either the main unit or remote control, toggles one step through the following source choices. OPTICAL IN: Record digital signals via the OPTI- CAL terminal. COAXIAL IN: Record via the COAXIAL terminal. CD DIGITAL: Record digital signals from 3-CD changer. CD ANALOG: Record analog signals from 3-CD changer. LINE IN: Record via the LINE IN terminal. CD+LINE MIX: Record via 3-CD changer and LINE mix. 3 Press the SYNCHRO button (main unit/remote control). • The CDR is put into the synchronized recording pause mode. • The source device must be stopped at this time. 4 Start playing of the source unit Notes • When recording with the SYNCHRO button, recording starts when the input level is detected. If the track starts very quietly (with a low input level), the beginning of the track may not be recorded. When recording from an analog source, such as records or tapes, recording may not start if the recording level is too low. When this occurs, please perform manual recording. Performing synchronized recording of a digital source • Recording is started based on the digital signal. • Track marking is based on track information recorded in the digital signal. For digital sources other than CD, MD and DAT, track marking is based on silent track space. Performing synchronized recording of an analog source • Recording is started when the unit detects an audio signal. • Track marking is based on silent track space which the unit interprets to be track breaks. If automatic track marking has been turned off, manual track marking is necessary during the recording process. To stop recording at any time Press the CDR Control STOP s button on the main unit or the s (stop) button on the remote control. !! RQT6087
-
 1
1 -
2
-
3
-
4
-
5
-
6
-
7
-
8
-
9
-
10
-
11
-
12
-
13
-
14
-
15
-
16
-
17
-
18
-
19
-
20
-
21
-
22
-
23
-
24
-
25
-
26
-
27
-
 28
28 -
 29
29 -
 30
30 -
 31
31 -
 32
32 -
 33
33 -
 34
34 -
 35
35 -
 36
36 -
 37
37 -
 38
38 -
39
-
40
-
41
-
42
-
43
-
44
-
45
-
46
-
47
-
48
-
49
-
50
 |
 |