Panasonic SLPR300 SLPR300 User Guide - Page 26
Synchronized Recording Of 3-cd Changer Playback, Auto Tr On.
 |
View all Panasonic SLPR300 manuals
Add to My Manuals
Save this manual to your list of manuals |
Page 26 highlights
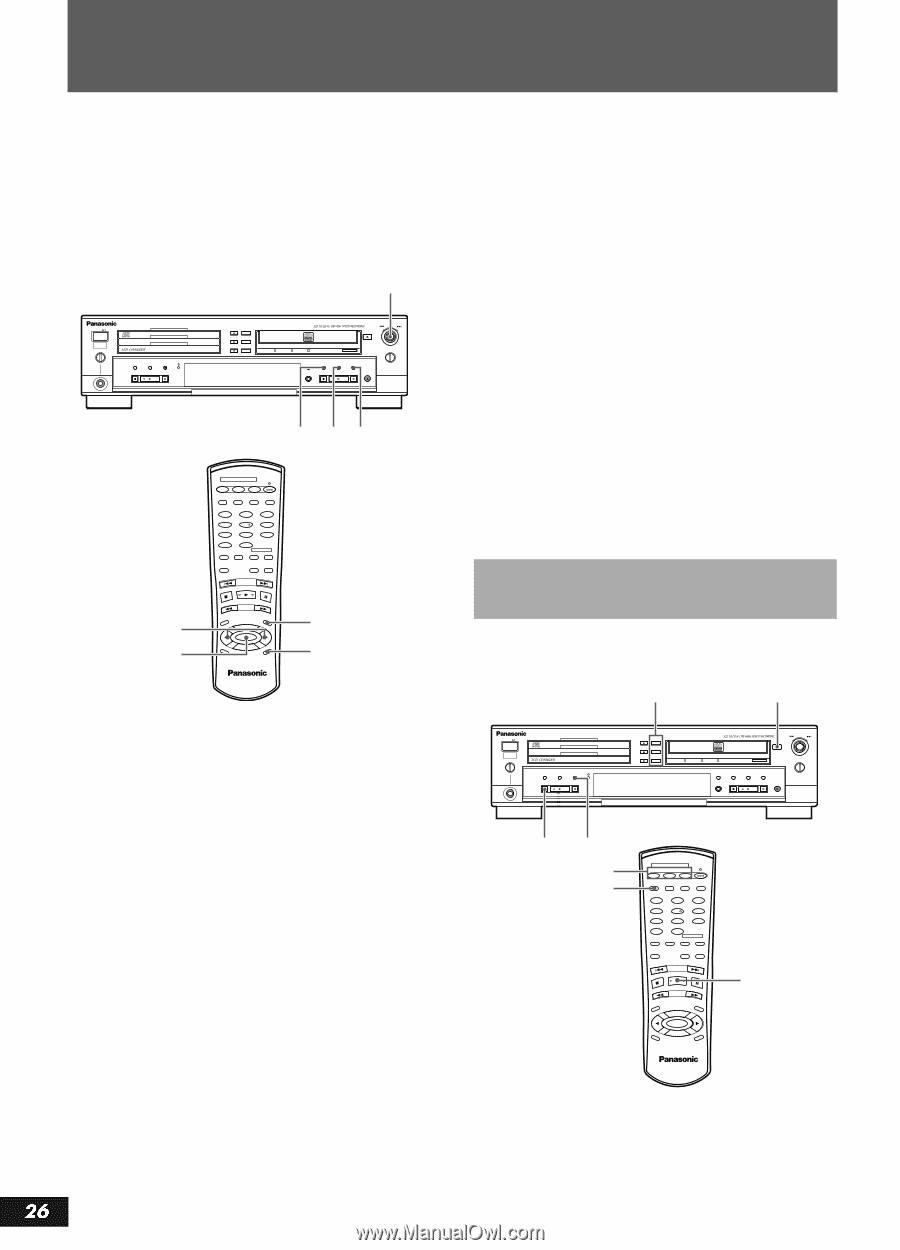
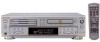
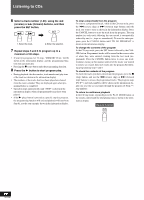
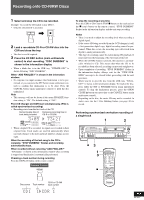
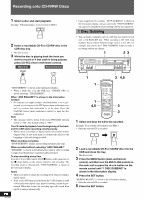
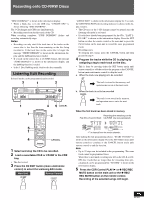
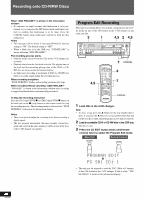
Recording onto CD-R/RW Discs AUTO TRACK function off • Manual track marking offers you the flexibility of placing track marks anywhere you like in the recording. • Manual track marking is not possible when the AUTO TRACK function is on. To add track marks automatically 2,4 POWER COMPACT DISC RECORDER SL-PR300 PHONES MIN MAX PLAY MODE CD EDIT CD REC DISC 3 DISC 2 DISC 1 OPEN / CLOSE DISC SELECTOR 3 2 1 OPEN / CLOSE MULTI JOG REC LEVEL - + DIGITAL CD LINE REC SELECTOR SYNCHRO FINALIZE MENU SET CANCEL REC/ REC MUTE MIX BALANCE LINE CD 1 3,5 CANCEL DISC SELECTOR CD1 CD2 CD3 CD REC CD EDIT FINALIZE DISPLAY 1 2 3 4 5 6 7 8 9 0 PLAY MODE >_10 CONTROL REPEAT CD CD-R/RW •REC REC MUTE FADE SYNCHRO 2,4 3,5 RSEECLECTOR PITCH+ SET PITCH 0 PITCH- MENU CANCEL COMPACT DISC RECORDER RAK-PR300 1 CANCEL 1 When the unit is in the stop mode, press the MENU button (main unit/remote control). 2 Turn the MULTI JOG control or press the P/p (menu) button on the remote control until "AUTO TRACK" is shown in the information display. 3 Press the SET button (main unit/remote control). 4 Turn the MULTI JOG control or press the P/p (menu) button on the remote control to select "AUTO TR ON". • "ON" will flash in the information display. (The default setting for this function is on.) 5 Press the SET button (main unit/remote control). • The AUTO TRACK indicator is now shown in the display window. • Press the CANCEL button (main unit/remote control) to cancel the procedure and return to the normal display. Note • In order to prevent the beginning of a song from being cutoff when changing tracks, digital sources provide a safety variance of 12 frames and analog sources 19 frames. $ RQT6087 To add track marks manually 1 Follow the procedure written for selecting the AUTO TRACK function, but in step 4, select AUTO TR OFF. 2 Press the SET button (main unit/remote control). • The AUTO TRACK indicator in the display window will turn off. • Press the CANCEL button (main unit/remote control) to cancel the procedure and return to the normal display. 3 During recording, press the SET button (main unit/remote control) to insert a track mark. Notes • Even if automatic track marking is turned off, automatic track marking will be performed during synchronized one-button recording. When this occurs, manual track marking is temporarily disabled. • Tracks must be at least four seconds in length. Pressing the SET button less than four seconds after the previous track mark creates a new track mark once 4 seconds of recording has been performed. . Synchronized Recording of 3-CD Changer Playback Performing synchronized one-button recording of one entire CD 1 2 POWER COMPACT DISC RECORDER SL-PR300 PHONES MIN MAX PLAY MODE CD EDIT CD REC DISC 3 DISC 2 DISC 1 OPEN / CLOSE DISC SELECTOR 3 2 1 OPEN / CLOSE MULTI JOG REC LEVEL - + DIGITAL CD LINE REC SELECTOR SYNCHRO FINALIZE MENU SET CANCEL REC/ REC MUTE MIX BALANCE LINE CD 13 1 3 DISC SELECTOR CD1 CD2 CD3 CD REC CD EDIT FINALIZE DISPLAY 1 2 3 4 5 6 7 8 9 0 PLAY MODE >_10 REPEAT CONTROL CD CD-R/RW •REC REC MUTE FADE SYNCHRO RSEECLECTOR PITCH+ SET PITCH 0 PITCH- MENU CANCEL COMPACT DISC RECORDER RAK-PR300 1 Note • It is only possible to record from a CD loaded in the 3-CD changer using this feature.
-
 1
1 -
2
-
3
-
4
-
5
-
6
-
7
-
8
-
9
-
10
-
11
-
12
-
13
-
14
-
15
-
16
-
17
-
18
-
19
-
20
-
 21
21 -
 22
22 -
 23
23 -
 24
24 -
 25
25 -
 26
26 -
 27
27 -
 28
28 -
 29
29 -
 30
30 -
 31
31 -
32
-
33
-
34
-
35
-
36
-
37
-
38
-
39
-
40
-
41
-
42
-
43
-
44
-
45
-
46
-
47
-
48
-
49
-
50
 |
 |