Pfaff creative stylist MN 110 Manual - Page 12
Thread Stand Assembly
 |
View all Pfaff creative stylist MN 110 manuals
Add to My Manuals
Save this manual to your list of manuals |
Page 12 highlights
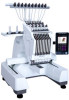
THREAD STAND ASSEMBLY Assemble the thread rack by inserting a spool pin in each hole. Put a sponge cushion onto each spool pin. If needed, put a plastic thread reel onto each spool pin. The plastic thread reels are used to help keep the thread spool in place as the machine runs and/or when using larger spools. ATTACHING THE THREAD STAND TO THE MACHINE 1 1. Loosen the lower screws (A) on the thread stand columns. Lift off the thread stand. A 2. Remove the lower lock nuts (B) on the thread stand columns. Place the thread rack onto the thread stand columns. Replace and tighten the lower lock nuts (B) to the thread stand columns. If needed, also tighten the upper lock nuts (C). 3. Put the assembled thread stand back onto the machine. Tighten the lower screws (A) on the thread 2 stand columns to secure the thread rack. Loosen the upper screws (D) on the thread stand columns to adjust the height of the thread stand columns. C B 3 D 12 - PREPARATIONS
-
 1
1 -
2
-
3
-
4
-
5
-
6
-
 7
7 -
 8
8 -
 9
9 -
 10
10 -
 11
11 -
 12
12 -
 13
13 -
 14
14 -
 15
15 -
 16
16 -
 17
17 -
18
-
19
-
20
-
21
-
22
-
23
-
24
-
25
-
26
-
27
-
28
-
29
-
30
-
31
-
32
-
33
-
34
-
35
-
36
-
37
-
38
-
39
-
40
-
41
-
42
-
43
-
44
-
45
-
46
-
47
-
48
-
49
-
50
-
51
-
52
-
53
-
54
-
55
-
56
 |
 |
