Pfaff creative stylist MN 110 Manual - Page 21
Flat Hoop Support
 |
View all Pfaff creative stylist MN 110 manuals
Add to My Manuals
Save this manual to your list of manuals |
Page 21 highlights
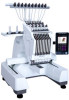
FLAT HOOP SUPPORT Your embroidery machine comes with a flat hoop support, 4 hoops and a cap attachment (see overview on page 10). Before embroidering with any of the hoops, the flat hoop support must be attached to the embroidery arm. Adjust the support to fit to the different hoop sizes. 1 ATTACHING THE FLAT HOOP SUPPORT • Install the flat hoop support (1) by aligning the holes on the frame (2) with the dowels on the embroidery arm connecting plate (3). • Secure the flat hoop support to the embroidery arm connecting plate with the two M4x8 screws provided (4). REMOVING THE FLAT HOOP SUPPORT Loosen and remove the two screws (4). Lift off the flat hoop support and put it aside. Once removed, keep the flat hoop support away from any part of the embroidery machine. ADJUSTING THE WIDTH OF THE FLAT HOOP SUPPORT The width of the flat hoop support can be adjusted to fit each embroidery hoop. Move the left arm of 1 the flat hoop support to the right/left to adjust the width. Make sure that the flat hoop support does not collide with the 10 needle bar rack or any other part of the embroidery machine. • Select the hoop you will use. • Loosen the two screws (1) on the flat hoop support by turning them counterclockwise. Do not remove the screws. • Adjust the width of the flat hoop support to fit the hoop by pushing it to the right or left (2). 2 • Retighten the screws to secure the width of the flat hoop support. POSITIONING THE FLAT HOOP SUPPORT To position the flat hoop support to fit the differentsized hoops, place the hoop you will use and move the left arm to the right until it reaches the side of the hoop. The hoop should fit into the flat hoop support tightly to ensure the hoop is secure as the machine stitches. 3 2 4 PREPARATIONS - 21
-
 1
1 -
2
-
3
-
4
-
5
-
6
-
7
-
8
-
9
-
10
-
11
-
12
-
13
-
14
-
15
-
 16
16 -
 17
17 -
 18
18 -
 19
19 -
 20
20 -
 21
21 -
 22
22 -
 23
23 -
 24
24 -
 25
25 -
 26
26 -
27
-
28
-
29
-
30
-
31
-
32
-
33
-
34
-
35
-
36
-
37
-
38
-
39
-
40
-
41
-
42
-
43
-
44
-
45
-
46
-
47
-
48
-
49
-
50
-
51
-
52
-
53
-
54
-
55
-
56
 |
 |
