Pfaff creative stylist MN 110 Manual - Page 16
Bobbin Overview, Placing The Bobbin In, The Bobbin Case
 |
View all Pfaff creative stylist MN 110 manuals
Add to My Manuals
Save this manual to your list of manuals |
Page 16 highlights
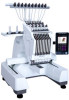
BOBBIN OVERVIEW 1 1. Bobbin 6 2. Tension spring 3. Opening 5 4. Bobbin case 5. Bobbin case release latch 2 6. Thread guide/Pig tail 3 4 • An "L" size/style bobbin must be used for your embroidery machine. • The bobbin case can be found in the tool box. • Remove the foam piece in the rotary hook before use. • The embroidery machine will not indicate remaining quantity of bobbin thread. Before starting your embroidery, make sure sufficient bobbin thread for the embroidery design. • If the bobbin runs out of thread, the embroidery machine will display a thread break ("T-break") notification. See the Thread break section for more information. • On average, bobbins usually last for about 35,000 to 42,000 stitches depending on the stitch length of your design. • Clean the bobbin case when replacing the bobbin. • Open the needle plate and clean the trimming set area weekly. • Wind self-wound bobbins or buy pre-wound commercial bobbins in disposable cartridges. • For a high speed, commercial embroidery machine, a smooth and consistent release of thread is required for proper function. Commercial pre-wound bobbins are economical and they run smoothly. It is better to run a polyester bobbin, than a cotton bobbin because it leaves less lint. PLACING THE BOBBIN IN 1 THE BOBBIN CASE Inserting your bobbin correctly will help your embroidery machine run smoothly. An issue with the bobbin thread affects all needle bars. 2 • Hold the bobbin with the thread in the clockwise direction (1). • Insert the bobbin into the bobbin case (2). • Pass the thread through the opening slit (3). • Pull the bobbin thread under the tension arm and exit the notch at the other end (4). 3 • Turn the bobbin over, and pull on the thread. Make sure the bobbin rotates in a clockwise direction. 4 5 • Wrap the thread around the pigtail twice (5). 16 - PREPARATIONS
-
 1
1 -
2
-
3
-
4
-
5
-
6
-
7
-
8
-
9
-
10
-
 11
11 -
 12
12 -
 13
13 -
 14
14 -
 15
15 -
 16
16 -
 17
17 -
 18
18 -
 19
19 -
 20
20 -
 21
21 -
22
-
23
-
24
-
25
-
26
-
27
-
28
-
29
-
30
-
31
-
32
-
33
-
34
-
35
-
36
-
37
-
38
-
39
-
40
-
41
-
42
-
43
-
44
-
45
-
46
-
47
-
48
-
49
-
50
-
51
-
52
-
53
-
54
-
55
-
56
 |
 |
