Pfaff creative stylist MN 110 Manual - Page 24
Cap Hoop
 |
View all Pfaff creative stylist MN 110 manuals
Add to My Manuals
Save this manual to your list of manuals |
Page 24 highlights
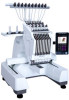
CAP HOOP There is a special accessory allowing you to embroider on caps. There is a cap hoop (1), a cap driver (2) (placed on the machine) and one cap station (3) (placed on a table for easier hooping). CAP DRIVER INSTALLATION Tools & Parts: • 1 cap driver • 2 4x8 screws • 1 screwdriver 1. Remove the flat hoop support (page 21). 2. Position the cap driver in-line with the railing (located on the bottom of the embroidery arm). 3. Place the cap driver around the free arm aligning the wheels of the hoop (1) with the rail under the free arm (2). 4. Push the cap driver towards the embroidery arm. 5. Align the two sets of holes on the embroidery arm railing with the holes on the cap driver. 6. Match the set of holes on the cap driver with the metal dowels on the embroidery arm (3). 7. Insert and tighten a screw in the other two holes (4). 9. Make sure the cap driver is tightly secured. CAP STATION INSTALLATION 1. Select a location to clamp your cap station onto. 2. Twist the knob counterclockwise to separate the knob from the cap station device. 3. Make sure enough room is available to fit the width of your desired location. 4. Slide the cap station onto your desired location. 5. Twist the knob clockwise to tighten the grip of the cap station to the desired location. 6. Make sure the cap station is securely attached to the desired location. For a more permanent solution, screw the cap station onto a table through the provided holes. To decrease wear and tear, it may be helpful to insert a piece of cardboard or cloth between the clamps and the table's edge. 24 - PREPARATIONS 1 2 1 3 2 3 4
-
 1
1 -
2
-
3
-
4
-
5
-
6
-
7
-
8
-
9
-
10
-
11
-
12
-
13
-
14
-
15
-
16
-
17
-
18
-
 19
19 -
 20
20 -
 21
21 -
 22
22 -
 23
23 -
 24
24 -
 25
25 -
 26
26 -
 27
27 -
 28
28 -
 29
29 -
30
-
31
-
32
-
33
-
34
-
35
-
36
-
37
-
38
-
39
-
40
-
41
-
42
-
43
-
44
-
45
-
46
-
47
-
48
-
49
-
50
-
51
-
52
-
53
-
54
-
55
-
56
 |
 |
