Pfaff creative stylist MN 110 Manual - Page 15
Assembling The Bobbin Winder, Winding The Bobbin
 |
View all Pfaff creative stylist MN 110 manuals
Add to My Manuals
Save this manual to your list of manuals |
Page 15 highlights
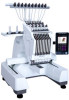
ASSEMBLING THE BOBBIN WINDER Inspect the package and device for any damages. If there are no damages, install the main engine to the bottom plate, with the two screws (1). Attach the thread guide (2) and the spool pin (3) as illustrated. 1 3 2 WINDING THE BOBBIN • Place the bobbin thread spool on the spool pin (1).Guide the thread through the thread guide 5 (2), and through the hole in the tension thread guide (3). • Place the thread between the thread tension discs under the thread tension knob.(4). • Place a bobbin on the winding motor (5) and wind a few turns of thread clockwise around it. Touch the "Start" button to start winding. The winding motor stops automatically when the bobbin is full. 43 2 1 PREPARATIONS - 15
-
 1
1 -
2
-
3
-
4
-
5
-
6
-
7
-
8
-
9
-
 10
10 -
 11
11 -
 12
12 -
 13
13 -
 14
14 -
 15
15 -
 16
16 -
 17
17 -
 18
18 -
 19
19 -
 20
20 -
21
-
22
-
23
-
24
-
25
-
26
-
27
-
28
-
29
-
30
-
31
-
32
-
33
-
34
-
35
-
36
-
37
-
38
-
39
-
40
-
41
-
42
-
43
-
44
-
45
-
46
-
47
-
48
-
49
-
50
-
51
-
52
-
53
-
54
-
55
-
56
 |
 |

PREPARATIONS –
15
ASSEMBLING THE BOBBIN WINDER
Inspect the package and device for any damages. If
there are no damages, install the main engine to the
bottom plate, with the two screws (1).
Attach the thread guide (2) and the spool pin (3) as
illustrated.
WINDING THE BOBBIN
•
Place the bobbin thread spool on the spool pin
(1).Guide the thread through the thread guide
(2), and through the hole in the tension thread
guide (3).
•
Place the thread between the thread tension
discs under the thread tension knob.(4).
•
Place a bobbin on the winding motor (5) and
wind a few turns of thread clockwise around it.
Touch the “Start” button to start winding. The
winding motor stops automatically when the
bobbin is full.
2
1
3
1
2
4
5
3