Pfaff creative stylist MN 110 Manual - Page 19
Threading The Thread Rack, Threading The Top Of The Machine, Threading The Needle Bar Frame,
 |
View all Pfaff creative stylist MN 110 manuals
Add to My Manuals
Save this manual to your list of manuals |
Page 19 highlights
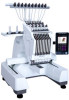
THREADING THE THREAD RACK • Place a thread spool on the spool pin at the rear right. Pull out some thread. • Pass the thread through the bottom eyelet of the rear metal rack (1). • Proceed to pull the thread through the vertical eyelet (2). • Pass the thread through the corresponding eyelet of the front metal rack (3). • Feed the thread through the eyelet of the upper tension knob (4). Pass the thread (from right to left) in between the tension plates (5). • Hold the upper end of the thread guide tube (6), and carfully remove it, by pulling it upwards and then out. Repeat with the other end of the tube. • Take the threading tool, and insert it completely into the thread guide tube. Hook the thread around the threading tool (7). • Carefully pull the threading tool (and thread) back through the tube (7). Unhook the thread. Snap the plastic tube ends back into place. Pull the thread out of the tube (enough thread to be able to continue threading down the entire thread path down to the presser foot). THREADING THE NEEDLE BAR FRAME • Pass the thread over the upper thread course (11). • Pass the thread down through the right path of the threading slot (12). Pull the thread around the bottom of the divider and bring the thread up again. • Pass the thread through the eye of the take-up lever from right to left (13), and then down through the slot again. THREADING THE NEEDLE • Lead the thread through the eylet in the needle bar (14). • Pass the thread behind the thread hook from right to left (15). • Thread the needle from front to back and then through the hole in the presser foot (16). • Pull the thread up and around the thread cutter (17), from the left to the right. THREADING THE TOP OF THE MACHINE • Guide the thread from right to left under the upper thread tension clip (8). On the machine cover, there are arrows guiding you through the correct threading path. • Thread around the thread guide as indicated by the arrows. • Turn the thread 1,5 turns around the lower thread tension knob (9). • Thread around the thread guide as indicated by the arrows. • Guide the thread from left to right under the lower thread tension clip (10). Note: For spool 1-5, thread from right to left, For spool 6-10, thread from left-right. PREPARATIONS - 19
-
 1
1 -
2
-
3
-
4
-
5
-
6
-
7
-
8
-
9
-
10
-
11
-
12
-
13
-
 14
14 -
 15
15 -
 16
16 -
 17
17 -
 18
18 -
 19
19 -
 20
20 -
 21
21 -
 22
22 -
 23
23 -
 24
24 -
25
-
26
-
27
-
28
-
29
-
30
-
31
-
32
-
33
-
34
-
35
-
36
-
37
-
38
-
39
-
40
-
41
-
42
-
43
-
44
-
45
-
46
-
47
-
48
-
49
-
50
-
51
-
52
-
53
-
54
-
55
-
56
 |
 |
