Pfaff creative stylist MN 110 Manual - Page 5
Contents
 |
View all Pfaff creative stylist MN 110 manuals
Add to My Manuals
Save this manual to your list of manuals |
Page 5 highlights
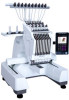
CONTENTS Quick Reference Guide/Checklist 7 INTRODUCTION 9 Embroidery machine overview 9 Front view 9 Rear view 9 Display overview 10 Embroidery hoop overview 10 Toolbox and spareparts 10 PREPARATION 11 Unpack your embroidery machine 11 Adjust and secure your embroidery machine 11 Thread stand assembly 12 Attaching the thread stand to the machine 12 Getting started 13 Turning on 13 Turning off 13 Electronic bobbin winder 14 Specifications 14 Bobbin winder overview 14 Assembling the bobbin winder 15 Winding the bobbin 15 Bobbin overview 16 Placing the bobbin in the bobbin case 16 Inserting the bobbin case into the rotary hook 17 Removing the bobbin 17 Threading the top threads 18 Threading the thread rack 19 Threading the top of the machine 19 Threading the needle bar frame 19 Threading the needle 19 Fast threading of the top thread 20 Flat hoop support 21 Attaching the flat hoop support 21 Removing the flat hoop support 21 Adjusting the width of the flat hoop support 21 Positioning the flat hoop support 21 Attaching the hoop 22 Removing the hoop 22 Hooping the fabric 23 Cap hoop 24 Cap driver installation 24 Cap station installation 24 Hooping the cap 25 Attaching the cap hoop to the cap driver 25 Removing the cap hoop from the cap driver 25 Removing the cap driver from the embroidery arm 25 Tension 26 Factors that affect thread tension 26 Check thread tension 26 Adjusting the thread tension 26 Changing the needle 27 Control panel functions 28 Start/stop 28 Trimming 28 100-Degree button 28 COLOR TOUCH SCREEN 29 The touch screen 29 Home page - overview 30 Logo selection page - overview 31 Color sequence page - overview 31 Design setting page - overview 32 Comprehensive setting page - overview 32 Importing/uploading a design 33 Selecting a design 34 Selecting an embroidery hoop 34 Selecting the color sequence 35 Color change mode 35 How to switch to color change mode 35 Needle switch display icon 36 Embroidery design trace 36 How to trace your design 36 Using float mode 37 How to float through a design 37 Offsetting the hoop on one needle 38 Setting low speed on a specific needle 38 Embroidery status 39 Tracing the embroidery area 39 Deleting a design 39 Adding a font 40
-
 1
1 -
 2
2 -
 3
3 -
 4
4 -
 5
5 -
 6
6 -
 7
7 -
 8
8 -
 9
9 -
 10
10 -
 11
11 -
12
-
13
-
14
-
15
-
16
-
17
-
18
-
19
-
20
-
21
-
22
-
23
-
24
-
25
-
26
-
27
-
28
-
29
-
30
-
31
-
32
-
33
-
34
-
35
-
36
-
37
-
38
-
39
-
40
-
41
-
42
-
43
-
44
-
45
-
46
-
47
-
48
-
49
-
50
-
51
-
52
-
53
-
54
-
55
-
56
 |
 |
