Pioneer AVH-X4800BS Owner s Manual - Page 45
Using BASS Boost
 |
View all Pioneer AVH-X4800BS manuals
Add to My Manuals
Save this manual to your list of manuals |
Page 45 highlights
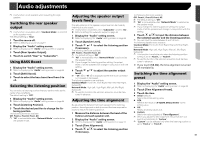
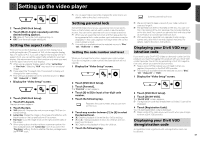
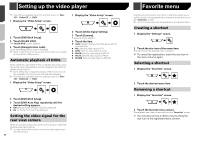
Audio adjustments p This function is not available when adjusting the High speaker. Switching the rear speaker output p This function is available when "Standard Mode" is selected as the speaker mode. The default setting is "Rear". 1 Turn the source off. Refer to Selecting a source on page 11 2 Display the "Audio" setting screen. Refer to Displaying the "Audio" setting screen on page 44 3 Touch [Rear Speaker Output]. 4 Touch to switch "Rear" or "Subwoofer". Using BASS Boost 1 Display the "Audio" setting screen. Refer to Displaying the "Audio" setting screen on page 44 2 Touch [BASS Boost]. 3 Touch to select the bass boost level from 0 to +6. Selecting the listening position You can select a listening position that you want to make as the center of sound effects. The default setting is "Off". 1 Display the "Audio" setting screen. Refer to Displaying the "Audio" setting screen on page 44 2 Touch [Listening Position]. 3 Touch the desired position to change the lis- tening position. The following items are available: Off, Front-L, Front-R, Front, All. p "All" is not available when "Network Mode" is selected as the speaker mode. Adjusting the speaker output levels finely Fine adjustments of the speaker output level can be made by listening to audio output. p This function is available when "Subwoofer" is set to "On". Refer to Setting the subwoofer output on page 44 1 Display the "Audio" setting screen. Refer to Displaying the "Audio" setting screen on page 44 2 Touch [Speaker Level]. 3 Touch or to select the listening position if necessary. The following items are available: Off, Front-L, Front-R, Front, All. p The default setting is "Off". p "All" is not available when "Network Mode" is selected as the speaker mode. p If you change the listening position setting, the output levels of all the speakers will change in conjunction with the setting. 4 Touch or to adjust the speaker output level. p "-24" dB to "10" dB is displayed as the level to be corrected is increased or decreased. The following speakers are available: Standard Mode: Front Left, Front Right, Rear Left, Rear Right, Subwoofer Network Mode: High Left, High Right, Mid Left, Mid Right, Subwoofer p To use this function, the vehicle's acoustics must be mea- sured in advance. Adjusting the time alignment By adjusting the distance from each speaker to the listening position, time alignment is able to correct the time required for sound to reach the listening position. 1 Measure the distance between the head of the listener and each speaker unit. 2 Display the "Audio" setting screen. Refer to Displaying the "Audio" setting screen on page 44 3 Touch [Time Alignment]. 4 Touch or to select the listening position if necessary. The following items are available: Off, Front-L, Front-R, Front, All. p The default setting is "Off". p "All" is not available when "Network Mode" is selected as the speaker mode. p If you change the listening position setting, the output levels of all the speakers will change in conjunction with the setting. 5 Touch or to input the distance between the selected speaker and the listening position. p You can input the value between 0 and 140 inch. The following speakers are available: Standard Mode: Front Left, Front Right, Rear Left, Rear Right, Subwoofer Network Mode: High Left, High Right, Mid Left, Mid Right, Subwoofer p This function is available only when the listening position setting is set to "Front-L" or "Front-R". p To use this function, the vehicle's acoustics must be mea- sured in advance. If you touch [TA On], the time alignment is turned off mandatorily. Switching the time alignment preset 1 Display the "Audio" setting screen. Refer to Displaying the "Audio" setting screen on page 44 2 Touch [Time Alignment Preset]. 3 Touch the item. Initial (default): Sets to the initial setting value. ATA: Reflects the result of "A-EQ&TA Measurement" to the setting value. Off: Resets all setting values to 0. Custom: Sets to the value adjusted at "Time Alignment". p When you adjust the time alignment, the preset item will switch automatically to "Custom". p "Custom" can be selected only when the listening position is set to "Front-L" or "Front-R". 45
-
 1
1 -
2
-
3
-
4
-
5
-
6
-
7
-
8
-
9
-
10
-
11
-
12
-
13
-
14
-
15
-
16
-
17
-
18
-
19
-
20
-
21
-
22
-
23
-
24
-
25
-
26
-
27
-
28
-
29
-
30
-
31
-
32
-
33
-
34
-
35
-
36
-
37
-
38
-
39
-
 40
40 -
 41
41 -
 42
42 -
 43
43 -
 44
44 -
 45
45 -
 46
46 -
 47
47 -
 48
48 -
 49
49 -
 50
50 -
51
-
52
-
53
-
54
-
55
-
56
-
57
-
58
-
59
-
60
-
61
-
62
-
63
-
64
-
65
-
66
-
67
-
68
-
69
-
70
-
71
-
72
-
73
-
74
-
75
-
76
-
77
-
78
-
79
-
80
-
81
-
82
-
83
-
84
-
85
-
86
-
87
-
88
-
89
-
90
-
91
-
92
-
93
-
94
-
95
-
96
-
97
-
98
-
99
-
100
-
101
-
102
-
103
-
104
-
105
-
106
-
107
-
108
-
109
-
110
-
111
-
112
-
113
-
114
-
115
-
116
-
117
-
118
-
119
-
120
-
121
-
122
-
123
-
124
-
125
-
126
-
127
-
128
-
129
-
130
-
131
-
132
-
133
-
134
-
135
-
136
-
137
-
138
-
139
-
140
-
141
-
142
-
143
-
144
-
145
-
146
-
147
-
148
-
149
-
150
-
151
-
152
-
153
-
154
-
155
-
156
-
157
-
158
-
159
-
160
-
161
-
162
-
163
-
164
-
165
-
166
-
167
-
168
-
169
-
170
-
171
-
172
-
173
-
174
-
175
-
176
-
177
-
178
-
179
-
180
-
181
-
182
-
183
-
184
-
185
-
186
-
187
-
188
-
189
-
190
-
191
-
192
-
193
-
194
-
195
-
196
-
197
-
198
-
199
-
200
-
201
-
202
-
203
-
204
-
205
-
206
-
207
-
208
-
209
-
210
-
211
-
212
-
213
-
214
-
215
-
216
 |
 |
