Pioneer DRM-1004 Operating Instructions - Page 4
Acontents
 |
View all Pioneer DRM-1004 manuals
Add to My Manuals
Save this manual to your list of manuals |
Page 4 highlights
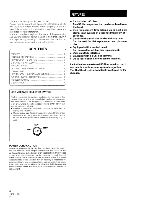
FEATURES Thank you for buying this Pioneer product. Please read through these operating instructions so you will know how to operate your model properly. After you have finished reading the instructions, put them away in a safe place for future reference. In some countries or regions, the shape of the power plug and power outlet may sometimes differ from that shown in the explanatory drawings. However, the method of connecting and operating the unit is the same. CONTENTS FEATURES 4 HANDLING PRECAUTIONS 5 HOW TO LOCK THE CASTERS 6 CHECKING THE ACCESSORIES 6 PANEL FACILITIES 7 OPTIONAL DRIVE AND INSTALLATION 8 CONNECTIONS 9 HOW TO INSTALL OR EXCHANGING DISCS 10 FUNCTION SWITCH DESCRIPTION 13 TROUBLESHOOTING 14 SPECIFICATIONS 15 • Capacity for 100 discs Two 50 disc magazines that can be replaced from the front. • Disc replacement time (clamp up to next disk clamp) is an average of 5 seconds (maximum of 7 seconds). • Comes with a mail slot (horizontal tray type) Can be used for disk replacement and plus one disc. • Equipped with a control panel. Can be used for off-line disc replacement. • Uses an SCSI2 interface • Equipped with a SCSI bus terminal • Up to four optional drives can be installed. Each drive has an external SCSI terminal so that it can handle multi-purpose system integration. The ID of the drive is automatically confirmed by the changer. LINE VOLTAGE SELECTOR SWITCH The line voltage selector switch is located on the rear panel of this changer. Check that it is set properly before plugging the power cord into the outlet. If the voltage is not properly set or if you move to an area where the voltage requirements differ, adjust the selector switch as follows: • Be sure to disconnect the power cord from its outlet before making this adjustment. • Use a medium-size (flat blade) screwdriver. Insert the tip of the screwdriver into the groove of the selector switch and turn it so that the arrow points to the power voltage making of your area. 120V 100y 230V POWER-CORD CAUTION Handle the power cord by the plug. Do not pull out the plug by tugging the cord and never touch the power cord when your hands are wet as this could cause a short circuit or an electric shock. Do not place the unit, a piece of furniture, etc., on the power cord, or pinch the cord. Never make a knot in the cord or tie it with other cords. The power cords should be routed such that they are not likely to be stepped on. A damaged power cord can cause a fire or give you an electrical shock. Check the power cord once in a while. When you find it damaged, ask your nearest PIONEER authorized service center or your dealer for a replacement. 4 En
-
 1
1 -
 2
2 -
 3
3 -
 4
4 -
 5
5 -
 6
6 -
 7
7 -
 8
8 -
 9
9 -
 10
10 -
11
-
12
-
13
-
14
-
15
-
16
-
17
-
18
-
19
-
20
-
21
-
22
-
23
-
24
-
25
-
26
-
27
-
28
-
29
-
30
-
31
-
32
-
33
-
34
-
35
-
36
-
37
-
38
-
39
-
40
-
41
-
42
-
43
-
44
-
45
-
46
-
47
-
48
-
49
-
50
-
51
-
52
 |
 |
