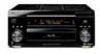
Pioneer VSX-55TXi Owner's Manual - Page 30
Displays and Controls
 |
View all Pioneer VSX-55TXi manuals
Add to My Manuals
Save this manual to your list of manuals |
Page 30 highlights
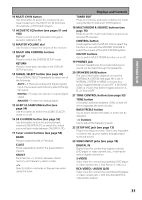
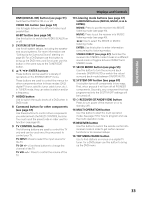
DDisipDsliapsypsllaaaynsyd&sCCooannnttrroodllss Controls Front Panel All the controls on the front panel are explained and/or referenced here. To open the front panel push gently on the lower third of the panel. 1 MULTI JOG dial You can use this dial for many purposes. When you press the SET UP button (13), you can use it to perform SYSTEM SETUP operations; select a function or a listening mode or do TUNER EDIT functions (in TUNER mode). 2 STANDBY/ON button Press to switch the receiver ON or into STANDBY mode. 3 Listening mode buttons (page 47) There are two types of SURROUND modes: MOVIE: Press to put the receiver into MOVIE mode (see page 48). MUSIC: Press to put the receiver into MUSIC mode (see page 49). STEREO/DIRECT (see page 47): Switches the receiver into STEREO mode if it was in a different sound mode or toggles between DIRECT and STEREO mode. 4 ENTER button Use this button to enter information concerning the SYSTEM SETUP, listening mode or the tuner. 5 STANDBY indicator Lights when the receiver is in STANDBY mode. (Please note that this receiver consumes a small amount of power [0.8 W] in the standby mode.) 6 Remote sensor Receives the signals from the remote control. 7 Display (see page 35) 8 MCACC indicator (see pages 13 and 51) Lights when the ACOUSTIC CAL EQ is on. (After the Auto Surround Sound Setup has been completed the ACOUSTIC CAL EQ is set on and this display will light.) 9 i.LINK indicator Lights when an i.LINK -Audio-equipped component is selected. 30
-
 1
1 -
2
-
3
-
4
-
5
-
6
-
7
-
8
-
9
-
10
-
11
-
12
-
13
-
14
-
15
-
16
-
17
-
18
-
19
-
20
-
21
-
22
-
23
-
24
-
 25
25 -
 26
26 -
 27
27 -
 28
28 -
 29
29 -
 30
30 -
 31
31 -
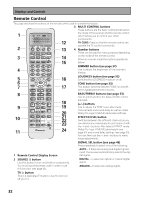 32
32 -
 33
33 -
 34
34 -
 35
35 -
36
-
37
-
38
-
39
-
40
-
41
-
42
-
43
-
44
-
45
-
46
-
47
-
48
-
49
-
50
-
51
-
52
-
53
-
54
-
55
-
56
-
57
-
58
-
59
-
60
-
61
-
62
-
63
-
64
-
65
-
66
-
67
-
68
-
69
-
70
-
71
-
72
-
73
-
74
-
75
-
76
-
77
-
78
-
79
-
80
-
81
-
82
-
83
-
84
-
85
-
86
-
87
-
88
-
89
-
90
-
91
-
92
-
93
-
94
-
95
-
96
-
97
-
98
-
99
-
100
-
101
-
102
-
103
-
104
-
105
-
106
-
107
-
108
-
109
-
110
-
111
-
112
-
113
-
114
-
115
-
116
-
117
-
118
-
119
 |
 |
