Ricoh CL3500N Quick Installation Guide - Page 1
Ricoh CL3500N - Aficio Color Laser Printer Manual
 |
UPC - 026649024344
View all Ricoh CL3500N manuals
Add to My Manuals
Save this manual to your list of manuals |
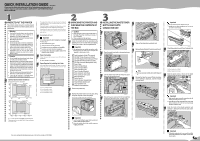
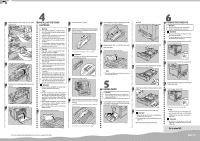
Page 1 highlights
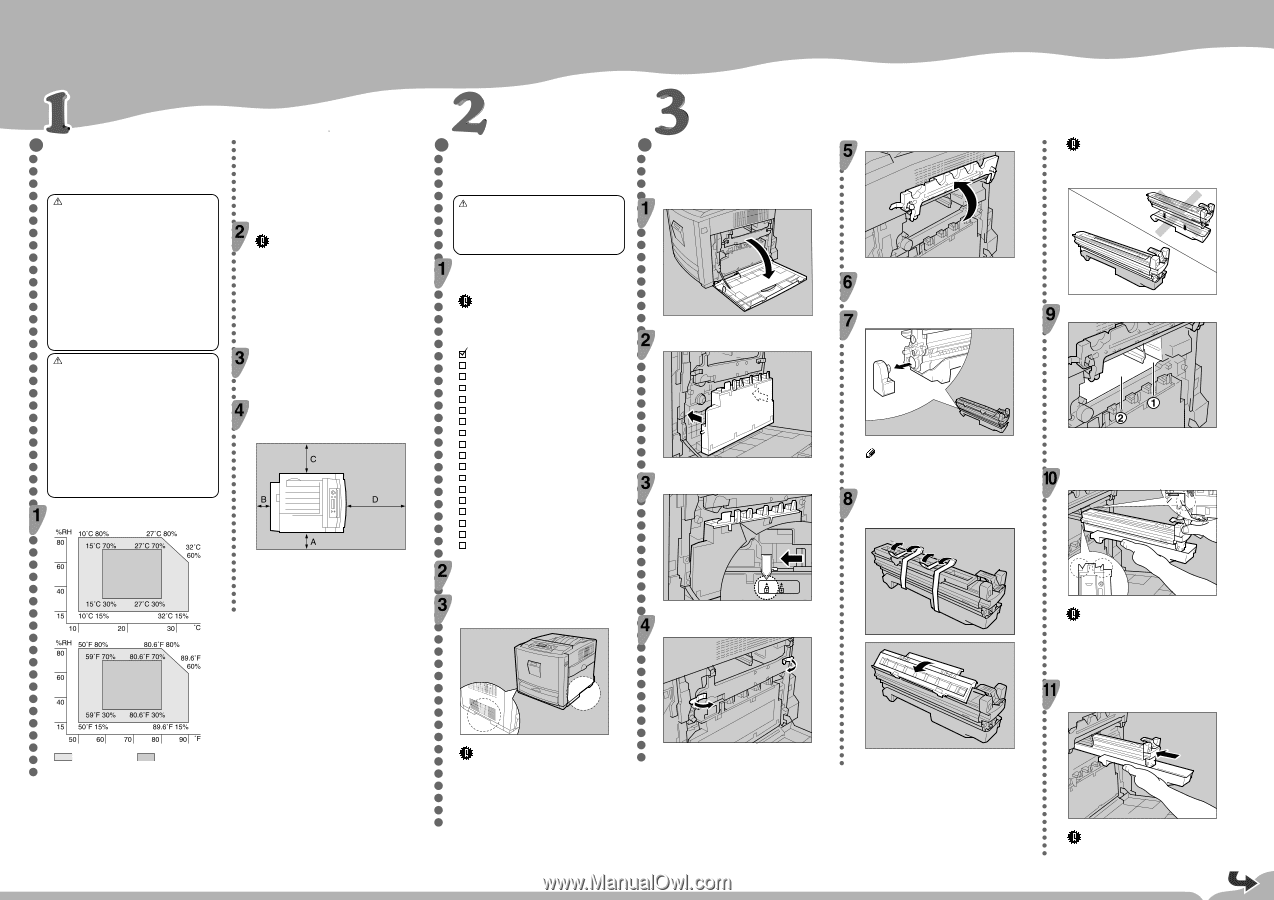
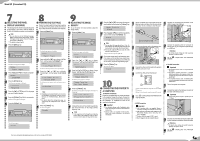
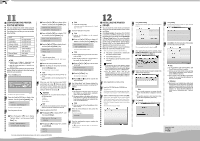
QUICK INSTALLATION GUIDE Please read the Safety Information in the Setup Guide before using this machine. It contains important information related to USER SAFETY and PREVENTING EQUIP- MENT PROBLEMS. WHERETO PUT THE PRINTER The printer's location should be carefully chosen because environmental conditions greatly affect its performance. Warning • Confirm that the wall outlet is near the machine and freely accessible, so that in event of an emergency, it can be unplugged easily. • Only connect the machine to the power source described on this manual. • Avoid multi-wiring. • Do not damage, break or make any modifications to the power cord. Do not place heavy objects on it, pull it hard or bend it more than necessary.These actions could cause an electric shock or fire. • The supplied power cord is for use with this equipment only. Do not use with other appliances. Doing so may result in fire, electric shock, or injury. Caution • Do not handle the plug with wet hands. Doing so might cause an electrical shock. • Keep the machine in an area that is within optimum environmental conditions. Operating the machine in an environment that is outside the recommended ranges of humidity and temperature can cause an electrical fire hazard. Keep the area around the socket free of dust. Accumulated dust can become an electrical fire hazard. • Place the machine on a strong and level surface. Otherwise, it might fall and injure someone. • If you use the machine in a confined space, ensure there is continuous air circulation. Optimum Environmental Conditions Recommended temperature and humidity To avoid possible build-up of ozone, place this printer in a large well ventilated room that has an air turnover of more than 30 m3 (183 cubic inch)/hr/person. If you use this printer in a cold area, leave the printer on or severe cold might damage sensitive components inside the printer. Depending on the temperature and humidity around the machine, vapor might occur when printing. Thus steam can be seen when prints come out. Environments to Avoid Important ❒ Locations exposed to direct sunlight or strong light ❒ Dusty areas ❒ Areas with corrosive gases ❒ Areas excessively cold, hot, or humid ❒ Locations near an air conditioner or humidifier ❒ Locations near other electronic equipment ❒ Locations where the printer might be subjected to frequent strong vibration Power Connection Connect the power cord to a power source with the following specifications: ❒ 120 V, 60 Hz, 11 A or more Space Required for Installing the Printer Leave enough space around the printer. This space is necessary to operate the printer. The recommended (or minimum) space requirement is as follows: A: 13 cm (5.2 inches) or more AJT054S B: 11 cm (4.4 inches) or more C: 35 cm (14.0 inches) or more D: 61 cm (24.4 inches) or more UNPACKING THE PRINTER AND CHECKING THE CONTENTS OF THE BOX Caution • When lifting the machine, use the inset grips on both sides. The printer could break or cause an injury if dropped. • Place no objects on the right cover. Check the contents of the box according to the following list. If one or some items are missing, Contact your sales or service representative. Important ❒ This package does not include an interface cable. Purchase one for use with your host computer. See "Appendix", Maintenance Guide. Quick Installation Guide (This manual) CD-ROM "Printer Drivers and Utilities" CD-ROM "Display-Version Manuals (HTML)" CD-ROM "Print-Version Manuals (PDF)" CD-ROM "Document Management Utility" Power Cable Toner Cartridge (Black) Toner Cartridge (Yellow) Toner Cartridge (Cyan) Toner Cartridge (Magenta) Photo Conductor Unit (Black) Photo Conductor Unit (Color) Waste Toner Bottle Ferrite Core (2) Color Calibration Sample Sheet Image density adjusting card User registration card Additional Documentation Remove the plastic bag. Position the printer where it is to be used. Lifting the printer requires at least two people. Lift using the inset grips on both sides of the printer. INSTALLING THE WASTE TONER BOTTLE AND PHOTO CONDUCTOR UNIT Open the printer's right cover. AJT044S Place the waste toner bottle in the position shown in the illustration. ZHBH660E Lock the waste toner bottle by sliding the green arrow into the position shown. ZHBHA670E Pull out the green levers on the left and right that are securing the inner cover, and then unlock. Lift the inner cover until it stays up. ZHBH311E Take out the black photo conductor unit. Remove the cap attached to the photo conductor unit. ZHBHA681E Note ❒ The cap is no longer needed and should be disposed of. Remove the tape from around Photo Conductor Unit by peeling it downward, and then remove unit's top cover. ZHBH681E Possible operation range Recommended range The machine must be level within 5 mm (0.2 inch) both front to rear and left to right. For more detailed information please refer to the included CD-ROM AJT043S Important ❒ Leave the tape holding the paper feed tray and cover in place while moving the printer. ❒ Lower the machine slowly and carefully to prevent trapping your hands. ZHBH301E ZHBHB680E Important ❒ Do not remove the unit's bottom cover yet. ❒ Install the new Photo Conductor Unit as soon as you take it out of the bag. ZHBHA682E Check the locations for each Photo Conductor Unit. ቢ Photo Conductor Unit (Black) ባ Photo Conductor Unit (Color) ZHBHA720E Align the green arrow at the tip of the photo conductor unit with the rail inside the printer. ZHBH370E Important ❒ Make sure the green arrow fits securely on the rail before proceeding to the next step. ❒ If you do not securely attach the green arrow of the photo conductor unit to the rail, you may damage the photo conductor unit. Push the front of the photo conductor unit carefully in, sliding the unit from its cover, until it clicks into place. ZHBH390E Important ❒ If the photo conductor unit is not correctly installed, print quality will be lost. For example, certain colors may not print.
-
 1
1 -
 2
2 -
 3
3 -
 4
4 -
 5
5 -
 6
6 -
 7
7 -
8
-
9
-
10
-
11
-
12
-
13
-
14
-
15
-
16
-
17
-
18
-
19
-
20
-
21
-
22
-
23
-
24
-
25
-
26
-
27
-
28
-
29
-
30
-
31
-
32
-
33
-
34
-
35
-
36
-
37
-
38
-
39
-
40
-
41
-
42
-
43
-
44
-
45
-
46
-
47
-
48
-
49
-
50
-
51
-
52
-
53
-
54
-
55
-
56
-
57
-
58
-
59
-
60
-
61
-
62
-
63
-
64
-
65
-
66
-
67
-
68
-
69
-
70
-
71
-
72
-
73
-
74
-
75
-
76
-
77
-
78
-
79
-
80
-
81
-
82
-
83
-
84
-
85
-
86
-
87
-
88
-
89
-
90
-
91
-
92
-
93
-
94
-
95
-
96
-
97
-
98
-
99
-
100
-
101
-
102
-
103
-
104
-
105
-
106
-
107
-
108
-
109
-
110
-
111
-
112
-
113
-
114
-
115
-
116
-
117
-
118
-
119
-
120
-
121
-
122
-
123
-
124
-
125
-
126
-
127
-
128
-
129
-
130
-
131
-
132
-
133
-
134
-
135
-
136
-
137
-
138
-
139
-
140
-
141
-
142
-
143
-
144
-
145
-
146
-
147
-
148
-
149
-
150
-
151
-
152
-
153
-
154
-
155
-
156
-
157
-
158
-
159
-
160
-
161
-
162
-
163
-
164
-
165
-
166
-
167
-
168
-
169
-
170
-
171
-
172
-
173
-
174
-
175
-
176
-
177
-
178
-
179
-
180
-
181
-
182
-
183
-
184
-
185
-
186
-
187
-
188
-
189
-
190
-
191
-
192
-
193
-
194
-
195
-
196
-
197
-
198
-
199
-
200
-
201
-
202
-
203
-
204
-
205
-
206
-
207
-
208
-
209
-
210
-
211
-
212
-
213
-
214
-
215
-
216
-
217
-
218
-
219
-
220
-
221
-
222
-
223
-
224
-
225
-
226
-
227
-
228
-
229
-
230
-
231
-
232
-
233
-
234
-
235
-
236
-
237
-
238
-
239
-
240
-
241
-
242
-
243
-
244
-
245
-
246
-
247
-
248
-
249
-
250
-
251
-
252
-
253
-
254
-
255
-
256
-
257
-
258
-
259
-
260
-
261
-
262
-
263
-
264
-
265
-
266
-
267
-
268
-
269
-
270
-
271
-
272
-
273
-
274
-
275
-
276
-
277
-
278
-
279
-
280
-
281
-
282
-
283
-
284
-
285
-
286
-
287
-
288
-
289
-
290
-
291
-
292
-
293
-
294
-
295
-
296
-
297
-
298
-
299
-
300
-
301
-
302
-
303
-
304
-
305
-
306
-
307
-
308
-
309
-
310
-
311
-
312
-
313
-
314
-
315
-
316
-
317
-
318
-
319
-
320
-
321
-
322
-
323
-
324
-
325
-
326
-
327
-
328
-
329
-
330
-
331
-
332
-
333
-
334
-
335
-
336
-
337
-
338
-
339
-
340
-
341
-
342
-
343
-
344
-
345
-
346
-
347
-
348
-
349
-
350
-
351
-
352
-
353
-
354
-
355
-
356
-
357
-
358
-
359
-
360
-
361
-
362
-
363
-
364
-
365
-
366
-
367
-
368
-
369
-
370
-
371
-
372
-
373
-
374
-
375
-
376
-
377
-
378
-
379
-
380
-
381
-
382
-
383
-
384
-
385
-
386
-
387
-
388
-
389
-
390
-
391
-
392
-
393
-
394
-
395
-
396
-
397
-
398
-
399
-
400
-
401
-
402
-
403
-
404
-
405
-
406
-
407
-
408
-
409
-
410
-
411
-
412
-
413
-
414
-
415
-
416
-
417
-
418
-
419
-
420
-
421
-
422
-
423
-
424
-
425
-
426
-
427
-
428
-
429
-
430
-
431
-
432
-
433
-
434
-
435
-
436
-
437
-
438
-
439
-
440
-
441
-
442
-
443
-
444
-
445
-
446
-
447
-
448
-
449
-
450
-
451
-
452
-
453
-
454
-
455
-
456
-
457
-
458
-
459
-
460
-
461
-
462
-
463
-
464
-
465
-
466
-
467
-
468
-
469
-
470
-
471
-
472
-
473
-
474
-
475
-
476
-
477
-
478
-
479
-
480
-
481
-
482
-
483
-
484
-
485
-
486
-
487
-
488
-
489
-
490
-
491
-
492
-
493
-
494
-
495
-
496
-
497
-
498
-
499
-
500
-
501
-
502
-
503
-
504
-
505
-
506
-
507
-
508
-
509
-
510
-
511
-
512
-
513
-
514
-
515
-
516
-
517
-
518
-
519
-
520
-
521
-
522
-
523
-
524
-
525
-
526
-
527
-
528
-
529
-
530
-
531
-
532
-
533
-
534
-
535
-
536
-
537
-
538
-
539
-
540
-
541
 |
 |