Ridgid 100-B Owners Manual - Page 10
Ridge Tool Company, Insertion Depth - press tool
 |
View all Ridgid 100-B manuals
Add to My Manuals
Save this manual to your list of manuals |
Page 10 highlights
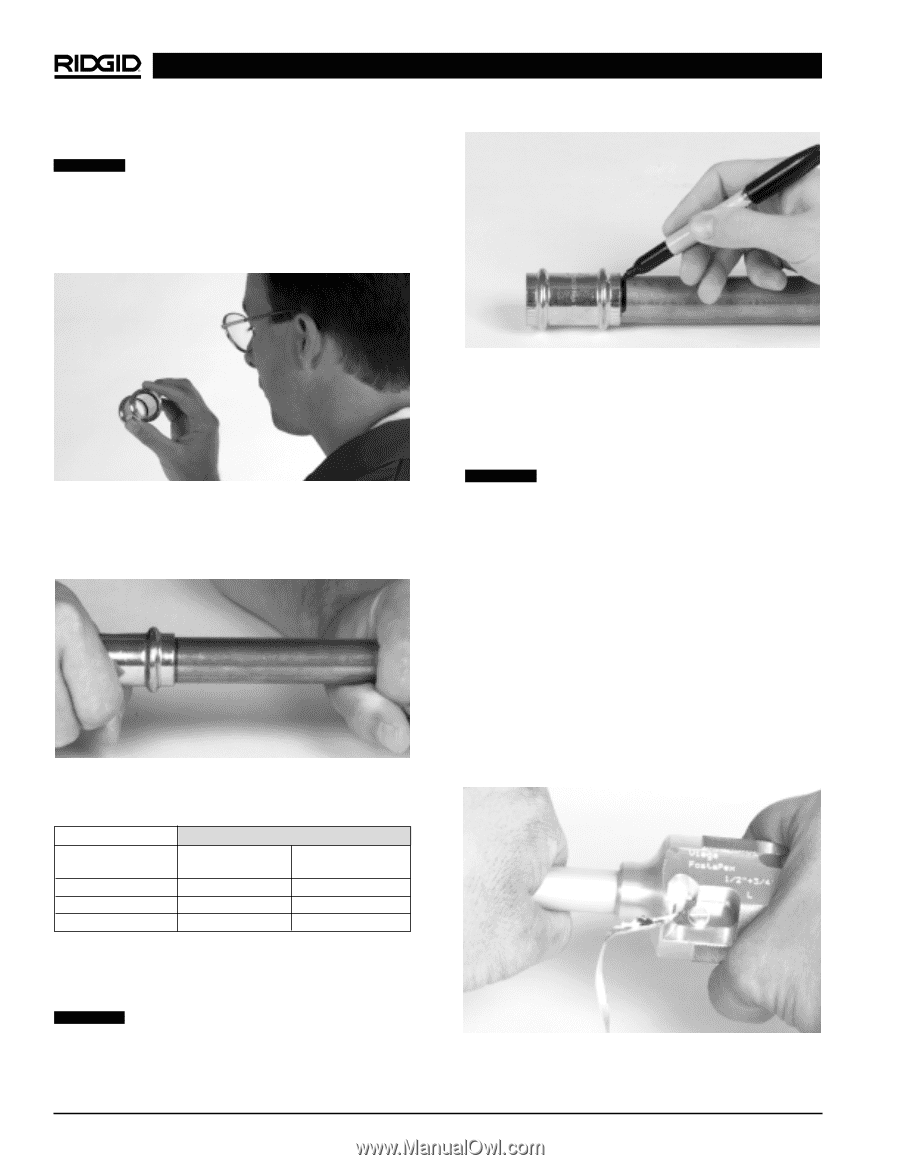
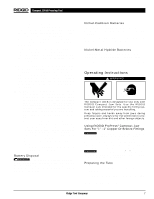
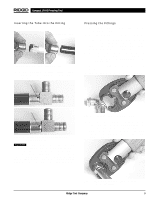
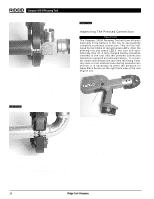
Compact 100-B Pressing Tool Inserting the Tube Into the Fitting CAUTION Never lubricate the fitting seal in the ProPress® fitting with anything other than soapy water. Oil lubricant, dirt or debris may damage the seal. An improper seal can lead to extensive property damage. 1. Check the fitting to make sure the fitting seal is in place, clean and free of oil or grease (Figure 5). Figure 5 - Checking the Seal 2. Insert the tube into the fitting using a twisting motion. Make sure that the tube is fully inserted to the fitting stop or shoulder (Figure 6). Figure 6 - Inserting the Tube to Proper Depth ProPress® System For Copper Tubing: Tube Size (inches) 1/2 3/4 1 Insertion Depth (inches) /13 16 /15 16 /15 16 (mm) 21 24 24 3. Mark the tube with a permanent marker to indicate proper depth (Figure 7). Refer to the Insertion Depth Table above for correct depth. CAUTION Tubing that is difficult to insert may have burrs or could be out-of round. Burrs must be removed and tubing end should not be damaged. Make sure fitting is inserted to proper depth. Failure to do so may result in an improper seal. Figure 7 - Marking the Tubing Using PureFlow™ Compact Jaw Sets for 3/8″ - 1″ Viega PureFlow™ System on Pexcel™, Pextron™ or FostaPex™ PEX Tubing CAUTION The following instructions for using PureFlow™ Compact Jaw Sets are only general guidelines. Viega (the fitting manufacturer) provides instructions for pressing PureFlow™ system fittings. The Viega instructions should be followed in the event of conflicting instructions. Contact a Viega PureFlow™ fitting distributor for a copy of the latest recommended installation instructions. Preparing The Tube 1. If necessary, cut the desired length of tubing using a PEX tubing cutter or other appropriate cutting method being sure to cut the tube square to the tube centerline. 2. For FostaPex™ tube only, use end preparation tool to remove outer PEX and aluminum tube layer to allow insertion into the stainless steel press sleeve (Figure 8). Hold tube firmly and rotate end prep tool clockwise until no resistance is felt and tool spins freely. Figure 8 - Removing Outer Layers From FostaPex™ Tube 3. Clean the tube end of all dirt, oil and grease. 8 Ridge Tool Company
-
 1
1 -
2
-
3
-
4
-
 5
5 -
 6
6 -
 7
7 -
 8
8 -
 9
9 -
 10
10 -
 11
11 -
 12
12 -
 13
13 -
 14
14 -
 15
15 -
16
-
17
-
18
-
19
-
20
-
21
-
22
-
23
-
24
-
25
-
26
-
27
-
28
-
29
-
30
-
31
-
32
-
33
-
34
-
35
-
36
-
37
-
38
-
39
-
40
-
41
-
42
-
43
-
44
-
45
-
46
-
47
-
48
-
49
-
50
-
51
-
52
-
53
-
54
 |
 |