Ridgid 100-B Owners Manual - Page 8
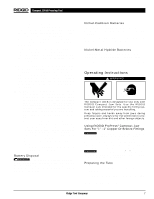
Tool and Work Area Set-Up
 |
View all Ridgid 100-B manuals
Add to My Manuals
Save this manual to your list of manuals |
Page 8 highlights
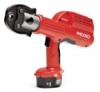
Compact 100-B Pressing Tool WARNING A jaw that has been welded, grounded, drilled or modified in any manner can shatter during pressing, resulting in sharp flying objects, severe injury or death. Discard and replace damaged jaw sets. 5. Slide the jaw set into the pressing tool (Figure 3). 6. Push the jaw set mounting pin until it clicks. NOTE! The Compact 100-B will not work unless the pin is fully engaged. Tool and Work Area Set-Up WARNING • The cord has sufficient wire thickness (16 AWG below 100′). If the wire thickness is too small, the cord may overheat, melting the cord's insulation or causing nearby objects to ignite. WARNING Do not attempt to use a step-up transformer, an engine generator or DC power receptacle. To prevent serious injury, proper set-up of the pressing tool and work area is required. The following procedures should be followed: 1. Check work area for: • Adequate lighting • Flammable liquids, vapors or dust that may ignite. Battery Charging Procedure: WARNING Before using the battery charger, read all the battery and charger instructions. 1. Locate the charger so the cord and charger will not be stepped on, tripped over or be subjected to damage. Do not expose charger to wet environment such as rain or snow. 2. Charge battery cartridge in temperatures above 50°F (10°C) and below 104°F (40°C). Store tool and battery cartridge in location where temperatures do not exceed 120°F (49°C). 3. Plug the battery charger into the proper A/C voltage source. The charging light will flash in green color (Figure 4). WARNING To avoid electric shock and electrical fires, never use an extension cord that is damaged or does not meet the following requirements: • The cord has pins on line plug that are similar in size and shape to those of the plug on the charger. • The cord is rated as "W" or "W-A" if being used outdoors. Figure 4 - Battery Charger NOTE! New batteries are not charged and must be charged before use. 4. Insert the battery cartridge so that the plus and minus terminals on the battery cartridge are on the same sides as their respective markings on the battery charger. Insert the cartridge fully into the port so that it rests on the charger port floor. 5. When the battery cartridge is inserted, the charging light color will change from green to red and charging will begin. The charging light will remain lit steadily during charging. When charging is completed, the charging light color will change from red to green. NOTE! Charging time will be approximately 11/4 hours for 2.6 AH Ni-MH standard equipment battery or one hour for 2.0 AH NiCd optional battery. WARNING Charge only Makita® batteries. Other types of batteries may burst causing personal injury. 6. After charging, unplug the charger from the power source. Always cover the battery terminals with the battery cover when the battery cartridge is not being used. Important Charging Notes 1. When you charge a new battery cartridge or a battery cartridge which has not been used for a long period of time, it may not accept a full charge. This is a normal condition and does not indicate a problem. You can recharge the battery cartridge fully after discharging it completely and recharging a couple of times. 6 Ridge Tool Company
-
 1
1 -
2
-
 3
3 -
 4
4 -
 5
5 -
 6
6 -
 7
7 -
 8
8 -
 9
9 -
 10
10 -
 11
11 -
 12
12 -
 13
13 -
14
-
15
-
16
-
17
-
18
-
19
-
20
-
21
-
22
-
23
-
24
-
25
-
26
-
27
-
28
-
29
-
30
-
31
-
32
-
33
-
34
-
35
-
36
-
37
-
38
-
39
-
40
-
41
-
42
-
43
-
44
-
45
-
46
-
47
-
48
-
49
-
50
-
51
-
52
-
53
-
54
 |
 |