Samsung SCH-R960 User Manual Us Cellular Sch-r960 Galaxy Mega Jb English User - Page 146
Adding a Basic VPN, NFC, Android Beam, Settings, Connections, More networks, Basic VPN, Server address
 |
View all Samsung SCH-R960 manuals
Add to My Manuals
Save this manual to your list of manuals |
Page 146 highlights
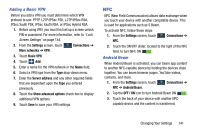
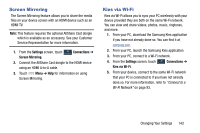
Adding a Basic VPN Before you add a VPN you must determine which VPN protocol to use: PPTP, L2TP/IPSec PSK, L2TP/IPSec RSA, IPSec Xauth PSK, IPSec Xauth RSA, or IPSec Hybrid RSA. 1. Before using VPN, you must first set up a screen unlock PIN or password. For more information, refer to "Lock Screen Settings" on page 144. 2. From the Settings screen, touch More networks ➔ VPN. Connections ➔ 3. Touch Basic VPN. 4. Touch Add. 5. Enter a name for the VPN network in the Name field. 6. Select a VPN type from the Type drop-down menu. 7. Enter the Server address and any other required fields that are dependent upon the Type you entered previously. 8. Touch the Show advanced options check box to display additional VPN options. 9. Touch Save to save your VPN settings. NFC NFC (Near Field Communication) allows data exchange when you touch your device with another compatible device. This is used for applications such as S Beam. To activate NFC, follow these steps: 1. From the Settings screen, touch NFC. Connections ➔ 2. Touch the ON/OFF slider, located to the right of the NFC field, to turn NFC ON . Android Beam When Android Beam is activated, you can beam app content to another NFC-capable device by holding the devices close together. You can beam browser pages, YouTube videos, contacts, and more. 1. From the Settings screen, touch Connections ➔ NFC ➔ Android Beam. 2. Tap the OFF / ON icon to turn Android Beam ON . 3. Touch the back of your device with another NFCcapable device and the content is transferred. Changing Your Settings 141
-
 1
1 -
2
-
3
-
4
-
5
-
6
-
7
-
8
-
9
-
10
-
11
-
12
-
13
-
14
-
15
-
16
-
17
-
18
-
19
-
20
-
21
-
22
-
23
-
24
-
25
-
26
-
27
-
28
-
29
-
30
-
31
-
32
-
33
-
34
-
35
-
36
-
37
-
38
-
39
-
40
-
41
-
42
-
43
-
44
-
45
-
46
-
47
-
48
-
49
-
50
-
51
-
52
-
53
-
54
-
55
-
56
-
57
-
58
-
59
-
60
-
61
-
62
-
63
-
64
-
65
-
66
-
67
-
68
-
69
-
70
-
71
-
72
-
73
-
74
-
75
-
76
-
77
-
78
-
79
-
80
-
81
-
82
-
83
-
84
-
85
-
86
-
87
-
88
-
89
-
90
-
91
-
92
-
93
-
94
-
95
-
96
-
97
-
98
-
99
-
100
-
101
-
102
-
103
-
104
-
105
-
106
-
107
-
108
-
109
-
110
-
111
-
112
-
113
-
114
-
115
-
116
-
117
-
118
-
119
-
120
-
121
-
122
-
123
-
124
-
125
-
126
-
127
-
128
-
129
-
130
-
131
-
132
-
133
-
134
-
135
-
136
-
137
-
138
-
139
-
140
-
 141
141 -
 142
142 -
 143
143 -
 144
144 -
 145
145 -
 146
146 -
 147
147 -
 148
148 -
 149
149 -
 150
150 -
 151
151 -
152
-
153
-
154
-
155
-
156
-
157
-
158
-
159
-
160
-
161
-
162
-
163
-
164
-
165
-
166
-
167
-
168
-
169
-
170
-
171
-
172
-
173
-
174
-
175
-
176
-
177
-
178
-
179
-
180
-
181
-
182
-
183
-
184
-
185
-
186
-
187
-
188
-
189
-
190
-
191
-
192
-
193
-
194
-
195
-
196
-
197
-
198
-
199
-
200
-
201
-
202
-
203
-
204
-
205
-
206
-
207
-
208
-
209
-
210
-
211
-
212
-
213
-
214
-
215
-
216
-
217
-
218
-
219
-
220
-
221
-
222
-
223
-
224
-
225
-
226
 |
 |
