Samsung SCX 4016 User Manual (ENGLISH) - Page 136
AaBbCc, Condition, Suggested solutions
 |
UPC - 635753611106
View all Samsung SCX 4016 manuals
Add to My Manuals
Save this manual to your list of manuals |
Page 136 highlights
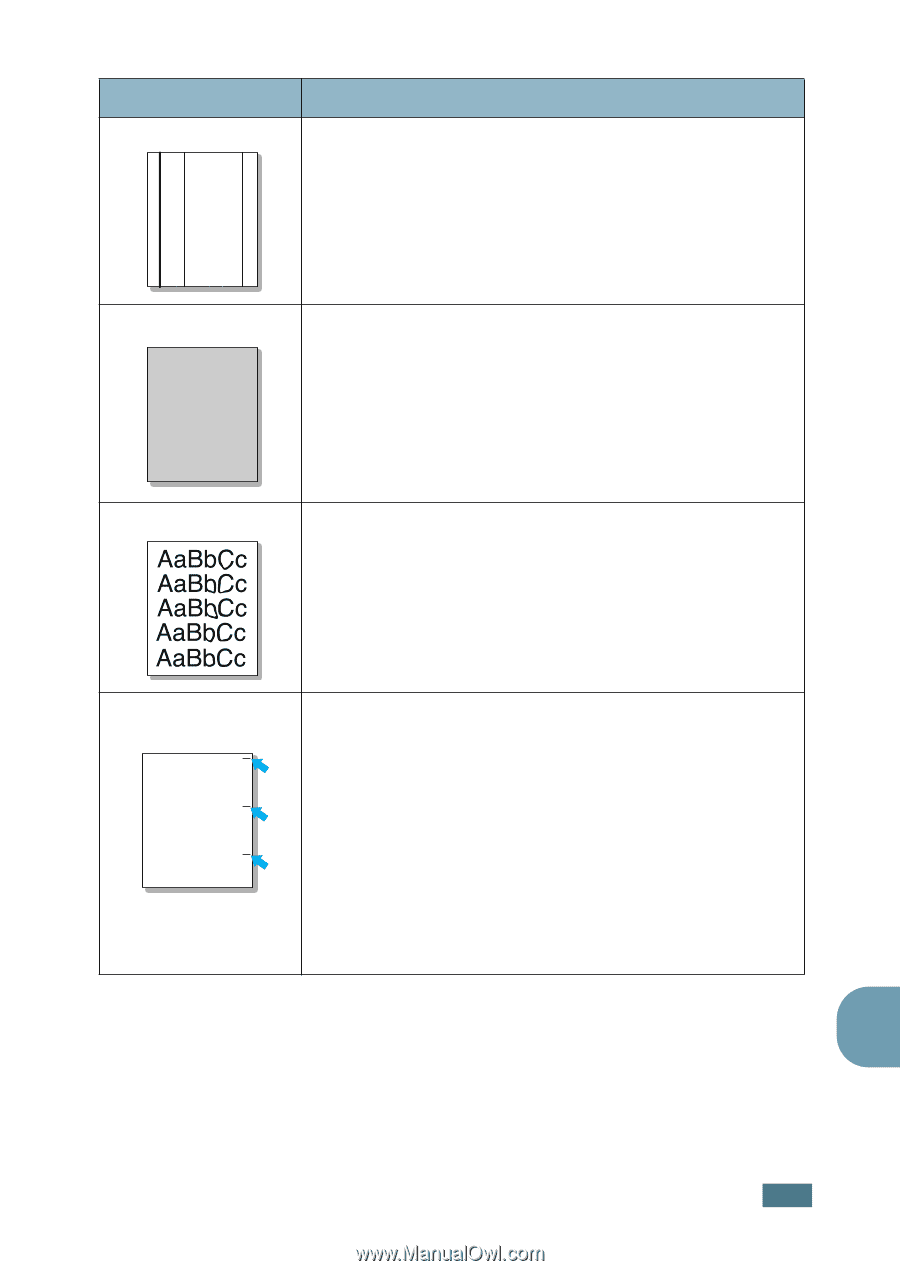
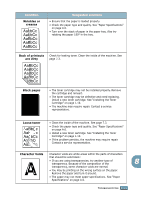
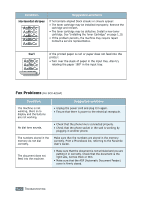
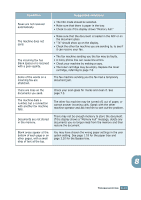
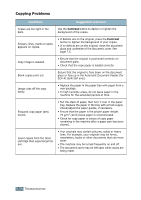
Condition Vertical lines AaBbCc AaBbCc AaBbCc AaBbCc AaBbCc Suggested solutions If black vertical streaks appear on the page: • The drum inside the toner cartridge has probably been scratched. Install a new toner cartridge. See "Installing the Toner Cartridge" on page 1.10. Gray background AaBbCc AaBbCc AaBbCc AaBbCc AaBbCc If the amount of background shading becomes unacceptable: • Change to a lighter weight pages. See "Paper Specifications" on page A.6. • Check the machine's environment; very dry (low humidity) or high humidity (higher than 80% RH) conditions can increase the amount of background shading. • Remove the old toner cartridge and install a new one. See "Installing the Toner Cartridge" on page 1.10. Toner smear • Clean the inside of the machine. See page 7.3. • Check the paper type and quality. See "Paper Specifications" on page A.6. • Remove the toner cartridge and install a new one. See "Installing the Toner Cartridge" on page 1.10. Vertical repetitive defects AaBbCc AaBbCc AaBbCc AaBbCc AaBbCc If marks repeatedly appear on the printed side of the page at even intervals: • The toner cartridge may be damaged. If a repetitive mark occurs on the page, print a cleaning sheet several times to clean the cartridge; see "Cleaning the Drum" on page 7.10. After the printout, if you still have the same problems, install a new toner cartridge. See "Installing the Toner Cartridge" on page 1.10. • Parts of the machine may have toner on them. If the defects occur on the back of the page, the problem will likely correct itself after a few more pages. • The fusing assembly may be damaged. Contact a service representative. 8 TROUBLESHOOTING 8.19
-
 1
1 -
2
-
3
-
4
-
5
-
6
-
7
-
8
-
9
-
10
-
11
-
12
-
13
-
14
-
15
-
16
-
17
-
18
-
19
-
20
-
21
-
22
-
23
-
24
-
25
-
26
-
27
-
28
-
29
-
30
-
31
-
32
-
33
-
34
-
35
-
36
-
37
-
38
-
39
-
40
-
41
-
42
-
43
-
44
-
45
-
46
-
47
-
48
-
49
-
50
-
51
-
52
-
53
-
54
-
55
-
56
-
57
-
58
-
59
-
60
-
61
-
62
-
63
-
64
-
65
-
66
-
67
-
68
-
69
-
70
-
71
-
72
-
73
-
74
-
75
-
76
-
77
-
78
-
79
-
80
-
81
-
82
-
83
-
84
-
85
-
86
-
87
-
88
-
89
-
90
-
91
-
92
-
93
-
94
-
95
-
96
-
97
-
98
-
99
-
100
-
101
-
102
-
103
-
104
-
105
-
106
-
107
-
108
-
109
-
110
-
111
-
112
-
113
-
114
-
115
-
116
-
117
-
118
-
119
-
120
-
121
-
122
-
123
-
124
-
125
-
126
-
127
-
128
-
129
-
130
-
 131
131 -
 132
132 -
 133
133 -
 134
134 -
 135
135 -
 136
136 -
 137
137 -
 138
138 -
 139
139 -
 140
140 -
 141
141 -
142
-
143
-
144
-
145
-
146
-
147
-
148
-
149
-
150
-
151
-
152
-
153
-
154
-
155
-
156
-
157
-
158
-
159
-
160
-
161
-
162
-
163
-
164
-
165
-
166
-
167
-
168
-
169
-
170
-
171
-
172
-
173
-
174
-
175
-
176
-
177
-
178
-
179
-
180
-
181
-
182
-
183
-
184
-
185
-
186
-
187
-
188
-
189
-
190
-
191
-
192
-
193
-
194
-
195
-
196
-
197
-
198
-
199
-
200
-
201
-
202
-
203
-
204
-
205
-
206
-
207
-
208
-
209
-
210
 |
 |