Samsung SCX 4016 User Manual (ENGLISH) - Page 167
Setting the Date and Time - reset
 |
UPC - 635753611106
View all Samsung SCX 4016 manuals
Add to My Manuals
Save this manual to your list of manuals |
Page 167 highlights
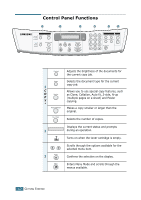
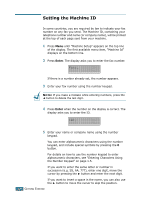
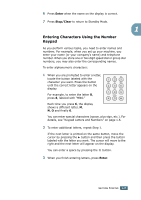
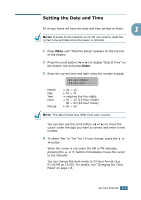
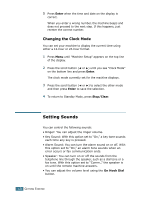
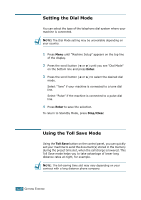
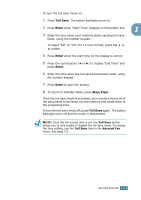
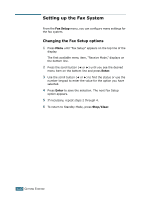
Setting the Date and Time All of your faxes will have the date and time printed on them. 1 NOTE: If power to the machine is cut off, you need to reset the correct time and date once the power is restored. 1 Press Menu until "Machine Setup" appears on the top line of the display. 2 Press the scroll button (¥ or Š) to display "Date & Time" on the bottom line and press Enter. 3 Enter the correct time and date using the number keypad. Month Day Year Hour Minute = 01 ~ 12 = 01 ~ 31 = requires the four digits = 01 ~ 12 (12-hour mode) 00 ~ 23 (24-hour mode) = 00 ~ 59 NOTE: The date format may differ from each country. You can also use the scroll button (¥ or Š) to move the cursor under the digit you want to correct and enter a new number. 4 To select "Am" or "Pm" for 12-hour format, press the or button. When the cursor is not under the AM or PM indicator, pressing the or button immediately moves the cursor to the indicator. You can change the clock mode to 24-hour format (e.g. 01:00 PM as 13:00). For details, see "Changing the Clock Mode" on page 1.8. GETTING STARTED 1.7
-
 1
1 -
2
-
3
-
4
-
5
-
6
-
7
-
8
-
9
-
10
-
11
-
12
-
13
-
14
-
15
-
16
-
17
-
18
-
19
-
20
-
21
-
22
-
23
-
24
-
25
-
26
-
27
-
28
-
29
-
30
-
31
-
32
-
33
-
34
-
35
-
36
-
37
-
38
-
39
-
40
-
41
-
42
-
43
-
44
-
45
-
46
-
47
-
48
-
49
-
50
-
51
-
52
-
53
-
54
-
55
-
56
-
57
-
58
-
59
-
60
-
61
-
62
-
63
-
64
-
65
-
66
-
67
-
68
-
69
-
70
-
71
-
72
-
73
-
74
-
75
-
76
-
77
-
78
-
79
-
80
-
81
-
82
-
83
-
84
-
85
-
86
-
87
-
88
-
89
-
90
-
91
-
92
-
93
-
94
-
95
-
96
-
97
-
98
-
99
-
100
-
101
-
102
-
103
-
104
-
105
-
106
-
107
-
108
-
109
-
110
-
111
-
112
-
113
-
114
-
115
-
116
-
117
-
118
-
119
-
120
-
121
-
122
-
123
-
124
-
125
-
126
-
127
-
128
-
129
-
130
-
131
-
132
-
133
-
134
-
135
-
136
-
137
-
138
-
139
-
140
-
141
-
142
-
143
-
144
-
145
-
146
-
147
-
148
-
149
-
150
-
151
-
152
-
153
-
154
-
155
-
156
-
157
-
158
-
159
-
160
-
161
-
 162
162 -
 163
163 -
 164
164 -
 165
165 -
 166
166 -
 167
167 -
 168
168 -
 169
169 -
 170
170 -
 171
171 -
 172
172 -
173
-
174
-
175
-
176
-
177
-
178
-
179
-
180
-
181
-
182
-
183
-
184
-
185
-
186
-
187
-
188
-
189
-
190
-
191
-
192
-
193
-
194
-
195
-
196
-
197
-
198
-
199
-
200
-
201
-
202
-
203
-
204
-
205
-
206
-
207
-
208
-
209
-
210
 |
 |