Samsung SCX 5530FN User Manual (ENGLISH) - Page 63
Printing on both sides of paper, Backing up data, Restoring data, Managing USB memory
 |
UPC - 635753618044
View all Samsung SCX 5530FN manuals
Add to My Manuals
Save this manual to your list of manuals |
Page 63 highlights
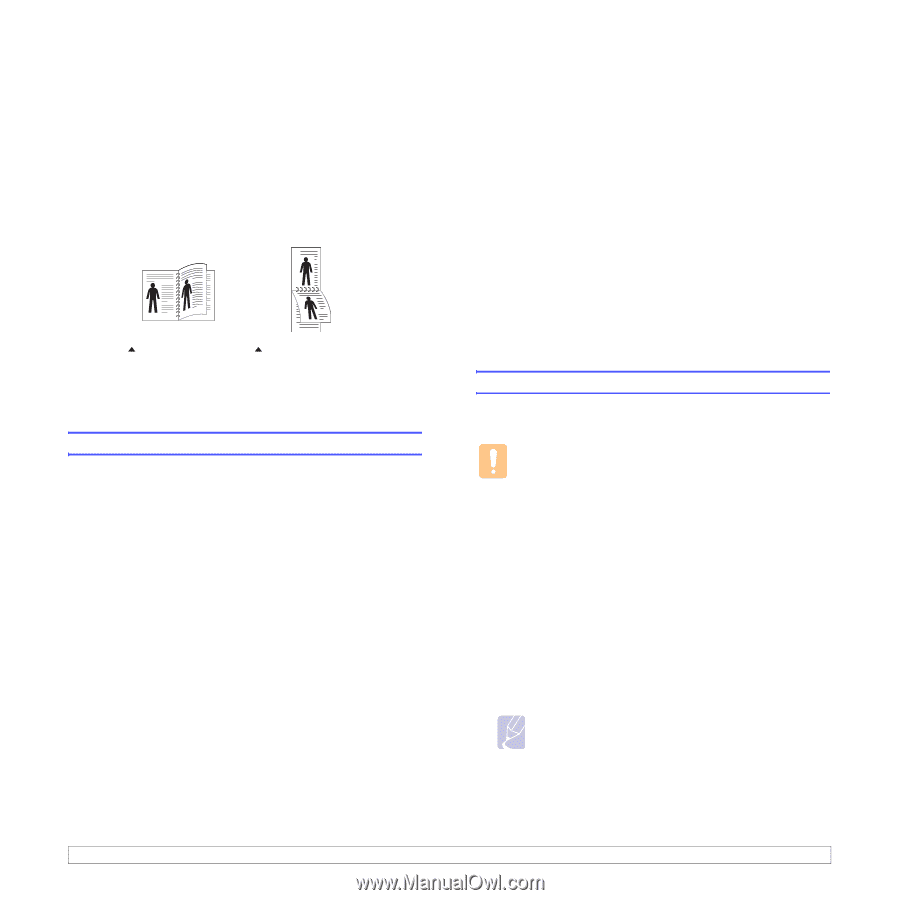
Printing on both sides of paper By using the Duplex button on your machine, you can set the machine to print documents on both sides of paper. 1 Press Duplex. 2 Press the Scroll buttons until the binding option you want appears. • Off: Prints in Normal mode. • 1->2Side Short: Prints pages to be read by flipping like a note pad. • 1->2Side Long: Prints pages to be read like a book. 2 3 2 5 1->2Side Long 3 5 1->2Side Short 3 Press OK to save your selection. If the mode is enabled, the Duplex button is backlit. Backing up data Data in the machine's memory can be accidentally erased due to power failure or storage failure. Backup helps you protect your Address Book/ Phone Book entries and the system settings by storing them as backup files on a USB memory device. Backing up data 1 Insert the USB memory device into the USB memory port on your machine. 2 Press Menu until System Setup appears on the bottom line of the display and press OK. 3 Press OK when Machine Setup appears. 4 Press the Scroll buttons until Export Setting appears and press OK. 5 Press the Scroll buttons until the option you want appears. • Address Book: Backs up all Address Book/Phone Book entries. • Setup Data: Backs up all system settings. 6 Press OK to begin backing up the data. The data is backed up to the USB memory. 7 Press Stop/Clear to return to Standby mode. Restoring data 1 Insert the USB memory device on which the backup data is stored in to the USB memory port. 2 Press Menu until System Setup appears on the bottom line of the display and press OK. 3 Press OK when Machine Setup appears. 4 Press the Scroll buttons until Import Setting appears and press OK. 5 Press the Scroll buttons until the data type you want appears and press OK. 6 Press the Scroll buttons until the file containing the data you want to restore appears and press OK. 7 Press OK when Yes appears to restore the backup file to the machine. 8 Press Stop/Clear to return to Standby mode. Managing USB memory You can delete image files stored on a USB memory device one by one or all at once by reformatting the device. Caution After deleting files or reformatting a USB memory device, files cannot be restored. Therefore, confirm that you no longer need the data before deleting it. Deleting an image file 1 Insert the USB memory device into the USB memory port on your machine. 2 Press Scan/Email. 3 Press OK when Scan to USB appears on the bottom line of the display. 4 Press the Scroll buttons until File Manage appears and press OK. 5 Press OK when Delete appears. 6 Press the Scroll buttons until the folder or file you want appears and press OK. Note If you see D in the front of a folder name, there are one or more folders in the selected folder. If you selected a file, the display shows the size of the file for about 2 seconds. Go to the next step. If you selected a folder, press the Scroll buttons until the file you want to delete appears and press OK. 11.3
-
 1
1 -
2
-
3
-
4
-
5
-
6
-
7
-
8
-
9
-
10
-
11
-
12
-
13
-
14
-
15
-
16
-
17
-
18
-
19
-
20
-
21
-
22
-
23
-
24
-
25
-
26
-
27
-
28
-
29
-
30
-
31
-
32
-
33
-
34
-
35
-
36
-
37
-
38
-
39
-
40
-
41
-
42
-
43
-
44
-
45
-
46
-
47
-
48
-
49
-
50
-
51
-
52
-
53
-
54
-
55
-
56
-
57
-
 58
58 -
 59
59 -
 60
60 -
 61
61 -
 62
62 -
 63
63 -
 64
64 -
 65
65 -
 66
66 -
 67
67 -
 68
68 -
69
-
70
-
71
-
72
-
73
-
74
-
75
-
76
-
77
-
78
-
79
-
80
-
81
-
82
-
83
-
84
-
85
-
86
-
87
-
88
-
89
-
90
-
91
-
92
-
93
-
94
-
95
-
96
-
97
-
98
-
99
-
100
-
101
-
102
-
103
-
104
-
105
-
106
-
107
-
108
-
109
-
110
-
111
-
112
-
113
-
114
-
115
-
116
-
117
-
118
-
119
-
120
-
121
-
122
-
123
-
124
-
125
-
126
-
127
-
128
-
129
-
130
-
131
-
132
-
133
-
134
-
135
-
136
-
137
-
138
-
139
-
140
-
141
-
142
-
143
-
144
-
145
-
146
 |
 |