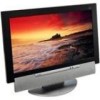
Sharp IT23M1U Operation Manual
Sharp IT23M1U Manual
 |
View all Sharp IT23M1U manuals
Add to My Manuals
Save this manual to your list of manuals |
Sharp IT23M1U manual content summary:
- Sharp IT23M1U | Operation Manual - Page 1
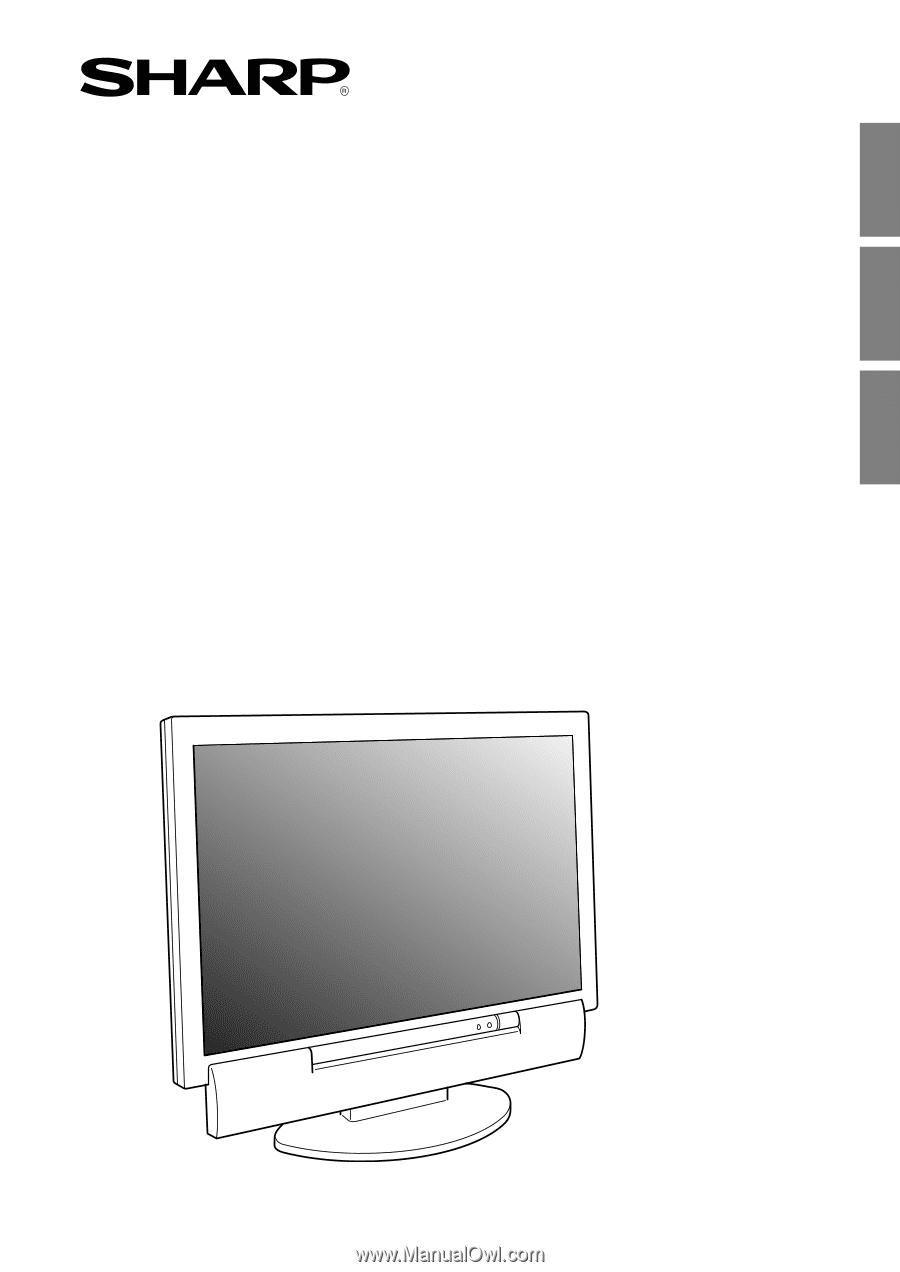
English Français Español LCD TV Monitor Moniteur TV LCD Monitor TV LCD IT-23M1U OPERATION MANUAL MODE D'EMPLOI MANUAL DE FUNCIONAMIENTO English ...... E1 Français .... F1 Español ..... S1 - Sharp IT23M1U | Operation Manual - Page 2
IT-23M1U_cover1-2.P65 2 2004/08/20, 10:56 - Sharp IT23M1U | Operation Manual - Page 3
a risk of electric shock to persons. The exclamation point within a triangle is intended to alert the user to the presence of important operating and maintenance (servicing) instructions in the literature accompanying the product. Español English IT-23M1U_gb_01.P65 1 E1 2004/08/20, 10 - Sharp IT23M1U | Operation Manual - Page 4
and used in accordance with the instructions, may cause harmful interference to TV technician for help. Use nothing but the included cables and AC cord to insure compliance with FCC regulation for Class B computing equipment. U.S.A. ONLY Declaration of Conformity SHARP LCD Color Monitor IT-23M1U - Sharp IT23M1U | Operation Manual - Page 5
in the memory (CHANNEL SEARCH E23 Adding weak or additional channels or erasing unwanted channels from TV memory (CHANNEL MEMORY) . . E24 Common operations Common operations E25 Turning power on/off E25 Switching display modes (INPUT E25 Adjusting the backlight E26 Adjusting the volume E27 - Sharp IT23M1U | Operation Manual - Page 6
features (for TV/AV mode E49 Pausing the screen (FREEZE E49 Switching power off after a specified length of time (SLEEP E49 Using the menus in TV/AV mode (ALL RESET E54 Appendix Instructions for attaching a VESA-compliant mount E55 Monitor care E56 Troubleshooting E56 Monitor care E57 Storage - Sharp IT23M1U | Operation Manual - Page 7
you for your purchase of the Sharp LCD TV Monitor. To ensure safety and many respect to proper grounding of the mast and supporting structure, grounding of the lead-in wire to ) GROUNDING CONDUCTORS (NEC SECTION 810-21) GROUND CLAMPS POWER SERVICE GROUNDING ELECTRODE SYSTEM (NEC ART 250, PART H) - - Sharp IT23M1U | Operation Manual - Page 8
common phenomena of LCDs and will not understand that Sharp Corporation power cord supplied with the monitor. - Insert the power servicing to the service representative. - Do not try to open the AC adapter. - Do not use water or wet cloth for cleaning the AC adapter. Manual Scope - In this manual - Sharp IT23M1U | Operation Manual - Page 9
in the package. - LCD TV monitor (1) - AC adapter (1) (model name: NL-A72J) - Power cord (1) - PC analog Sharp Corporation holds authorship rights to the Utility program. Do not reproduce it without permission. - The shape of the supplied accessories may not be exactly same as shown in this manual - Sharp IT23M1U | Operation Manual - Page 10
3 4 CH 1 5 6 1. Speakers 2. Control buttons 3. Headphone terminal 4. Remote sensor window 5. MAIN POWER button 6. Power LED Green: in use Red: in standby mode Orange: in power-saving mode (only for PC mode) Off: power off Removing/replacing the terminal cover VOL/BRIGHT Removing the cover - Sharp IT23M1U | Operation Manual - Page 11
English Français Deutsch Italiano Product description Main unit Rear view/left view A Remote control POWER 7 1 Virtual 9 8 PC TV AV1 AV2 10 9 2 10 FREEZE MULTI VIEW MODE 11 SLEEP MENU 12 3 13 11 12 4 BRIGHT MODE ENTER BRIGHT 13 5 14 6 15 DISPLAY CC MTS - Sharp IT23M1U | Operation Manual - Page 12
description Cable clamp Angle adjustment Use the supplied cable clamp to secure the cables connected to sides of the monitor when adjusting the viewing angle. The LCD panel used in this monitor is made of glass. Pressure from hands on the LCD panel could cause damage. - Be careful not to allow - Sharp IT23M1U | Operation Manual - Page 13
two ("AAA" size, UM/SUM-4) batteries (supplied). When the operable distance becomes shorter, replace or explosion. Be sure to follow the instructions below. - Place batteries with their terminals found, wipe with a cloth. - The batteries supplied with the monitor may have a shorter life expectancy - Sharp IT23M1U | Operation Manual - Page 14
- Follow these steps to connect the monitor to AV equipment and enjoy watching DVDs or playing games. PC TV AV Connecting the monitor to a power source (See page E20.) PC TV Adjusting the computer display automatically (See page E21.) - Required when using the monitor with an analog connection - Sharp IT23M1U | Operation Manual - Page 15
English Basic adjustment screen operation The explanations in this manual use primarily the remote control. (Operations requiring the use of monitor control buttons are specifically identified using the word "monitor".) The following table shows the - Sharp IT23M1U | Operation Manual - Page 16
as this could lead to a malfunction. Analog connection Connect the supplied PC analog signal cable to the analog RGB output terminal of the 2 row Apple Power Macintosh, attach a Macintosh conversion adapter (commercially available) to the analog signal cable. Power Macintosh Macintosh conversion - Sharp IT23M1U | Operation Manual - Page 17
PC audio cable to the audio output terminal of the computer. PC audio input terminal Audio output terminal PC audio cable (supplied) Digital signal cable (separately-sold) Digital RGB output terminal - Paying attention to the connector direction, firmly insert the signal cable straight into - Sharp IT23M1U | Operation Manual - Page 18
"twin-lead" cable that can be attached to a 75-ohm terminal through a 300-75-ohm adapter (not supplied). 300-ohm twin-lead cable (flat) Notes: - The 75-ohm coaxial cable is recommended. - TV memory for channels is empty at shipment. To receive channels, use the CHANNEL SETTING menu. (See pages E22 - Sharp IT23M1U | Operation Manual - Page 19
, consult your cable TV company.) For more specific instructions on installing cable TV, consult your cable TV company. One possible supplied) OUT IN Cable TV converter/ descrambler (not supplied) Two-set signal splitter (not supplied) Cable TV Line Note: - Consult your SHARP Dealer or Service - Sharp IT23M1U | Operation Manual - Page 20
Connecting the monitor to AV equipment CAUTION! - Ensure that the monitor and all the equipment you are connecting to it are switched off before you begin. Examples of equipment you can connect VCRs Video cameras Home video game systems Videodisc players DVD players etc. Equipment with S-video - Sharp IT23M1U | Operation Manual - Page 21
English Français Deutsch Italiano Connecting the monitor to AV equipment AV equipment with S-video output terminals Left side of the monitor AV-IN1 VCR etc. (White) (White) (Red) (Red) RCA pin cable (commercially available) S-video cable (commercially available) Note: - When you are - Sharp IT23M1U | Operation Manual - Page 22
Connecting the monitor to a power source CAUTION! - When connecting, ensure that the power input terminal. Power input terminal AC adapter (supplied) 2. Plug the power cord into the AC adapter and then place the power plug into an AC outlet. Power cord (supplied) AC outlet AC adapter (supplied - Sharp IT23M1U | Operation Manual - Page 23
. "CLOCK", "PHASE", "H-POS", and "V-POS" will be set to their optimum states. Note: - When using the monitor with a digital connection, automatic screen adjustment is unnecessary. POWER Virtual PC TV AV1 AV2 FREEZE MULTI VIEW MODE SLEEP MENU BRIGHT MODE ENTER BRIGHT 1. Press the MAIN - Sharp IT23M1U | Operation Manual - Page 24
cable TV service to receive cable channels.) Displaying the CHANNEL SETTING menu POWER Virtual PC TV AV1 AV2 FREEZE MULTI VIEW MODE SLEEP MENU TV memory Setting channels one at a time (CHANNEL MEMORY) This method is for manually setting the channels you want one by one. Use this method if - Sharp IT23M1U | Operation Manual - Page 25
change channels automatically. - When Channel Search completes, all channels, which were set previously, will be erased. - If you search for channels but cannot receive any, TV memory becomes empty. Español English IT-23M1U_gb_01.P65 23 E23 2004/08/20, 10:42 - Sharp IT23M1U | Operation Manual - Page 26
. 1. Display the CHANNEL SETTING menu. (See page E22.) 2. Press the buttons to select "CHANNEL MEMORY", and press the ENTER button. CHANNEL MEMORY AIR 2 < TV/AV > 3. Press the CH buttons or the buttons to select each desired channel to add or erase. You can also use the channel buttons - Sharp IT23M1U | Operation Manual - Page 27
MODE SLEEP MENU BRIGHT MODE ENTER BRIGHT POWER Virtual PC TV AV1 AV2 FREEZE MULTI VIEW MODE SLEEP MENU BRIGHT MODE ENTER BRIGHT Turning power on When the power LED is off: 1. Press the MAIN POWER button on the monitor. 2. Turn on power for the connected equipment. After a while the - Sharp IT23M1U | Operation Manual - Page 28
the backlight The brightness of the backlight can be set individually for PC mode and TV/AV mode. Start by switching to the display mode for which you want to adjust the backlight. POWER Virtual PC TV AV1 AV2 FREEZE MULTI VIEW MODE SLEEP MENU BRIGHT MODE ENTER BRIGHT 1. Press the BRIGHT - Sharp IT23M1U | Operation Manual - Page 29
. "Dolby", "Pro Logic" and the double-D symbol are trademarks of Dolby Laboratories. BRIGHT MODE ENTER BRIGHT DISPLAY CC MTS MUTE VOL POWER Virtual PC TV AV1 AV2 FREEZE MULTI VIEW MODE SLEEP MENU CH FLASHBACK 1. Press the VOL +/- buttons to adjust. VOLUME 30 < PC > Increase Decrease - Sharp IT23M1U | Operation Manual - Page 30
language (English/French/ Spanish) using the MODE SELECT menu while in any mode. (The selected language will be displayed in all modes.) POWER Virtual PC TV AV1 AV2 FREEZE MULTI VIEW MODE SLEEP MENU BRIGHT MODE ENTER BRIGHT 1. Press the MENU button to display the MENU screen. 2. Press - Sharp IT23M1U | Operation Manual - Page 31
PIP/SPLIT window's video source. You can also select the source of audio you want to hear while the PIP/ SPLIT window is displayed. POWER Virtual PC TV AV1 AV2 FREEZE MULTI VIEW MODE SLEEP MENU BRIGHT MODE ENTER BRIGHT 1. Press the MENU button in PC mode to display the MENU screen - Sharp IT23M1U | Operation Manual - Page 32
another audio source while viewing the computer screen (SOUND) You can listen to the TV or another audio source while the monitor is displaying the computer screen. POWER Virtual PC TV AV1 AV2 FREEZE MULTI VIEW MODE SLEEP MENU BRIGHT MODE ENTER BRIGHT 1. Press the MENU button in PC mode - Sharp IT23M1U | Operation Manual - Page 33
you are using Windows, you can use the adjustment pattern on the supplied CD-ROM. This explanation is for Windows 95/98/2000/Me/ XP, and point will be applied and the screen will automatically disappear. - This manual describes display adjustment based on the use of the adjustment pattern (for - Sharp IT23M1U | Operation Manual - Page 34
Using the menus in PC mode Menu setting items MENU ADJUSTMENT GAIN CONTROL AUDIO ADJUST COLOR CONTROL MODE SELECT MULTI SCREEN < PC * When using the monitor with a digital connection, this item adjustment is not necessary. ** You can also set this item directly using the remote control, - Sharp IT23M1U | Operation Manual - Page 35
English Français Deutsch Using the menus in PC mode ADJUSTMENT menu When using the monitor with a digital connection, this menu adjustment is not necessary. Item AUTO CLOCK Description Automatically adjusts "CLOCK", "PHASE", "H-POS", and "V-POS". (See page E21.) Adjusts the clock so that no - Sharp IT23M1U | Operation Manual - Page 36
be possible. Please perform manual adjustment instead. - If "OUT OF ADJUST" is displayed, perform manual adjustment. AUDIO ADJUST menu set to "OFF". - Even in PC mode, the TV/AV mode's AUDIO ADJUST menu will appear when: - Watching and listening to TV or video in the PIP/SPLIT window. (See pages E29 - Sharp IT23M1U | Operation Manual - Page 37
color tone of the LCD monitor. - sRGB tone redder than standard. - USER Allows you to individually adjust red its aspect ratio. When the image's resolution is lower than 1024 x 768, the see page E47), TV/AV-IN SOUND is not available in PC mode. Adjusts the image to optimum sharpness when it is - Sharp IT23M1U | Operation Manual - Page 38
source of the PIP/SPLIT window. Selects the audio you want to hear while displaying the PIP/SPLIT window. - PC Computer audio - SUB SOURCE ... TV or video audio Resets adjustment values for this menu to their original factory settings. Note: - "PIP SIZE", "PIP POSITION" and "PC POSITION" can - Sharp IT23M1U | Operation Manual - Page 39
the computer's own operation manual while reading this.) About reproduction characteristics of the LCD monitor. Using an application supplied CD-ROM into the CD-ROM drive of the computer. 2. Click [Next]. 3. Check [Display a list of all the drivers in a specific location, so you can select the driver - Sharp IT23M1U | Operation Manual - Page 40
value. This explanation assumes that the CD-ROM drive is "D" drive. If the "Add New Hardware Wizard" has appeared: 1. Load the supplied CD-ROM into the CD-ROM drive of the computer. 2. Check [Specify the location of the driver [Advanced]] and click [Next]. 3. Check [Display a list of all the - Sharp IT23M1U | Operation Manual - Page 41
]] and click [Next]. 8. Check [Don't search. I will choose the driver to install.] and click [Next]. 9. Click on [Have Disk], confirm that it.) This explanation assumes that the CD-ROM drive is "D" drive. 1. Load the supplied CD-ROM into the CD-ROM drive of the computer. 2. Click on the [Start - Sharp IT23M1U | Operation Manual - Page 42
. A ColorSync profile describes the color characteristics of the LCD monitor. Notes: - This monitor's ColorSync profile works with and methods may differ. Please follow the computer's own operation manual while reading this. 1. Load the supplied CD-ROM into the CD-ROM drive of the computer. 2. - Sharp IT23M1U | Operation Manual - Page 43
using the CHANNEL SETTING menu. (See page E22.) POWER Virtual PC TV AV1 AV2 FREEZE MULTI VIEW MODE SLEEP MENU BRIGHT MODE ENTER BRIGHT Notes: the CH buttons or channel buttons. Pressing one of these buttons automatically switches to TV mode if the monitor is in PC or AV mode. To select a 1- - Sharp IT23M1U | Operation Manual - Page 44
AV2 FREEZE MULTI VIEW MODE SLEEP MENU Returning to previous channel (FLASHBACK) You can return to the previous channel you were watching. POWER Virtual PC TV AV1 AV2 FREEZE MULTI VIEW MODE SLEEP MENU BRIGHT MODE ENTER BRIGHT BRIGHT MODE ENTER BRIGHT DISPLAY CC MTS MUTE DISPLAY CC - Sharp IT23M1U | Operation Manual - Page 45
control. (See page E52 for information on using the MENU screen.) POWER Virtual PC TV AV1 AV2 1. Press the CC button to display the CC/TEXT screen strange characters, etc.) if signal conditions are poor or if there are problems at the broadcast source. - If no text broadcast is being received - Sharp IT23M1U | Operation Manual - Page 46
Adjusting the V-chip settings (V-CHIP) Important: - Please refer to the end of this manual for "Clearing the secret number". This function allows TV programs to be restricted and TV usage to be controlled based on FCC data. It prevents children from watching violent or sexual scenes that may be - Sharp IT23M1U | Operation Manual - Page 47
age-based rating is set to BLOCK, this will automatically block the higher ratings: TV-G, TV-PG, TV-14 and TV-MA. In addition, D, L, S, V and FV in CONTENT are automatically blocked unless you manually set BLOCK CONTENT. Italiano Español English Example 2: When the content-based rating: "D for - Sharp IT23M1U | Operation Manual - Page 48
POWER Virtual PC TV AV1 AV2 FREEZE MULTI VIEW MODE SLEEP MENU BRIGHT MODE ENTER BRIGHT DISPLAY CC MTS MUTE VOL CH FLASHBACK 1. Press the TV button to select TV number for the first time, press the ENTER button to register it. Otherwise, continue to the next step. The V-CHIP BLOCK menu - Sharp IT23M1U | Operation Manual - Page 49
see page E46), V-chip Block will be activated again. - If you turn the power on from off, V-chip Block will be activated again. Resetting the V-chip Block screen. Note: - When "STATUS" in the V-CHIP BLOCK menu is "ON", TV/AV-IN SOUND is not available in PC mode (see page E30). Español English - Sharp IT23M1U | Operation Manual - Page 50
connected to AV-IN2 Display mode "AV2" Note: - Since the use of AV1 and AV2 is the same, this manual refers to AV1 mode and AV2 mode as "AV mode". POWER Virtual PC TV AV1 AV2 FREEZE MULTI VIEW MODE SLEEP MENU BRIGHT MODE ENTER BRIGHT DISPLAY CC MTS MUTE VOL CH FLASHBACK - Sharp IT23M1U | Operation Manual - Page 51
specified length of time. This is handy if you want to watch the monitor at bedtime. POWER Virtual PC TV AV1 AV2 FREEZE MULTI VIEW MODE SLEEP MENU BRIGHT MODE ENTER BRIGHT POWER Virtual PC TV AV1 AV2 FREEZE MULTI VIEW MODE SLEEP MENU BRIGHT MODE ENTER BRIGHT 1. Press the FREEZE - Sharp IT23M1U | Operation Manual - Page 52
ADJUST AUDIO ADJUST CHANNEL SETTING SCREEN ADJUST MODE SELECT CLOSED CAPTION V-CHIP BLOCK < TV/AV 3. Press the buttons to select the menu you want to set, and Page E51 BLACK LEVEL Page E51 COLOR Page E51 TINT Page E51 SHARPNESS Page E51 FLESH TONE Page E51 VIDEO SELECT Page E51 WHITE - Sharp IT23M1U | Operation Manual - Page 53
Deutsch Using the menus in TV/AV mode VIDEO ADJUST menu Item CONTRAST BLACK LEVEL COLOR TINT SHARPNESS FLESH TONE VIDEO SELECT TV (CABLE). (See page E23.) Set this item when "AIR/CABLE" is set to "CABLE". (See page E23.) Sets available channels automatically. (See page E23.) Sets channels manually - Sharp IT23M1U | Operation Manual - Page 54
Description Selects the screen size. - NORMAL ........ Displays 4:3 aspect ratio TV images normally. - WIDE Expands 4:3 images horizontally to fill the entire (See page E47.) When "STATUS" in the V-CHIP BLOCK menu is "ON", TV/AV-IN SOUND is not available in PC mode (see page E30). Resets adjustment - Sharp IT23M1U | Operation Manual - Page 55
the screen size to match the video on videotapes and DVDs. POWER Virtual PC TV AV1 AV2 FREEZE MULTI VIEW MODE SLEEP MENU BRIGHT MODE ENTER NORMAL Displays the image without changing its aspect ratio. When the image's resolution is lower than 1024 x 768, the image is expanded. FULL - Sharp IT23M1U | Operation Manual - Page 56
). Concerning the ALL RESET procedure, refer to the end of this manual. Disabling the control buttons other than the following buttons (monitor and The changing of adjusted values for both PC mode and TV/AV mode will be prevented. [Monitor] - MAIN POWER button - VOL/BRIGHT buttons - INPUT button - - Sharp IT23M1U | Operation Manual - Page 57
over bend the cable or add extension cords as this could lead to malfunction. - While following these instructions, please also refer to the installation instructions in the operation manual included with the arm or stand. CAUTION! - Be careful not to get your fingers pinched between the display and - Sharp IT23M1U | Operation Manual - Page 58
Monitor care Troubleshooting If you think the monitor may be faulty, please check the following points before taking it to be repaired. If afterwards it still does not work, please contact the shop where you purchased the monitor or your nearest Sharp authorized Service Center. The monitor's - Sharp IT23M1U | Operation Manual - Page 59
Problem There is no video picture. There is no game picture. The TV speakers while the monitor is in power-saving mode. - When "STATUS" in the V-CHIP BLOCK menu is "ON", TV/AV-IN SOUND is not . LCD panel section Use a soft dry cloth to lightly wipe away dirt and dust from the surface of the LCD panel - Sharp IT23M1U | Operation Manual - Page 60
Specifications Product specifications Model name IT-23M1U LCD display 23" TFT LCD module Actual display size 23.0" (58.3 cm) measured diagonally Resolution (max.) 1366 x 768 Displayable colors (max.) Approx. 16.77 million colors (8 bit) Dot pitch (H x V) 0.372 mm x 0.372 mm Brightness (max.) 500 cd - Sharp IT23M1U | Operation Manual - Page 61
policy of continuous improvement, SHARP reserves the right to resolution is 1360 x 768, 1280 x 768 or 1024 x 768. - All are compliant only with non-interlaced. - Frequencies for Power OUT OF TIMING" will appear. Follow your computer's instruction manual to set the timing so that it is compatible - Sharp IT23M1U | Operation Manual - Page 62
Power consumption ON Display on 95 W OFF Display off 5.5 W DDC (Plug & Play) This monitor supports the VESA DDC (Display Data Channel) standard. DDC is a signal standard for carrying out Plug & Play functions on the monitor or computer. It transfers information such as degree of resolution - Sharp IT23M1U | Operation Manual - Page 63
causer une électrocution aux personnes. Ce symbole (point d'exclamation dans un triangle équilatéral) avertit l'utilisateur de la présence d'instructions d'utilisation et d'entretien (dépannage) importantes dans la documentation accompagnant l'appareil. IT-23M1U_fr_01.P65 1 F1 2004/08/20, 10:45 - Sharp IT23M1U | Operation Manual - Page 64
utilisé conformément aux instructions, est susceptible de provoquer ou un technicien spécialisé en TV/radio. N'utilisez que les câbles de conformité Moniteur LCD couleurs SHARP IT-23M1U Cet appareil répond SHARP ELECTRONICS CORPORATION Sharp Plaza, Mahwah, New Jersey 07430 TEL : 1-800-BE-SHARP - Sharp IT23M1U | Operation Manual - Page 65
English Français Table des matières Pour démarrer Conseils et mesures de sécurit F5 Consignes de sécurité importantes F5 Moniteur et liste des accessoires F7 Description du produit F8 Moniteur F8 Télécommande F9 Serre-câble F10 Utilisation de casque audio (en vente dans le commerce F10 Ré - Sharp IT23M1U | Operation Manual - Page 66
des DVD, des jeux et d'autres équipements F48 Fonctions pratiques (pour le mode TV/AV F49 Arrêt sur image (FREEZE F49 Mise hors tension du téléviseur après toutes les valeurs de réglage (ALL RESET F54 Appendices Instructions relatives à l'installation d'un bras conforme VESA F55 Entretien du - Sharp IT23M1U | Operation Manual - Page 67
é Nous vous remercions d'avoir porté votre choix sur ce Moniteur TV LCD Sharp. Pour assurer la sécurité et le bon fonctionnement de cet informations sur la mise à la terre correcte du mât d'antenne et de sa structure de support, la mise à la terre de la descente d'antenne à une unité de décharge - Sharp IT23M1U | Operation Manual - Page 68
pas un mauvais fonctionnement mais un phénomène courant des écrans LCD et que cela n'affecte aucunement les performances du moniteur. - Ne pas le moniteur avec des objets durs. - Il faut savoir que la Sharp Corporation décline toute responsabilité en cas d'erreur survenue durant l'utilisation par - Sharp IT23M1U | Operation Manual - Page 69
que les éléments suivants sont bien présents dans l'emballage : - Moniteur TV LCD (1) - Adaptateur secteur (1) (nom du modèle : NL-A72J) carton d'emballage pour le cas où le moniteur devrait être transporté. - Sharp Corporation détient les droits d'auteur de Utility programme. Ne pas le reproduire - Sharp IT23M1U | Operation Manual - Page 70
INPUT 2 MENU ENTER/BMROIDGEHT 3 4 CH 1 1. Haut-parleurs 2. Boutons de commande 3. Borne pour casque audio 4. Capteur de télécommande 5. Bouton MAIN POWER 6. Diode d'alimentation Vert : en fonction Rouge : mode veille Orange : mode économie d'énergie (seulement en mode PC) Hors : équipement hors - Sharp IT23M1U | Operation Manual - Page 71
produit Moniteur Vue arrière/vue gauche A Télécommande POWER 7 1 Virtual 9 8 PC TV AV1 AV2 10 9 2 10 3 FREEZE MULTI VIEW Caption) 8. Boutons de chaînes 9. Bouton Dolby Virtual 10. Boutons d'entrée (PC, TV, AV1 et AV2) 11. Bouton VIEW MODE 12. Bouton MULTI 13. Bouton MENU 14. - Sharp IT23M1U | Operation Manual - Page 72
! - Assurez vous de bien saisir les deux bords du moniteur lorsque vous réglez l'angle de vue. Le panneau LCD de cet appareil est en verre. Appuyer les mains sur le panneau LCD peut provoquer son endommagement. - Prendre garde de ne pas se coincer les doigts. approx. 20° approx. 45° approx - Sharp IT23M1U | Operation Manual - Page 73
pas correctement utilisées, elles peuvent couler et/ou exploser. Observez les instructions ci-dessous. - Disposez les piles en faisant correspondre leur polarité avec neuves avec des piles usagées. Ceci raccourcirait la durée de service des piles neuves et/ou pourrait faire couler les piles usagées. - Sharp IT23M1U | Operation Manual - Page 74
est nécessaire lorsqu'on utilise le moniteur comme moniteur d'ordinateur TV ...C'est nécessaire lorsqu'on utilise le moniteur comme téléviseur AV érique, le câble de signal numérique vendu séparément est nécessaire.) TV Connexion du moniteur à une prise d'antenne de résidence (Voir aux pages F16 - Sharp IT23M1U | Operation Manual - Page 75
English Français Opérations de base sur l'écran de réglage Les explications dans ce mode d'emploi concernent surtout l'utilisation de la télécommande. (Les opérations nécessitant l'utilisation des boutons de commande du moniteur sont spécialement identifiées par l'emploi du mot "moniteur".) Le - Sharp IT23M1U | Operation Manual - Page 76
le câble pour signal dans le connecteur et ensuite, serrez les vis des deux côtés. S'il s'agit d'un D-sub à 15 broches sur 2 rangées pour Apple Power Macintosh, installer un adaptateur de conversion Macintosh (en vente dans le commerce) sur le câble de signal analogique - Sharp IT23M1U | Operation Manual - Page 77
English Français Raccordement du moniteur à un ordinateur Connexion numérique Connectez le câble de signal numérique vendu séparément (nom du modèle : NL-C04J) à la borne de sortie numérique RVB de l'ordinateur. Voyez à la page F8 les informations pour enlever/remettre le couvercle du borne. - Le - Sharp IT23M1U | Operation Manual - Page 78
Connexion du moniteur à une prise d'antenne de résidence ATTENTION ! - Lorsque vous faites un raccordement, assurez-vous que le moniteur est mis hors tension. L'antenne joue un rôle plus important pour la réception couleur que pour la réception noir et blanc. Il est donc vivement recommandé d' - Sharp IT23M1U | Operation Manual - Page 79
par câble (non fourni) Ligne de télévision par câble Remarque : - Pour le type de répartiteur, commutateur RF ou multiplexeur éventuellement nécessaires, consultez votre revendeur ou service après-vente SHARP. IT-23M1U_fr_01.P65 17 F17 2004/08/20, 10:46 - Sharp IT23M1U | Operation Manual - Page 80
Raccordement du moniteur à l'équipement AV ATTENTION ! - Assurez-vous que le moniteur et tous les équipement qui vont lui être raccordés sont mis hors tension avant de commencer. Exemples d'équipements que vous pouvez raccorder Magnétoscopes Caméscopes Consoles de jeux Lecteurs de vidéodisques - Sharp IT23M1U | Operation Manual - Page 81
English Français Raccordement du moniteur à l'équipement AV Equipement AV avec les bornes sortie S-vidéo Côté gauche du moniteur AV-IN1 Magnétoscope etc. (Blanc) (Blanc) (Rouge) (Rouge) Câble broche RCA (en vente dans le commerce) Câble S-vidéo (en vente dans le commerce) Remarque : - - Sharp IT23M1U | Operation Manual - Page 82
Raccordement du moniteur à une source d'alimentation ATTENTION ! - Lorsque vous faites un raccordement, assurez-vous que le moniteur est mis hors tension. - Utilisez toujours l'adaptateur secteur qui vous a été fourni avec le moniteur. - Ne pas courber le câble de manière excessive ni y ajouter de - Sharp IT23M1U | Operation Manual - Page 83
vont être réglés à leurs états optimaux. Remarque : - Quand vous utilisez le moniteur avec une connexion numérique, le réglage automatique de l'écran n'est pas nécessaire. POWER Virtual PC TV AV1 AV2 FREEZE MULTI VIEW MODE SLEEP MENU BRIGHT MODE ENTER BRIGHT 1. Appuyez sur le bouton MAIN - Sharp IT23M1U | Operation Manual - Page 84
înes est vide au départ de l'usine. Pour recevoir les chaînes, utilisez le menu CHANNEL SETTING. Affichage du menu CHANNEL SETTING POWER Virtual PC TV AV1 AV2 FREEZE MULTI VIEW MODE SLEEP MENU BRIGHT MODE ENTER BRIGHT Remarque : - Relachez le verrouillage du réglage (voir à la page F54 - Sharp IT23M1U | Operation Manual - Page 85
les boutons pour sélectionner "CHANNEL SEARCH", puis appuyez sur le bouton ENTER. CHANNEL SEARCH AIR 2 < TV/AV > 3. Appuyez sur le bouton ENTER. Le tuner va rechercher toutes les chaînes disponibles dans votre mémoire de la télévision est vide. F23 IT-23M1U_fr_01.P65 23 2004/08/20, 10:46 - Sharp IT23M1U | Operation Manual - Page 86
. (Voir à la page F22.) 2. Appuyez sur les boutons pour sélectionner "CHANNEL MEMORY", puis appuyez sur le bouton ENTER. CHANNEL MEMORY AIR 2 < TV/AV > 3. Appuyez sur les boutons CH ou sur les boutons pour sélectionner chaque chaîne désirée à ajouter ou à effacer. Vous pouvez également - Sharp IT23M1U | Operation Manual - Page 87
çais Opérations communes Mise EN/HORS tension Commutation des modes d'affichage (INPUT) POWER Virtual PC TV AV1 AV2 FREEZE MULTI VIEW MODE SLEEP MENU BRIGHT MODE ENTER BRIGHT POWER Virtual PC TV AV1 AV2 FREEZE MULTI VIEW MODE SLEEP MENU BRIGHT MODE ENTER BRIGHT Mise sous - Sharp IT23M1U | Operation Manual - Page 88
Démarrez le réglage en passant en mode affichage l'équipement sur lequel vous voulez régler le rétroéclairage. POWER Virtual PC TV AV1 AV2 FREEZE MULTI VIEW MODE SLEEP MENU BRIGHT MODE ENTER BRIGHT 1. Appuyez sur le bouton BRIGHT. BRIGHT 31 < PC > 2. Appuyez sur les boutons luminosit - Sharp IT23M1U | Operation Manual - Page 89
VOL/BRIGHT > button Diminuez VOL/BRIGHT < button L'écran pour le réglage du volume va automatiquement disparaître au bout de 15 secondes. POWER Virtual PC TV AV1 AV2 FREEZE MULTI VIEW MODE SLEEP MENU BRIGHT MODE ENTER BRIGHT 1. Appuyez sur le bouton Dolby Virtual. À chaque fois que vous - Sharp IT23M1U | Operation Manual - Page 90
ou Espagnol) en utilisant le menu MODE SELECT dans n'importe quel mode. (La langue sélectionnée sera affichée sur tous les modes.) POWER Virtual PC TV AV1 AV2 FREEZE MULTI VIEW MODE SLEEP MENU BRIGHT MODE ENTER BRIGHT 1. Appuyez sur le bouton MENU pour afficher l'écran MENU. 2. Appuyez - Sharp IT23M1U | Operation Manual - Page 91
pour la fenêtre PIP/SPLIT. Vous pouvez aussi sélectionner l'audio que vous désirez entendre pendant l'affichage de la fenêtre PIP/SPLIT. POWER Virtual PC TV AV1 AV2 FREEZE MULTI VIEW MODE SLEEP MENU BRIGHT MODE ENTER BRIGHT 1. Appuyez sur le bouton MENU en mode PC pour afficher l'écran - Sharp IT23M1U | Operation Manual - Page 92
cran de l'ordinateur (SOUND) Vous pouvez écouter la télévision ou une autre source audio pendant que le moniteur affiche l'écran de l'ordinateur. POWER Virtual PC TV AV1 AV2 FREEZE MULTI VIEW MODE SLEEP MENU BRIGHT MODE ENTER BRIGHT 1. Appuyez sur le bouton MENU en mode PC pour afficher - Sharp IT23M1U | Operation Manual - Page 93
English Français Utiliser les menus en mode PC Vous pouvez régler la couleur de l'image de l'écran de l'ordinateur et faire les réglages MULTI SCREEN (écran multiple) en utilisant les menus pour le mode PC. Comment régler 1. Appuyez sur le bouton PC pour sélectionner le mode PC. 2. Appuyez sur - Sharp IT23M1U | Operation Manual - Page 94
Utiliser les menus en mode PC Options de réglage des menus MENU ADJUSTMENT GAIN CONTROL AUDIO ADJUST COLOR CONTROL MODE SELECT MULTI SCREEN < PC * Lorsqu'on utilise le moniteur avec une connexion numérique, le réglage de cette option n'est pas nécessaire. ** Vous pouvez également régler cette - Sharp IT23M1U | Operation Manual - Page 95
English Français Utiliser les menus en mode PC Menu ADJUSTMENT Quand le moniteur est utilisé avec une connexion numérique, ce réglage de menu n'est pas nécessaire. Option AUTO CLOCK Description Règle automatiquement "CLOCK", "PHASE", "H-POS", et "V-POS". (Voir à la page F21.) Règle l'horloge - Sharp IT23M1U | Operation Manual - Page 96
: - "TREBLE", "BASS" et "BALANCE" peuvent être réglés seulement lorsque "DOLBY VIRTUAL" est réglé sur "OFF". - Même en mode PC, le menu AUDIO ADJUST du mode TV/AV va apparaître lorsque : - On regarde et on écoute la télévision ou la vidéo dans la fenêtre PIP/SPLIT. (Voir aux pages F29 - Sharp IT23M1U | Operation Manual - Page 97
teinte d'origine du moniteur LCD. - sRGB sRGB est . - WARM2 .......... Teinte plus rouge que la norme. - USER Vous permet de régler individuellement le contraste de rouge, de vert CHIP BLOCK est sur "ON" (voir à la page F47), SOUND de TV/AV-IN n'est pas disponible sur le mode PC. Restaure la netteté - Sharp IT23M1U | Operation Manual - Page 98
Utiliser les menus en mode PC Menu MULTI SCREEN Option MULTI SCREEN DISPLAY PIP SIZE PIP POSITION PC POSITION SUB SOURCE SOUND RESET Description Désigne si l'écran de l'ordinateur et les images de la télévision ou de la vidéo sont affichés simultanément. - OFF - PIP L'image de la télévision - Sharp IT23M1U | Operation Manual - Page 99
qui décrit les caractéristiques de l'affichage des couleurs du moniteur LCD. L'utilisation d'une application compatible avec un profil ICC permet de Cocher la case [Display a list of all the drivers in a specific location, so you can select the driver you want.], ensuite cliquer sur [Next]. 4. - Sharp IT23M1U | Operation Manual - Page 100
[Control Panel]. 3. Double-cliquer sur [Display]. 4. Cliquer sur [Settings], sur [Advanced], et sur [Monitor]. 5. Cliquer sur [Properties], sur [Driver], et sur [Update Driver]. 6. Lorsque [Upgrade Device Driver Wizard] apparaît, cliquer sur [Next]. 7. Cocher la case [Display a list of the known - Sharp IT23M1U | Operation Manual - Page 101
ît, cocher la case [Install from a list or specific location [Advanced]] et cliquer sur [Next]. 8. Cocher la case [Don't search. I will choose the driver to install.] et cliquer sur [Next]. 9. Cliquer sur [Have disk], et s'assurer que [Copy manufacturer's files from:] est [D:] et cliquer sur [OK - Sharp IT23M1U | Operation Manual - Page 102
affichage de couleurs lors d'une utilisation avec une application compatible. Un profil ColorSync décrit les caractéristiques de couleur du moniteur LCD. Remarques : - Le profil ColorSync de ce moniteur fonctionne sous MacOS 8.5 ou version ultérieure. - Lorsqu'on utilise le profil ColorSync, réglez - Sharp IT23M1U | Operation Manual - Page 103
utilisant le menu CHANNEL SETTING. (Voir à la page F22.) POWER Virtual PC TV AV1 AV2 FREEZE MULTI VIEW MODE SLEEP MENU BRIGHT MODE ENTER chaînes. En appuyant sur un de ces boutons, on passe automatiquement en mode TV si le moniteur était en mode PC ou AV. Pour sélectionner des nombres - Sharp IT23M1U | Operation Manual - Page 104
Regarder la télévision Sélection de MTS (Multi ch TV Sound) Retour à la chaîne précédente (FLASHBACK) Vous pouvez second programme audio programme audio monophonique POWER Virtual PC TV AV1 AV2 FREEZE MULTI VIEW MODE SLEEP MENU POWER Virtual PC TV AV1 AV2 FREEZE MULTI VIEW MODE SLEEP - Sharp IT23M1U | Operation Manual - Page 105
MENU. La procédure utilisant la télécommande va être décrite ici. (Voir à la page F52 pour les informations sur l'utilisation de l'écran MENU.) POWER Virtual PC TV AV1 AV2 1. Appuyez sur le bouton CC pour afficher l'écran CC/TEXT. CC/TEXT : OFF FREEZE MULTI VIEW MODE SLEEP MENU BRIGHT MODE - Sharp IT23M1U | Operation Manual - Page 106
Guidelines sont basées sur l'âge et le contenu. - Puisque un programme de télévision peut utiliser soit la classification MPAA soit les TV Parental Guidelines, les deux doivent être réglées pour un contrôle complet. Classification MPAA CLASSIFICATION G TOUS PUBLICS. Convenable pour tous les - Sharp IT23M1U | Operation Manual - Page 107
choisir ce niveau de classification selon le contenu. Exemple 1 : Lorsque le niveau basé sur l'âge TV-Y7 est réglé sur BLOCK, ceci va automatiquement bloquer les niveaux plus élevés : TV-G, TV-PG, TV-14 et TV-MA. De plus, D, L, S, V et FV dans CONTENT sont automatiquement bloqués à moins que vous ne - Sharp IT23M1U | Operation Manual - Page 108
Réglage de la puce V pour la classification MPAA POWER Virtual PC TV AV1 AV2 FREEZE MULTI VIEW MODE SLEEP MENU BRIGHT MODE ENTER BRIGHT DISPLAY CC MTS MUTE VOL CH FLASHBACK 1. Appuyez sur le bouton TV pour sélectionner le mode TV. 2. Appuyez sur le bouton MENU pour afficher l'écran - Sharp IT23M1U | Operation Manual - Page 109
de la puce V après le "Réglage de la puce V pour la classification MPAA" et/ou après le "Réglage de la puce V pour les TV Parental Guidelines (TV GUIDELINE)". 1. Répétez les étapes 1 à 4 de "Réglage de la puce V pour la classification MPAA" à la page F46. (Le menu V-CHIP BLOCK va être affich - Sharp IT23M1U | Operation Manual - Page 110
de AV1 et de AV2 est la même, ce mode d'emploi va utiliser "mode AV" pour désigner le mode AV1 et le mode AV2. POWER Virtual PC TV AV1 AV2 FREEZE MULTI VIEW MODE SLEEP MENU BRIGHT MODE ENTER BRIGHT DISPLAY CC MTS MUTE VOL CH FLASHBACK 1. Appuyez sur le bouton AV1 - Sharp IT23M1U | Operation Manual - Page 111
alors qu'une image est sur pause. Le menu SCREEN ADJUST ne peut pas également être réglé alors qu'une image est sur pause. POWER Virtual PC TV AV1 AV2 FREEZE MULTI VIEW MODE SLEEP MENU BRIGHT MODE ENTER BRIGHT DISPLAY CC MTS MUTE 1. Appuyez sur le bouton SLEEP. 2. Précisez dans - Sharp IT23M1U | Operation Manual - Page 112
AUDIO ADJUST CHANNEL SETTING SCREEN ADJUST MODE SELECT CLOSED CAPTION V-CHIP BLOCK < TV/AV 3. Appuyez sur les boutons pour sélectionner le menu que vous Page F51 BLACK LEVEL Page F51 COLOR Page F51 TINT Page F51 SHARPNESS Page F51 FLESH TONE Page F51 VIDEO SELECT Page F51 WHITE BALANCE - Sharp IT23M1U | Operation Manual - Page 113
Utilisation des menus dans le mode TV/AV Menu VIDEO ADJUST Option CONTRAST BLACK LEVEL COLOR TINT SHARPNESS FLESH TONE VIDEO SELECT WHITE DOLBY VIRTUAL" est réglé sur "OFF". Menu CHANNEL SETTING (Uniquement mode TV) Option AIR/CABLE CABLE MODE CHANNEL SEARCH CHANNEL MEMORY Description Règle le - Sharp IT23M1U | Operation Manual - Page 114
TV la page F43.) Menu V-CHIP BLOCK Option MPAA TV GUIDELINES STATUS RESET Description Règle le blocage ou F46.) Règle le blocage ou le déblocage (-----) de TV GUIDELINES. (Voir aux pages F46 et F47.) Détermine le menu V-CHIP BLOCK est sur "ON", SOUND de TV/AV-IN n'est pas disponible sur le mode PC - Sharp IT23M1U | Operation Manual - Page 115
pour l'adapter à la vidéo des bandes vidéo et des DVD. POWER Virtual PC TV AV1 AV2 FREEZE MULTI VIEW MODE SLEEP MENU BRIGHT MODE ENTER BRIGHT manière à remplir l'écran. (Le format de l'image peut changer.) [Mode TV/AV] 1. Appuyez sur le bouton VIEW MODE. La commutation de mode va se - Sharp IT23M1U | Operation Manual - Page 116
hors service des boutons de commande autres que les boutons suivantes (du moniteur et de la télécommande) empêche les valeurs réglées d'être modifiées. Le changement des valeurs réglées non seulement du mode PC, mais encore du mode TV/AV vont être évités. [Moniteur] - Bouton MAIN POWER - Boutons - Sharp IT23M1U | Operation Manual - Page 117
ajouter de rallonge car cela peut provoquer un dysfonctionnement. - Tout en suivant ces instructions, se reporter aux instructions relatives à l'installation dans le mode d'emploi qui accompagne le bras ou le support. ATTENTION ! - Faites attention de ne pas vous pincer les doigts entre l'affichage - Sharp IT23M1U | Operation Manual - Page 118
limite de vie. Se renseigner auprès du revendeur ou du réparateur agréé Sharp le plus proche. - Au début de l'utilisation, en raison de la "OFF"? (Page F54) Une chaîne particulière - Avez-vous réglé les chaînes TV correctement? (Pages F22 à F24) n'est pas syntonisée. Il y a des bandes et des - - Sharp IT23M1U | Operation Manual - Page 119
. - Quand "STATUS" dans le menu V-CHIP BLOCK est sur "ON", SOUND de TV/AV-IN n'est pas disponible sur le mode PC. (Pages F30 et F47) Les boutons et éliminer les saletés. Panneau LCD Utiliser un chiffon doux et sec pour éliminer la poussière de la surface du panneau LCD. (Un chiffon doux tel qu' - Sharp IT23M1U | Operation Manual - Page 120
23M1U Moniteur LCD Module TFT à cristaux liquides de 23 in Dimension réelle de l'affichage 23 entrée audio : broche RCA (G/D x 2) Chaînes TV captables VHF : 2 à 13 ; UHF : 14 type NL-A72J de Sharp Corporation) Température recommand ; 22,5 lb. (non compris le support) Dimensions (Unités : mm) 589 90 - Sharp IT23M1U | Operation Manual - Page 121
English Français Caractéristiques techniques Remarque : - SHARP se réserve le droit d'apporter des modifications à la 47,7kHz 60Hz 84,7MHz Saisie de texte US 720X400 31,5kHz 70Hz 28,3MHz Série Power Macintosh 640X480 832X624 1024X768 35,0kHz 66,7Hz 49,7kHz 74,6Hz 60,2kHz 75Hz 30,2MHz - Sharp IT23M1U | Operation Manual - Page 122
données 1+ 22 Ecran horloge TMDS 11 Ecran TMDS data 1/3 23 Horloge TMDS + 12 N.C. 24 Horloge TMDS - Gestion de l'alimentation Power Management Mode DMPM Ecran Consommation électrique Activé Affichage activé 95 W Désactivé Affichage désactivé 5,5 W DDC (Plug & Play) Ce moniteur supporte - Sharp IT23M1U | Operation Manual - Page 123
English Deutsch Español ESPAÑOL IMPORTANTE: Para colaborar en caso de denuncias por pérdida o robo, registre el modelo y los números de serie correspondientes al monitor en el espacio provisto. Los números se encuentran situados en la parte trasera del monitor. Modelo No.: Serie No.: EE.UU. - Sharp IT23M1U | Operation Manual - Page 124
del concesionario o de un técnico en radio/TV experimentado. No se sirva de otros cables y SOLAMENTE Declaración de conformidad Monitor LCD a color SHARP IT-23M1U El presente equipo cumple las condiciones SHARP ELECTRONICS CORPORATION Sharp Plaza, Mahwah, New Jersey 07430 TEL: 1-800-BE-SHARP - Sharp IT23M1U | Operation Manual - Page 125
la memoria (CHANNEL SEARCH S23 Cómo agregar canales débiles o adicionales, o cómo borrar canales no deseados de la memoria del TV (CHANNEL MEMORY S24 Operaciones comunes Operaciones comunes S25 Encendido/Apagado S25 Cómo alternar modos de visualización (INPUT S25 Cómo ajustar la iluminación de - Sharp IT23M1U | Operation Manual - Page 126
uso de DVDs, juegos y otros equipos S48 Características prácticas (para modo TV/AV S49 Cómo congelar la pantalla (FREEZE S49 Cómo apagar el monitor luego de tiempo especificado (SLEEP S49 Utilización de los menú en el modo TV/AV S50 Cómo realizar ajustes S50 Items de ajuste del men S50 Otras - Sharp IT23M1U | Operation Manual - Page 127
English Sugerencias y precauciones de seguridad Gracias por adquirir el Monitor TV LCD Sharp. Para garantizar la seguridad y el buen funcionamiento durante años del producto, lea las precauciones de seguridad cuidadosamente antes de hacer uso de este monitor. Precauciones - Sharp IT23M1U | Operation Manual - Page 128
sino que es un fenómeno común de los LCDs y no afectará para nada al rendimiento del golpee jamás el monitor con objetos duros. - Sharp Corporation no asume responsabilidad alguna por las faltas cometidas rayos diferentes de los que aparecen en este manual. solares, ni cerca de equipos de calefacci - Sharp IT23M1U | Operation Manual - Page 129
incluye los siguientes componentes: - Monitor TV LCD (1) - Adaptador de CA (1) (nombre ROM (Disquete de utilidades para Windows/ Macintosh) (1) - Manual de funcionamiento (1) Notas: - El cable de señal por si necesita transportar el monitor. - Sharp Corporation es titular de los derechos de autor - Sharp IT23M1U | Operation Manual - Page 130
INPUT 2 MENU ENTER/BMROIDGEHT 3 4 CH 1 5 6 VOL/BRIGHT 1. Altavoces 2. Botones de control 3. Borne de auriculares 4. Ventana del sensor remoto 5. Botón MAIN POWER 6. LED indicador de conexión Verde: en uso Rojo: en modo standby Anaranjado: en modo de ahorro de energía (sólo para modo PC) Off - Sharp IT23M1U | Operation Manual - Page 131
English Deutsch Español Descripción del producto Unidad principal Vista trasera/vista izquierda A Control remoto POWER 7 1 Virtual 9 8 PC TV AV1 AV2 10 9 10 2 FREEZE MULTI VIEW MODE 11 SLEEP MENU 12 3 13 11 12 4 BRIGHT ENTER MODE BRIGHT 13 5 14 6 15 DISPLAY CC MTS - Sharp IT23M1U | Operation Manual - Page 132
flojos. ¡PRECAUCIÓN! - Asegúrese de sostener ambos lados del monitor al ajustar el ángulo de visión. El panel LCD que se utiliza en este monitor es de vidrio. Si presiona el panel LCD con las manos podría dañarlo. - Tenga cuidado para que sus dedos no queden atrapados. aprox. 20° aprox - Sharp IT23M1U | Operation Manual - Page 133
English Deutsch Español Control remoto Utilización del control remoto Utilice el control remoto apuntándolo hacia la ventana de sensor remoto que se encuentra en el monitor. La presencia de objetos situados entre el control remoto y la ventana de sensor puede impedir el funcionamiento apropiado. - Sharp IT23M1U | Operation Manual - Page 134
la Conexión digital en la página S15. (Cuando utilice el monitor con una conexión digital, es necesario el cable de señal digital vendido separadamente.) TV Conexión del monitor a un borne de antena de casa (Vea las páginas S16 y S17.) AV Cómo conectar el monitor a un equipo AV (Vea las páginas - Sharp IT23M1U | Operation Manual - Page 135
English Deutsch Funcionamiento de la pantalla de ajuste básica Las explicaciones de este manual utilizan básicamente el control remoto. (Las funciones que necesitan utilizar los botones de control del monitor se identifican especificamente con la palabra "monitor".) El siguiente - Sharp IT23M1U | Operation Manual - Page 136
el cable de señal verticalmente en el conector y apriete los tornillos en ambos lados. Si la conexión es a un D-sub 15 contactos 2 hileras Apple Power Macintosh, acople un adaptador de conversión Macintosh (de venta en el comercio) al cable de señal analógica - Sharp IT23M1U | Operation Manual - Page 137
English Deutsch Español Conexión del monitor a un ordenador Conexión digital Conecte el cable de señal digital vendido separadamente (nombre del modelo: NL-C04J) al borne de salida RGB digital del ordenador. Para obtener mayor información acerca de cómo quitar/reemplazar la tapa del borne, - Sharp IT23M1U | Operation Manual - Page 138
(redondo) Cable bifilar de 300 ohmios (plano) Notas: - Se recomienda el uso de un cable coaxial de 75-ohm. - La memoria para canales de TV se encuentra vacía al momento del envío. Para poder recibir canales, utilice el menú CHANNEL SETTING. (Ver páginas S22 a S24.) Conexión de antena exterior - Sharp IT23M1U | Operation Manual - Page 139
) Divisor de señal binario (no suministrado) Línea de TV por cable SALIDA SALIDA ENTRADA ENTRADA Convertidor/ decodificador de TV por cable (no suministrado) Nota: - Consulte con su distribuidor o centro de reparaciones SHARP para más información sobre el tipo de divisor de señal - Sharp IT23M1U | Operation Manual - Page 140
Cómo conectar el monitor a un equipo AV ¡PRECAUCIÓN! - Asegúrese de que tanto el monitor como todo equipo que usted conecta al mismo se encuentren apagados antes de comenzar. Ejemplos de equipos que pueden ser conectados VCRs Videocámaras Consolas para juegos Reproductors de Videodiscos - Sharp IT23M1U | Operation Manual - Page 141
English Deutsch Español Cómo conectar el monitor a un equipo AV Equipos AV provistos de bornes de salida de video S Lado izquierdo del monitor AV-IN1 VCR, etc. (Blanco) (Blanco) (Rojo) (Rojo) Cable de pin RCA (de venta en el comercio) Cable de Video S (de venta en el comercio) Nota: - - Sharp IT23M1U | Operation Manual - Page 142
Conexión del monitor a una toma de corriente ¡PRECAUCIÓN! - Cuando realice una conexión, asegúrese que el monitor se encuentre apagado. - Utilice siempre el adaptador de CA que viene con el monitor. - Tenga cuidado de no doblar excesivamente el cable ni utilizar cables de prolongación ya que ello - Sharp IT23M1U | Operation Manual - Page 143
automático. POWER Virtual PC TV AV1 AV2 FREEZE MULTI VIEW MODE SLEEP MENU BRIGHT MODE ENTER BRIGHT 1. Presione el botón MAIN POWER para encender automático 2 ó 3 veces. - Se puede llevar a cabo un ajuste manual (página S31) tras el ajuste automático, si resultara necesario debido a una - Sharp IT23M1U | Operation Manual - Page 144
para encender el monitor. Cuando el LED indicador de conexión se ilumine en color rojo, presione el botón POWER del control remoto. 2. Presione el botón TV para seleccionar el modo TV. Aparecerá un número de canal en la esquina superior derecha de la pantalla. 3. Presione el botón MENU para que - Sharp IT23M1U | Operation Manual - Page 145
botones para seleccionar "CHANNEL SEARCH", y presione el botón ENTER. CHANNEL SEARCH AIR 2 < TV/AV > 3. Presione el botón ENTER. El sintonizador buscará todos los canales disponibles en puede recibir ninguno, la memoria del TV se encuentra vacía. S23 IT-23M1U_es_01.P65 23 2004/08/20, 10:51 - Sharp IT23M1U | Operation Manual - Page 146
CHANNEL MEMORY", y presione el botón ENTER. CHANNEL MEMORY AIR 2 < TV/AV > 3. Presione los botones CH o los botones para seleccionar cada canal el botón para agregar el canal en la memoria de TV. Para borrar el canal de la memoria de TV, presione el botón . 5. Presione el botón MENU para - Sharp IT23M1U | Operation Manual - Page 147
Español Operaciones comunes Encendido/Apagado Cómo alternar modos de visualización (INPUT) POWER Virtual PC TV AV1 AV2 FREEZE MULTI VIEW MODE SLEEP MENU BRIGHT MODE ENTER BRIGHT POWER Virtual PC TV AV1 AV2 FREEZE MULTI VIEW MODE SLEEP MENU BRIGHT MODE ENTER BRIGHT Encendido - Sharp IT23M1U | Operation Manual - Page 148
/AV. Comience alternando al modo de visualización para la cual desea ajustar la iluminación de fondo. POWER Virtual PC TV AV1 AV2 FREEZE MULTI VIEW MODE SLEEP MENU BRIGHT MODE ENTER BRIGHT 1. Presione el botón BRIGHT. BRIGHT 31 < PC > 2. Presione los botones Aumentar botón Disminuir - Sharp IT23M1U | Operation Manual - Page 149
VOLUME 30 Subir Bajar botón VOL + botón VOL - La pantalla para ajustar el volumen desaparecerá automáticamente luego de varios segundos. POWER Virtual PC TV AV1 AV2 FREEZE MULTI VIEW MODE SLEEP MENU BRIGHT MODE ENTER BRIGHT 1. Presione el botón Dolby Virtual. Cada vez que presione el - Sharp IT23M1U | Operation Manual - Page 150
(inglés/ francés/español) utilizando el menú MODE SELECT en cualquier modo. (El idioma seleccionado se visualizará en todos los modos.) POWER Virtual PC TV AV1 AV2 FREEZE MULTI VIEW MODE SLEEP MENU BRIGHT MODE ENTER BRIGHT 1. Presione el botón MENU para que aparezca la pantalla MENU - Sharp IT23M1U | Operation Manual - Page 151
video de la ventana PIP/SPLIT. También puede seleccionar la fuente de audio que desea escuchar mientras siga visualizada la ventana PIP/SPLIT. POWER Virtual PC TV AV1 AV2 FREEZE MULTI VIEW MODE SLEEP MENU BRIGHT MODE ENTER BRIGHT 1. Presione el botón MENU en el modo PC para que aparezca - Sharp IT23M1U | Operation Manual - Page 152
otra fuente de audio mientras se observa la pantalla del ordenador (SOUND) Se puede escuchar TV o cualquier otra fuente de audio mientras el monitor muestra la pantalla del ordenador. POWER Virtual PC TV AV1 AV2 FREEZE MULTI VIEW MODE SLEEP MENU BRIGHT MODE ENTER BRIGHT 1. Presione el - Sharp IT23M1U | Operation Manual - Page 153
se encuentra en una pantalla de menú, se aplicarán los ajustes que se hayan realizado hasta esa instancia y la pantalla desaparecerá automáticamente. - Este manual describe ajustes de visualización basados en el uso de patrón de ajustes (para Windows). IT-23M1U_es_01.P65 31 S31 2004/08/20, 10:52 - Sharp IT23M1U | Operation Manual - Page 154
Utilice los menús en el modo PC Items de ajuste del menú MENU ADJUSTMENT GAIN CONTROL AUDIO ADJUST COLOR CONTROL MODE SELECT MULTI SCREEN < PC Menú ADJUSTMENT AUTO Páginas S21 y S33 CLOCK Página S33 PHASE Página S33 H-POS Página S33 V-POS Página S33 Menú GAIN CONTROL AUTO Página S34 - Sharp IT23M1U | Operation Manual - Page 155
English Deutsch Español Utilice los menús en el modo PC Menú ADJUSTMENT Cuando se utiliza el monitor con una conexión digital, no es necesario este ajuste de menú. Item AUTO CLOCK Descripción Ajusta "CLOCK", "PHASE", "H-POS", y "V-POS" automáticamente. (Vea la página S21.) Ajusta el reloj de - Sharp IT23M1U | Operation Manual - Page 156
En tal caso, realice un ajuste manual. - Si se visualiza "OUT OF ADJUST", realice el ajuste manual. Menú AUDIO ADJUST Cuando los auriculares ú AUDIO ADJUST del modo TV/AV cuando: - Mira y escucha el TV o video en la ventana PIP/SPLIT. (Vea las páginas S29 y S36.) - Escucha el TV. (Vea las páginas - Sharp IT23M1U | Operation Manual - Page 157
el tono del color original del monitor LCD. - sRGB sRGB es una norma internacional Tono de color más rojo de lo normal. - USER Permite ajustar contraste rojo, verde y azul individualmente. V-CHIP BLOCK está en "ON" (ver página S47), el TV/AV-IN SOUND no está disponible en modo PC. Ajusta la imagen - Sharp IT23M1U | Operation Manual - Page 158
PIP/SPLIT. Selecciona el audio que desea escuchar cuando aparezca la ventana PIP/SPLIT. - PC Audio del ordenador - SUB SOURCE ... Audio del TV o video Reajusta los valores de ajuste para este menú a los ajustes originales provenientes de fábrica. Nota: - Sólo puede ajustar "PIP SIZE", "PIP - Sharp IT23M1U | Operation Manual - Page 159
la "D". podrían ser diferentes. Siga el manual de funcionamiento propio del ordenador mientras lee esto.) de reproducción cromática del monitor LCD. El uso de una aplicación compatible con Display a list of all the drivers in a specific location, so you can select the driver you want.] y a continuaci - Sharp IT23M1U | Operation Manual - Page 160
Panel]. 3. Haga doble clic en [Display]. 4. Haga clic en [Settings], [Advanced] y [Monitor]. 5. Haga clic sobre [Properties], [Driver] y [Update Driver]. 6. Cuando aparezca el Asistente [Upgrade Device Driver Wizard], haga clic sobre [Next]. 7. Coloque una tilde en [Display a list of the known - Sharp IT23M1U | Operation Manual - Page 161
], compruebe [Install from a list or specific location [Advanced]], haga clic sobre [Next]. 8. Coloque una tilde en [Don't search. I will choose the driver to install.] y haga clic sobre [Next]. 9. Haga clic en [Have disk], confirme que [Copy manufacturer's files from:] es [D:] y haga clic sobre - Sharp IT23M1U | Operation Manual - Page 162
. Un perfil ColorSync describe las características cromáticas del monitor LCD. Notas: - El perfil ColorSync de este monitor funciona con MacOS comandos y los procedimientos a seguir podrían ser diferentes. Siga el manual de funcionamiento propio del ordenador mientras lee esto. 1. Introduzca el - Sharp IT23M1U | Operation Manual - Page 163
envío. Al utilizar el monitor por primera vez o al trasladarse a una nueva área, ajuste los canales utilizando el menú CHANNEL SETTING. (Vea la página S22.) POWER Virtual PC TV AV1 AV2 FREEZE MULTI VIEW MODE SLEEP MENU BRIGHT MODE ENTER BRIGHT Notas: - Para cambiar los modos de visualizaci - Sharp IT23M1U | Operation Manual - Page 164
MENU BRIGHT MODE ENTER BRIGHT Cómo regresar al canal anterior (FLASHBACK) Se puede regresar al canal que usted estaba mirando anteriormente. POWER Virtual PC TV AV1 AV2 FREEZE MULTI VIEW MODE SLEEP MENU BRIGHT MODE ENTER BRIGHT DISPLAY CC MTS MUTE VOL DISPLAY CC MTS MUTE 1. Presione - Sharp IT23M1U | Operation Manual - Page 165
procedimiento a seguir mediante uso del control remoto. (Para obtener mayor información acerca de cómo utilizar la pantalla MENU, consulte la página S52.) POWER Virtual PC TV AV1 AV2 1. Presione el botón CC para que aparezca la pantalla CC/TEXT. CC/TEXT : OFF FREEZE MULTI VIEW MODE SLEEP MENU - Sharp IT23M1U | Operation Manual - Page 166
Cómo ajustar los ajustes V-chip (V-CHIP) Importante: - Consulte el final de este manual para "Cómo borrar el número secreto". Esta función permite restringir programas de TV y controlar su uso de acuerdo con los datos correspondientes a FCC. Evita que los niños puedan ver escenas de violencia o de - Sharp IT23M1U | Operation Manual - Page 167
el índice de popularidad basado en la edad a BLOCK, se bloquearán automáticamente los índices más altos: TV-G, TV-PG, TV-14 y TV-MA. Además, se bloquearán automáticamente D, L, S, V y FV en CONTENT, a menos que BLOCK CONTENT se ajuste manualmente. Español Ejemplo 2: Cuando la clasificación basada - Sharp IT23M1U | Operation Manual - Page 168
Cómo ajustar V-chip para el indice MPAA POWER Virtual PC TV AV1 AV2 FREEZE MULTI VIEW MODE SLEEP MENU BRIGHT MODE ENTER BRIGHT DISPLAY CC MTS MUTE VOL CH FLASHBACK 1. Presione el botón TV para seleccionar el modo TV. 2. Presione el botón MENU para que aparezca la pantalla MENU. MENU - Sharp IT23M1U | Operation Manual - Page 169
V-chip de acuerdo a lo que se detalla en "Cómo ajustar V-chip para el indice MPAA" y/o "Cómo ajustar V-chip para las Guías de TV para Padres (TV GUIDELINE)". 1. Repita pasos 1 a 4 de "Cómo ajustar V-chip para el indice MPAA" en la página S46. (Aparecerá el menú V-CHIP BLOCK.) 2. Presione los - Sharp IT23M1U | Operation Manual - Page 170
de armas de fuego en este monitor. Nota: - Debido a que el uso de AV1 y AV2 es el mismo, este manual se referirá a los modos AV1 y AV2 como "AV modo". POWER Virtual PC TV AV1 AV2 FREEZE MULTI VIEW MODE SLEEP MENU BRIGHT MODE ENTER BRIGHT DISPLAY CC MTS MUTE VOL CH FLASHBACK 1. Presione - Sharp IT23M1U | Operation Manual - Page 171
resulta muy práctico si se desea mirar el monitor a la hora de ir a dormir. POWER Virtual PC TV AV1 AV2 FREEZE MULTI VIEW MODE SLEEP MENU BRIGHT MODE ENTER BRIGHT POWER Virtual PC TV AV1 AV2 FREEZE MULTI VIEW MODE SLEEP MENU BRIGHT MODE ENTER BRIGHT 1. Presione el botón FREEZE - Sharp IT23M1U | Operation Manual - Page 172
ADJUST CHANNEL SETTING SCREEN ADJUST MODE SELECT CLOSED CAPTION V-CHIP BLOCK < TV/AV 3. Presione los botones para seleccionar el menú que desea ajustar S51 BLACK LEVEL Página S51 COLOR Página S51 TINT Página S51 SHARPNESS Página S51 FLESH TONE Página S51 VIDEO SELECT Página S51 WHITE - Sharp IT23M1U | Operation Manual - Page 173
los menú en el modo TV/AV Menú VIDEO ADJUST Item CONTRAST BLACK LEVEL COLOR TINT SHARPNESS FLESH TONE VIDEO SELECT WHITE lo cuando "DOLBY VIRTUAL" está en "OFF". Menú CHANNEL SETTING (sólo modo TV) Item AIR/CABLE CABLE MODE CHANNEL SEARCH CHANNEL MEMORY Descripción Ajusta modos de recepción: - Sharp IT23M1U | Operation Manual - Page 174
Muestra una relación de aspecto de 4:3 normalmente para las imágenes de TV. - WIDE Amplía las imágenes 4:3 horizontalmente hast llenar toda la S47.) Cuando el "STATUS" en el menú V-CHIP BLOCK está en "ON", el TV/AV-IN SOUND no está disponible en modo PC (ver página S30). Reajusta los valores de - Sharp IT23M1U | Operation Manual - Page 175
coincidir el video en las cintas de video y en los DVDs. POWER Virtual PC TV AV1 AV2 FREEZE MULTI VIEW MODE SLEEP MENU BRIGHT MODE ENTER BRIGHT [ ésta llene la pantalla. (Puede cambiar la relación de aspecto.) [Modo TV/AV] 1. Presione el botón VIEW MODE. El modo cambia en el siguiente - Sharp IT23M1U | Operation Manual - Page 176
pantalla para el modo PC y el modo TV/AV. - Puede ajustar el brillo de la TV/AV como para modo PC. [Control Remoto] - Botón POWER - Botones VOL - Botón MUTE - Botones de entrada (PC, TV también el botón MAIN POWER (es decir, encienda el el modo PC como el modo TV/AV (incluyendo los ajustes de canal - Sharp IT23M1U | Operation Manual - Page 177
podría llevar a un funcionamiento anómalo. - Al mismo tiempo que sigue estas instrucciones, consulte también las instrucciones de instalación en el manual de funcionamiento suministrado con el brazo o el pedestal. ¡PRECAUCIÓN! - Tenga cuidado de no atrapar sus dedos entre la pantalla y el pedestal - Sharp IT23M1U | Operation Manual - Page 178
til. Consulte a su proveedor o al servicio autorizado de asistencia técnica de Sharp más cercano. - Debido a las características de los tubos fluorescentes, la . - ¿Existe algún tipo de interferencia proveniente de un aparato de TV cercano? Cambiar la altura y dirección de la antena podría ayudar. - Sharp IT23M1U | Operation Manual - Page 179
energía. - Cuando el "STATUS" en el menú V-CHIP BLOCK está en "ON", el TV/AV-IN SOUND no está disponible en modo PC. (Páginas S30 y S47) - ¿Se encuentra escúrralo bien y proceda a la limpieza. Sector del panel LCD Utilice un paño suave y seco para limpiar, sin apretar demasiado, la suciedad y - Sharp IT23M1U | Operation Manual - Page 180
-23M1U Display LCD Módulo TFT LCD de 23 pulg. Tamaño de pantalla real 23 1 Borne de entrada de audio: RCA pin (L/R x 2) Canales de TV que pueden recibirse VHF: 2 a 13; UHF: 14 a 69; Cable un adaptador de CA especial, de tipo NL-A72J de Sharp Corporation) Temperatura ambiental 5°C - 35°C (41°F - 95 - Sharp IT23M1U | Operation Manual - Page 181
política de mejoras continuas, SHARP se reserva el derecho de 60,15kHz 75Hz 102,977MHz US text Series Power Macintosh 1360X768 720X400 640X480 832X624 1024X768 47,7kHz son compatibles, aparecerá "OUT OF TIMING". Consulte el manual de instrucciones de su ordenador para ajustar la sincronización - Sharp IT23M1U | Operation Manual - Page 182
Para entrada de señal Vsync 15 Reloj DDC DPMS: Display Power Management Signalling (Sistema de administración de energía del monitor) Modo 0+ 19 Protector 0/5 de datos TMDS 20 N.C. 21 N.C. 22 Protector de reloj TMDS 23 Reloj TMDS + 24 Reloj TMDS - DDC (Plug & Play) Este monitor soporta el - Sharp IT23M1U | Operation Manual - Page 183
IT-23M1U_es_02.P65 61 2004/08/20, 10:54 - Sharp IT23M1U | Operation Manual - Page 184
IT-23M1U_es_02.P65 62 2004/08/20, 10:54 - Sharp IT23M1U | Operation Manual - Page 185
instructions from the operation manual to prevent children from reading them. Keep the instructions manual.) Perform this procedure on the monitor. 1. Turn off the monitor power using the MAIN POWER inclut non seulement le mode PC, mais également le mode TV/AV (y compris les réglages de chaînes et le - Sharp IT23M1U | Operation Manual - Page 186
ajuste. Esto incluye no sólo el modo PC, sino también el modo TV/AV (incluyendo los ajustes de canal y el número secreto para el Bloquear Vea la página S54 del manual.) Realice este procedimiento en el monitor. 1. Apague el monitor utilizando el botón MAIN POWER. 2. Mientras presiona simultá - Sharp IT23M1U | Operation Manual - Page 187
IT-23M1U_cover4.P65 133 2004/08/20, 10:55 - Sharp IT23M1U | Operation Manual - Page 188
SHARP CORPORATION IT-23M1U_cover4.P65 134 Printed in China Imprimé en Chine Impreso en China 561567932001 0LTCY67932001 (1) 2004/08/20, 10:55
-
 1
1 -
 2
2 -
 3
3 -
 4
4 -
 5
5 -
 6
6 -
 7
7 -
8
-
9
-
10
-
11
-
12
-
13
-
14
-
15
-
16
-
17
-
18
-
19
-
20
-
21
-
22
-
23
-
24
-
25
-
26
-
27
-
28
-
29
-
30
-
31
-
32
-
33
-
34
-
35
-
36
-
37
-
38
-
39
-
40
-
41
-
42
-
43
-
44
-
45
-
46
-
47
-
48
-
49
-
50
-
51
-
52
-
53
-
54
-
55
-
56
-
57
-
58
-
59
-
60
-
61
-
62
-
63
-
64
-
65
-
66
-
67
-
68
-
69
-
70
-
71
-
72
-
73
-
74
-
75
-
76
-
77
-
78
-
79
-
80
-
81
-
82
-
83
-
84
-
85
-
86
-
87
-
88
-
89
-
90
-
91
-
92
-
93
-
94
-
95
-
96
-
97
-
98
-
99
-
100
-
101
-
102
-
103
-
104
-
105
-
106
-
107
-
108
-
109
-
110
-
111
-
112
-
113
-
114
-
115
-
116
-
117
-
118
-
119
-
120
-
121
-
122
-
123
-
124
-
125
-
126
-
127
-
128
-
129
-
130
-
131
-
132
-
133
-
134
-
135
-
136
-
137
-
138
-
139
-
140
-
141
-
142
-
143
-
144
-
145
-
146
-
147
-
148
-
149
-
150
-
151
-
152
-
153
-
154
-
155
-
156
-
157
-
158
-
159
-
160
-
161
-
162
-
163
-
164
-
165
-
166
-
167
-
168
-
169
-
170
-
171
-
172
-
173
-
174
-
175
-
176
-
177
-
178
-
179
-
180
-
181
-
182
-
183
-
184
-
185
-
186
-
187
-
188
 |
 |
LCD TV Monitor
Moniteur TV LCD
Monitor TV LCD
IT-23M1U
OPERATION MANUAL
MODE D
'
EMPLOI
MANUAL DE FUNCIONAMIENTO
English
Français
Español
English
......
E1
Français
....
F1
Español
.....
S1