Singer Fashion Mate 5560 5560 Stitch Applications Guide - Page 24
Use an Open Toe Foot or Satin
 |
View all Singer Fashion Mate 5560 manuals
Add to My Manuals
Save this manual to your list of manuals |
Page 24 highlights
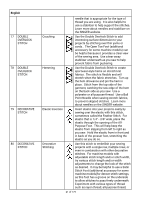
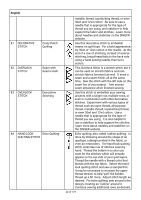
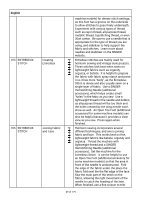
English 88 DECORATIVE STITCH Decorative Stitching 89 DECORATIVE STITCH Couching 90 BUTTON SEWING Attaching STITCH Buttons 91 BUTTON SEWING AttachingTrims STITCH 92 BUTTON SEWING Quilt Tacking STITCH stitching guidelines. It may be helpful to use an Even Feed /Walking Foot (additionall accessory for some machine models) to prevent fabric layers from shifting. Use this stitch to embellish your sewing projects with a single row, multiple rows, or even in combination with other decorative stitches. Experiment with various types of thread such as rayon thread, all-purpose thread, metallic thread, topstitching thread, or even 30wt and 12wt cotton. Use a needle that is appropriate for the type of thread you are using. It is also helpful to use a stabilizer to help support the stitches. Learn more about needles and stabilizer on the SINGER website. Sew this stitch over light weight ribbon or trim to add surface dimension to your fabrics. Use an Open Toe Foot or Satin Stitch Foot (additional accessory for some machine models) to make it easier to sew over the thickness of the stitch and trim. Use a tear-away stabilizer underneath as you sew to help prevent fabric puckering. The Button Sewing Stitch is used along with a Button Sewing Foot (additional accessory for some machine models) to easily attach buttons by machine. The foot holds the button in place, while still providing a clear view of the stitching area. The rubber grips on the front of the foot keep the button from slipping out of place. See this video for informtion on sewing buttons by machine. Attach ribbons or trims to a base fabric for a fun embellishment. Disengage the machine's feed teeth (see your machine's manual). Cut a length of ribbon, then sew the Button Sewing Stitch over it to secure it in place on the main fabric. It is helpful to place a small scrap of stabilizer underneath the fabric. When the stitch has been sewn, bring thread tails to the back side of the fabric with a hand sewing needle, then tie the ribbon into a bow to finish. The Button Sewing Stitch can be used to attach quilt layers together. Disengage the machine's feed teeth (see your machine's manual). Attach the Button Sewing Foot or Open Toe Foot (additional accessory for 24 of 179
-
 1
1 -
2
-
3
-
4
-
5
-
6
-
7
-
8
-
9
-
10
-
11
-
12
-
13
-
14
-
15
-
16
-
17
-
18
-
 19
19 -
 20
20 -
 21
21 -
 22
22 -
 23
23 -
 24
24 -
 25
25 -
 26
26 -
 27
27 -
 28
28 -
 29
29 -
30
-
31
-
32
-
33
-
34
-
35
-
36
-
37
-
38
-
39
-
40
-
41
-
42
-
43
-
44
-
45
-
46
-
47
-
48
-
49
-
50
-
51
-
52
-
53
-
54
-
55
-
56
-
57
-
58
-
59
-
60
-
61
-
62
-
63
-
64
-
65
-
66
-
67
-
68
-
69
-
70
-
71
-
72
-
73
-
74
-
75
-
76
-
77
-
78
-
79
-
80
-
81
-
82
-
83
-
84
-
85
-
86
-
87
-
88
-
89
-
90
-
91
-
92
-
93
-
94
-
95
-
96
-
97
-
98
-
99
-
100
-
101
-
102
-
103
-
104
-
105
-
106
-
107
-
108
-
109
-
110
-
111
-
112
-
113
-
114
-
115
-
116
-
117
-
118
-
119
-
120
-
121
-
122
-
123
-
124
-
125
-
126
-
127
-
128
-
129
-
130
-
131
-
132
-
133
-
134
-
135
-
136
-
137
-
138
-
139
-
140
-
141
-
142
-
143
-
144
-
145
-
146
-
147
-
148
-
149
-
150
-
151
-
152
-
153
-
154
-
155
-
156
-
157
-
158
-
159
-
160
-
161
-
162
-
163
-
164
-
165
-
166
-
167
-
168
-
169
-
170
-
171
-
172
-
173
-
174
-
175
-
176
-
177
-
178
-
179
 |
 |