Sony D-VM1 Operating Instructions (primary manual) - Page 64
Setting the Display or Sound Track Language (LANGUAGE SETUP), Select a setting, a desired language
 |
View all Sony D-VM1 manuals
Add to My Manuals
Save this manual to your list of manuals |
Page 64 highlights
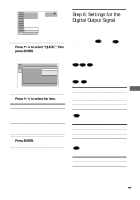
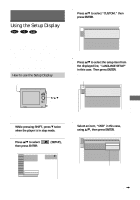
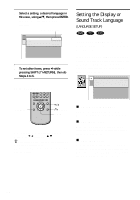
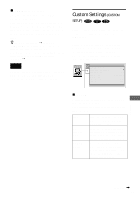
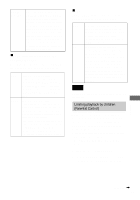
6 Select a setting, a desired language in this case, using v/V, then press ENTER. The setting is selected and setup is complete. Selected setting LANGUAGE SETUP OSD : MENU : AUDIO : SUBTITLE : ENGLISH ENGLISH ORIGINAL AUDIO FOLLOW 7 To set other items, press b while pressing SHIFT (ORETURN), then do Steps 4 to 6. Using the remote Setting the Display or Sound Track Language (LANGUAGE SETUP) "LANGUAGE SETUP" allows you to set various languages for the on-screen display or sound track. Select "LANGUAGE SETUP" in the Setup Display. For details on using the display, see "Using the Setup Display" (page 63). The on-screen displays differ depending upon the player model. LANGUAGE SETUP OSD : MENU : AUDIO : SUBTITLE : ENGLISH ENGLISH ORIGINAL AUDIO FOLLOW DISPLAY X/x ORETURN ENTER Press DISPLAY to display the Control Menu. Use X/x instead of v/V. z If you select "QUICK" in Step 3, you will enter the Quick Setup mode (page 60). Follow from Step 5 of the Quick Setup explanation to make the settings. xOSD (On-Screen Display) Switches the display language on the screen. Selects the language from the displayed list. xMENU (DVD only) When you play the DVD that plural menu languages are recorded, selects the desired language for the menu. xAUDIO (DVD only) Switches the language of the sound track. Selects the language from the displayed list. When you select "ORIGINAL," the language given priority in the disc is selected. 64
-
 1
1 -
2
-
3
-
4
-
5
-
6
-
7
-
8
-
9
-
10
-
11
-
12
-
13
-
14
-
15
-
16
-
17
-
18
-
19
-
20
-
21
-
22
-
23
-
24
-
25
-
26
-
27
-
28
-
29
-
30
-
31
-
32
-
33
-
34
-
35
-
36
-
37
-
38
-
39
-
40
-
41
-
42
-
43
-
44
-
45
-
46
-
47
-
48
-
49
-
50
-
51
-
52
-
53
-
54
-
55
-
56
-
57
-
58
-
 59
59 -
 60
60 -
 61
61 -
 62
62 -
 63
63 -
 64
64 -
 65
65 -
 66
66 -
 67
67 -
 68
68 -
 69
69 -
70
-
71
-
72
-
73
-
74
-
75
-
76
-
77
-
78
-
79
-
80
 |
 |
