Sony DSC-T700/H Cyber-shot® Handbook - Page 128
Exporting images to view on the camera, Deleting the USB connection
 |
View all Sony DSC-T700/H manuals
Add to My Manuals
Save this manual to your list of manuals |
Page 128 highlights
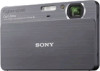
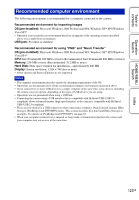
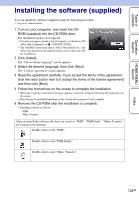
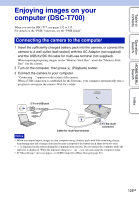
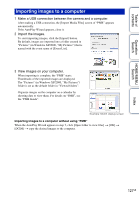
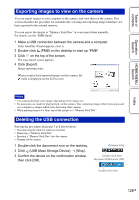
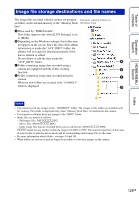
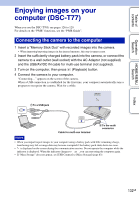
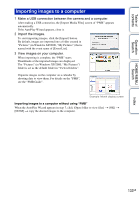
Table of contents Operation Search HOME/MENU Search Exporting images to view on the camera You can export images in your computer to the camera, and view them on the camera. This section describes the procedure for automatically selecting and exporting images that have not been exported to the internal memory. You can export the images to "Memory Stick Duo" or even export them manually. For details, see the "PMB Guide". 1 Make a USB connection between the camera and a computer. If the AutoPlay Wizard appears, close it. 2 Double-click (PMB) on the desktop to start up "PMB". 3 Click on the top of the screen. The easy export screen appears. 4 Click [Export]. Image exporting starts. When you play back exported images on this camera, the mark is displayed on the LCD screen. Notes • You cannot play back some images depending on the image size. • No guarantees are made for playing back, on this camera, files containing images which were processed on a computer or images which were shot using other cameras. • When printing images at a shop, export the images to a "Memory Stick Duo". Deleting the USB connection Perform the procedures from step 1 to 3 below before: • Disconnecting the cable for multi-use terminal. • Removing a "Memory Stick Duo". • Inserting a "Memory Stick Duo" into the camera. • Turning off the camera. 1 Double-click the disconnect icon on the tasktray. 2 Click (USB Mass Storage Device) t [Stop]. 3 Confirm the device on the confirmation window, then click [OK]. Windows Vista Double-click here Windows XP/Windows 2000 Double-click here Index 128GB
-
 1
1 -
2
-
3
-
4
-
5
-
6
-
7
-
8
-
9
-
10
-
11
-
12
-
13
-
14
-
15
-
16
-
17
-
18
-
19
-
20
-
21
-
22
-
23
-
24
-
25
-
26
-
27
-
28
-
29
-
30
-
31
-
32
-
33
-
34
-
35
-
36
-
37
-
38
-
39
-
40
-
41
-
42
-
43
-
44
-
45
-
46
-
47
-
48
-
49
-
50
-
51
-
52
-
53
-
54
-
55
-
56
-
57
-
58
-
59
-
60
-
61
-
62
-
63
-
64
-
65
-
66
-
67
-
68
-
69
-
70
-
71
-
72
-
73
-
74
-
75
-
76
-
77
-
78
-
79
-
80
-
81
-
82
-
83
-
84
-
85
-
86
-
87
-
88
-
89
-
90
-
91
-
92
-
93
-
94
-
95
-
96
-
97
-
98
-
99
-
100
-
101
-
102
-
103
-
104
-
105
-
106
-
107
-
108
-
109
-
110
-
111
-
112
-
113
-
114
-
115
-
116
-
117
-
118
-
119
-
120
-
121
-
122
-
 123
123 -
 124
124 -
 125
125 -
 126
126 -
 127
127 -
 128
128 -
 129
129 -
 130
130 -
 131
131 -
 132
132 -
 133
133 -
134
-
135
-
136
-
137
-
138
-
139
-
140
-
141
-
142
-
143
-
144
-
145
-
146
-
147
-
148
-
149
-
150
-
151
-
152
-
153
-
154
-
155
-
156
-
157
-
158
-
159
-
160
-
161
-
162
-
163
-
164
-
165
-
166
-
167
-
168
-
169
-
170
 |
 |