Sony DSC-U30 Operating Instructions - Page 20
Basic still image shooting — Using auto adjustment mode, subject in the center of the LCD - memory stick
 |
UPC - 027242629042
View all Sony DSC-U30 manuals
Add to My Manuals
Save this manual to your list of manuals |
Page 20 highlights
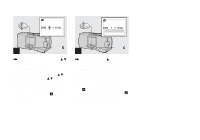
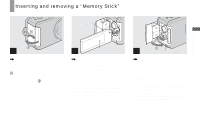
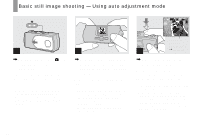
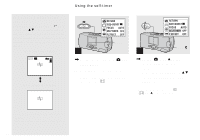
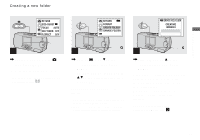
Basic still image shooting - Using auto adjustment mode 2.0M 101 10 1 , Set the mode switch to , and slide the lens cover to turn on the power. The name of the folder where the image will be recorded appears on the LCD screen for approximately five seconds. • [FOCUS] is set to [AUTO] at the factory. • The exposure is automatically adjusted. • This camera can create new folders and select folders to be stored in the "Memory Stick" (page 24). 2 , Hold the camera steadily with both hands and position the subject in the center of the LCD screen. Do not cover the lens or flash with your fingers. • When recording outdoors during clear weather or under other intense light, undesired light (ghosting) may enter the screen. If this happens, shade the lens with your hand or other object while recording. • The exposure and focus are adjusted to the center of the LCD screen. AE/AF lock indicator Flashes green 3 t Lights up , Press and hold the shutter button halfway down. A beep sounds. When the AE/AF lock indicator changes from flashing to lighted up, the camera is ready for shooting. • If you release the shutter button, the recording will be canceled. • When the camera does not beep, the AF adjustment is not complete. You can continue to shoot, but the focus is not adjusted properly. • This camera employs an auto-macro AF function. The minimum focal distance to the subject is 10 cm (4 inches). 20
-
 1
1 -
2
-
3
-
4
-
5
-
6
-
7
-
8
-
9
-
10
-
11
-
12
-
13
-
14
-
 15
15 -
 16
16 -
 17
17 -
 18
18 -
 19
19 -
 20
20 -
 21
21 -
 22
22 -
 23
23 -
 24
24 -
 25
25 -
26
-
27
-
28
-
29
-
30
-
31
-
32
-
33
-
34
-
35
-
36
-
37
-
38
-
39
-
40
-
41
-
42
-
43
-
44
-
45
-
46
-
47
-
48
-
49
-
50
-
51
-
52
-
53
-
54
-
55
-
56
-
57
-
58
-
59
-
60
-
61
-
62
-
63
-
64
-
65
-
66
-
67
-
68
-
69
-
70
-
71
-
72
-
73
-
74
-
75
-
76
-
77
-
78
-
79
-
80
-
81
-
82
-
83
-
84
 |
 |
