Sony PCV-RZ56G VAIO User Guide - Page 144
Changing TV Recording Settings, Start, Media Center Start, Settings, Recorder, History - reviews
 |
UPC - 027242642249
View all Sony PCV-RZ56G manuals
Add to My Manuals
Save this manual to your list of manuals |
Page 144 highlights
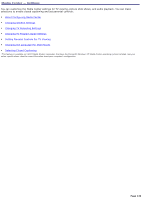
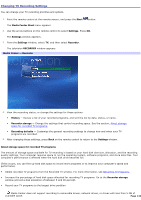
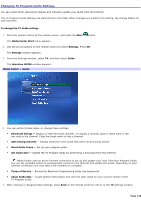
Changing TV Recording Settings You can change your TV recording priorities and options. 1. Point the remote control at the remote sensor, and press the Start button. The Media Center Start menu appears. 2. Use the arrow buttons on the remote control to select Settings. Press OK. The Settings window appears. 3. From the Settings window, select TV, and then select Recorder. The television RECORDER window appears. Media Center - Recorder 4. View the recording status, or change the settings for these options: History - Review a list of your recorded programs, and sort the list by date, status, or name. Recorder storage - Change the settings that control recording space. See the section, About storage space for recorded TV programs. Recording defaults - Customize the general recording settings to change how and when your TV programs are recorded. 5. After changing these settings, press Back on the remote control to return to the Settings window. About storage space for recorded TV programs The amount of storage space available for TV recording is based on your hard disk dive size, allocation, and the recording quality settings. Your computer requires space to run the operating system, software programs, and store data files. Your computer's performance is affected when the hard disk drive becomes full. If this occurs, you can free up hard disk space to record more programs or to improve your computer's speed and performance. Delete recorded TV programs from the Recorded TV window. For more information, see Recording TV Programs. Increase the percentage of hard disk space allocated for recording TV programs. Go to the Recorder storage window and set a disk allocation of between 5 and 90 percent. Record your TV programs to the largest drive partition. Media Center does not support recording to removable drives, network drives, or drives with less than 5 MB of available space. Page 144
-
 1
1 -
2
-
3
-
4
-
5
-
6
-
7
-
8
-
9
-
10
-
11
-
12
-
13
-
14
-
15
-
16
-
17
-
18
-
19
-
20
-
21
-
22
-
23
-
24
-
25
-
26
-
27
-
28
-
29
-
30
-
31
-
32
-
33
-
34
-
35
-
36
-
37
-
38
-
39
-
40
-
41
-
42
-
43
-
44
-
45
-
46
-
47
-
48
-
49
-
50
-
51
-
52
-
53
-
54
-
55
-
56
-
57
-
58
-
59
-
60
-
61
-
62
-
63
-
64
-
65
-
66
-
67
-
68
-
69
-
70
-
71
-
72
-
73
-
74
-
75
-
76
-
77
-
78
-
79
-
80
-
81
-
82
-
83
-
84
-
85
-
86
-
87
-
88
-
89
-
90
-
91
-
92
-
93
-
94
-
95
-
96
-
97
-
98
-
99
-
100
-
101
-
102
-
103
-
104
-
105
-
106
-
107
-
108
-
109
-
110
-
111
-
112
-
113
-
114
-
115
-
116
-
117
-
118
-
119
-
120
-
121
-
122
-
123
-
124
-
125
-
126
-
127
-
128
-
129
-
130
-
131
-
132
-
133
-
134
-
135
-
136
-
137
-
138
-
 139
139 -
 140
140 -
 141
141 -
 142
142 -
 143
143 -
 144
144 -
 145
145 -
 146
146 -
 147
147 -
 148
148 -
 149
149 -
150
-
151
-
152
-
153
-
154
-
155
-
156
-
157
-
158
-
159
-
160
-
161
-
162
-
163
-
164
-
165
-
166
-
167
-
168
-
169
-
170
-
171
-
172
-
173
-
174
-
175
-
176
-
177
-
178
-
179
-
180
-
181
-
182
-
183
-
184
-
185
-
186
-
187
-
188
-
189
-
190
-
191
-
192
-
193
-
194
-
195
-
196
-
197
-
198
-
199
-
200
-
201
-
202
-
203
-
204
-
205
-
206
-
207
-
208
-
209
-
210
-
211
-
212
-
213
-
214
-
215
-
216
-
217
-
218
-
219
-
220
-
221
-
222
-
223
-
224
-
225
-
226
-
227
-
228
-
229
-
230
-
231
-
232
-
233
-
234
-
235
-
236
-
237
-
238
-
239
-
240
-
241
-
242
-
243
-
244
-
245
 |
 |