Sony PDWHR1 User Manual (PDW-HR1 Operation Manual Ed. 1 Rev. 2 for Version 2.0 - Page 120
Assigning user-defined clip titles, PROAV directory
 |
View all Sony PDWHR1 manuals
Add to My Manuals
Save this manual to your list of manuals |
Page 120 highlights
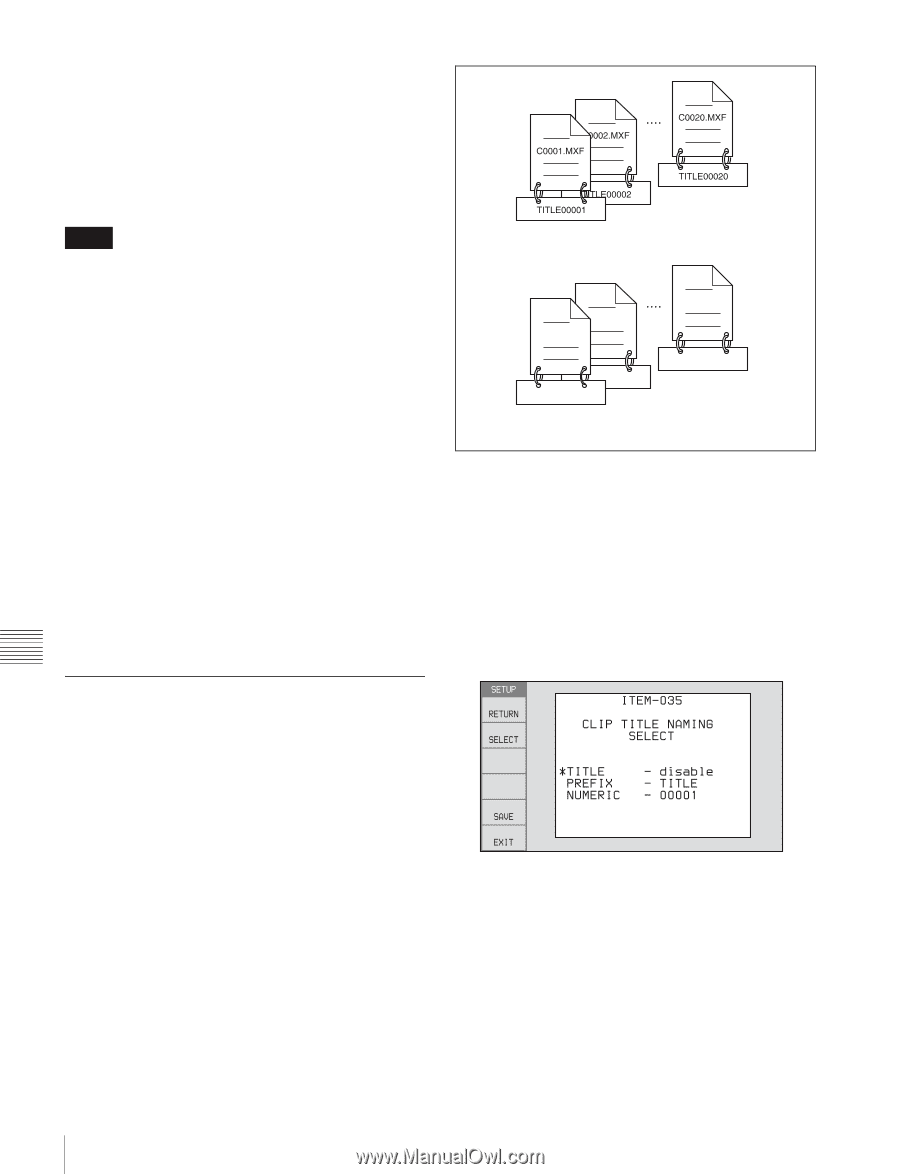
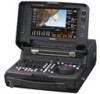
a) UTF-8 file names can be up to 63 bytes in length. (Depending on the character type, file names (including extension) may be limited to 21 characters.) The following directory operations are possible in the General directory. • Directory creation (up to 63 levels, including the General directory) • Deletion and renaming of directories Notes • The maximum number of files that can be created on a disc is 5,000 for single-layer discs and 6,000 for duallayer discs (both including directories). • File names and directory names can use letters, numbers, and symbols from the Unicode 2.0 (UTF-8) character set. However, the following control characters and symbols 1) cannot be used. - Control characters: U+0000 to U+001F, U+007F - Symbols 1) The following character codes cannot be used by FAM connections. U+010000, U+020000, U+030000, U+040000, U+050000, U+060000, U+070000, U+080000, U+090000, U+0A0000, U+0B0000, U+0C0000, U+0D0000, U+0E0000, U+0F0000, U+100000 PROAV directory This directory contains individual files recorded on the disc. To display the PROAV directory, set maintenance menu item M33: FILE I/F CONFIG > PROAV DISPLAY to "ENABLE". Assigning user-defined clip titles By default, clips on each disc are assigned names in the range C0001.MXF to C9999.MXF. For this reason, two discs can contain clips with the same names. The automatic title generation function allows you to assign titles to all of the clips on several discs, which facilitates clip management. For example, if the titles TITLE00001 to TITLE00020 are assigned to clips C0001.MXF to C0020.MXF on disc 1, then the titles TITLE00021 to TITLE00037 are assigned to clips C0001.MXF to C0017.MXF on disc 2. Clips recorded on Disc 1 C0002.MXF C0001.MXF C0017.MXF TITLE00022 TITLE00021 TITLE00037 Clips recorded on Disc 2 Proceed as follows to specify a title and assign it to recorded clips. 1 Press the MENU button. 2 Turn the PUSH SET knob to select setup menu item 035, and press the knob. 3 Turn the PUSH SET knob to select "on", and press the knob. The clip title naming screen appears. 4 Turn the PUSH SET knob to move the asterisk (*) on the left of the menu items to "TITLE", and press the knob. The asterisk indicates the selected item. 5 Turn the PUSH SET knob to select "enable", and press the knob. The automatic title generation function is enabled. Chapter 7 File Operations 120 Overview
-
 1
1 -
2
-
3
-
4
-
5
-
6
-
7
-
8
-
9
-
10
-
11
-
12
-
13
-
14
-
15
-
16
-
17
-
18
-
19
-
20
-
21
-
22
-
23
-
24
-
25
-
26
-
27
-
28
-
29
-
30
-
31
-
32
-
33
-
34
-
35
-
36
-
37
-
38
-
39
-
40
-
41
-
42
-
43
-
44
-
45
-
46
-
47
-
48
-
49
-
50
-
51
-
52
-
53
-
54
-
55
-
56
-
57
-
58
-
59
-
60
-
61
-
62
-
63
-
64
-
65
-
66
-
67
-
68
-
69
-
70
-
71
-
72
-
73
-
74
-
75
-
76
-
77
-
78
-
79
-
80
-
81
-
82
-
83
-
84
-
85
-
86
-
87
-
88
-
89
-
90
-
91
-
92
-
93
-
94
-
95
-
96
-
97
-
98
-
99
-
100
-
101
-
102
-
103
-
104
-
105
-
106
-
107
-
108
-
109
-
110
-
111
-
112
-
113
-
114
-
 115
115 -
 116
116 -
 117
117 -
 118
118 -
 119
119 -
 120
120 -
 121
121 -
 122
122 -
 123
123 -
 124
124 -
 125
125 -
126
-
127
-
128
-
129
-
130
-
131
-
132
-
133
-
134
-
135
-
136
-
137
-
138
-
139
-
140
-
141
-
142
-
143
-
144
-
145
-
146
-
147
-
148
-
149
-
150
-
151
-
152
-
153
-
154
-
155
-
156
-
157
-
158
-
159
-
160
-
161
-
162
-
163
-
164
-
165
-
166
-
167
-
168
-
169
-
170
-
171
-
172
-
173
-
174
-
175
-
176
-
177
-
178
-
179
-
180
-
181
-
182
-
183
-
184
-
185
-
186
-
187
-
188
-
189
-
190
-
191
-
192
-
193
-
194
-
195
-
196
-
197
-
198
-
199
 |
 |